Know About Adobe Photoshop
Adobe Photoshop is a powerful tool that allows you to unleash your creativity and design stunning visuals. Creating a striking radial gradient background in Adobe Photoshop is a fundamental skill for graphic designers and digital artists.
Click Preview to watch a step-by-step tutorial on creating a radial gradient background in Adobe Photoshop.
What is the Radial Gradient tool in Adobe Photoshop?
Radial gradients are a versatile tool for adding depth, focus, and a captivating visual appeal to your projects, whether you’re working on eLearning development, a website banner, social media graphic, or print design. The process involves a few simple steps that allow you to transition smoothly from one colour to another in a circular or elliptical pattern, resulting in a background that can elevate the overall aesthetic of your work.
In this tutorial, we will guide you through the steps to make a stunning radial gradient background in Adobe Photoshop.
To create a radial gradient background in Adobe Photoshop, follow these steps:
Step 1:
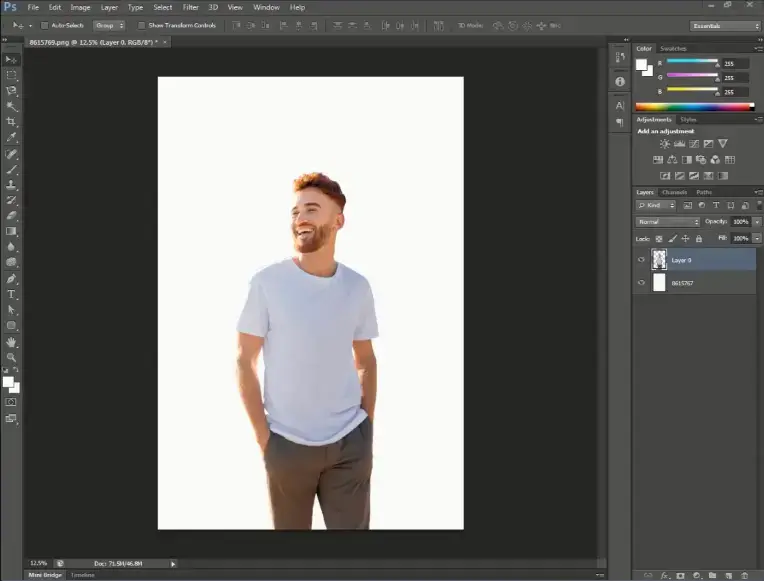
Open the ‘Photoshop’ software and create a new document, then add an image to it.
Step 2:
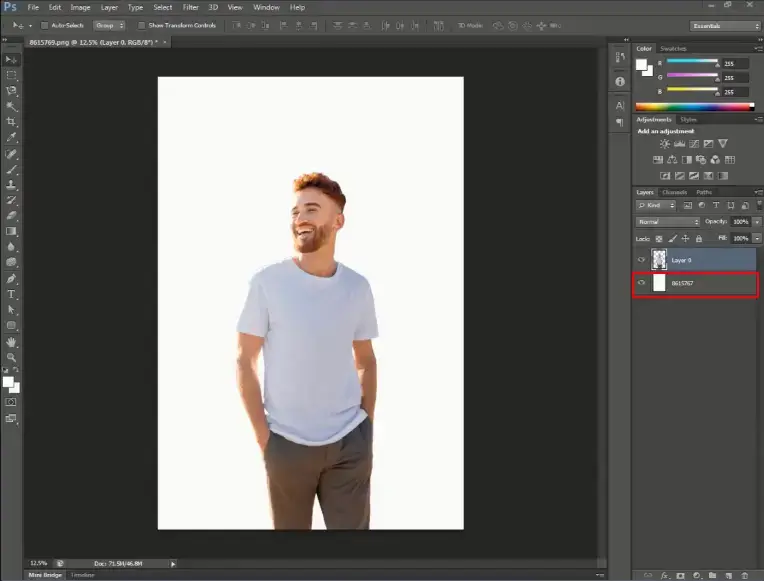
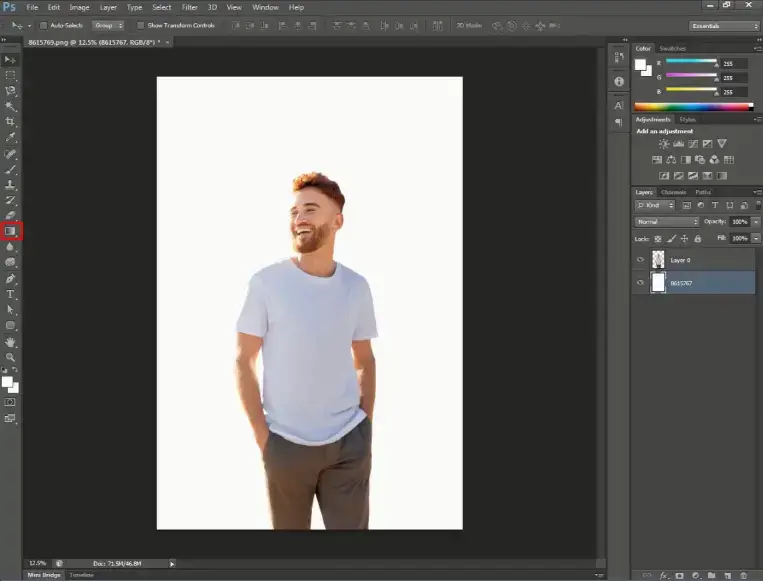
Choose the background layer and then click on the ‘Gradient’ icon located in the left side panel.
Step 3:
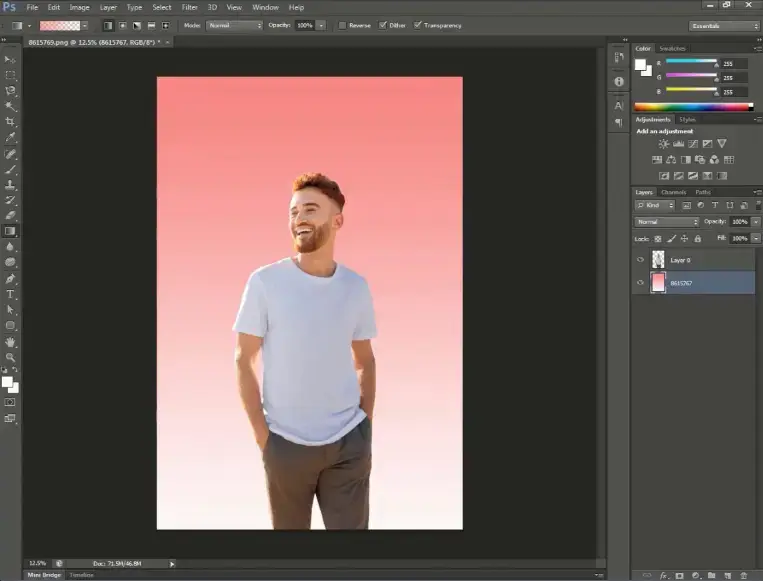
Apply the gradient to the background layer.
Step 4:
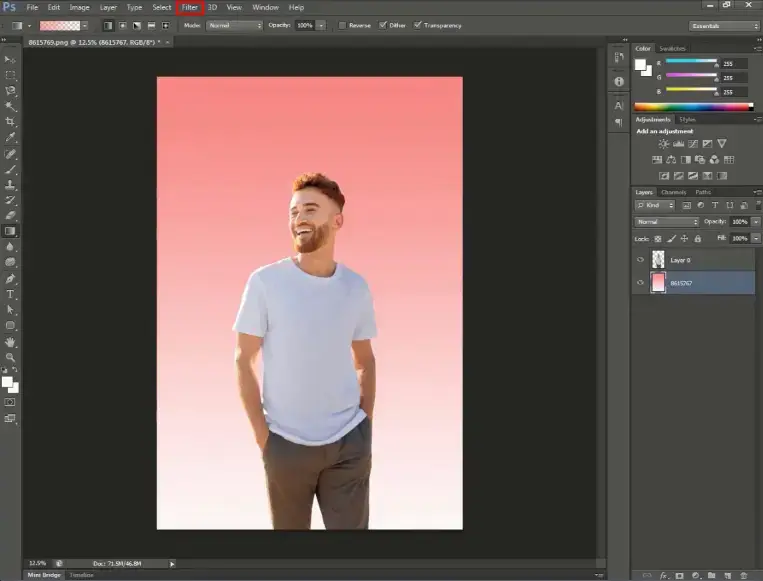
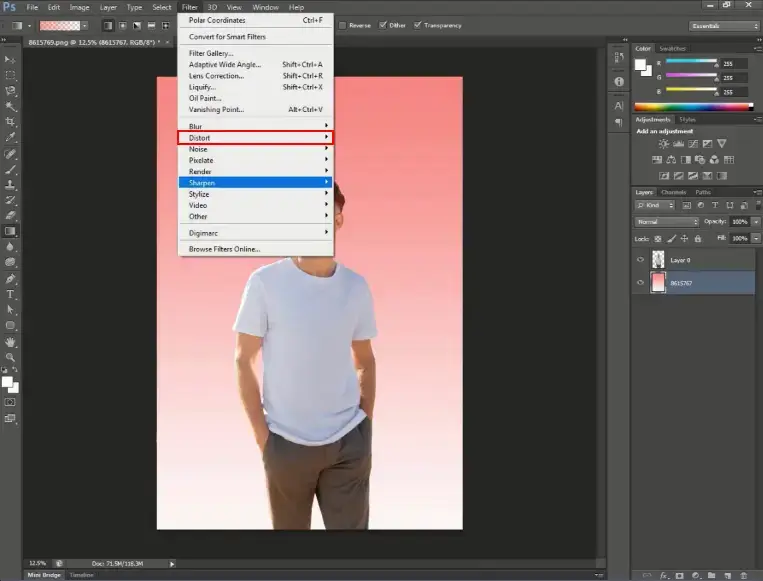
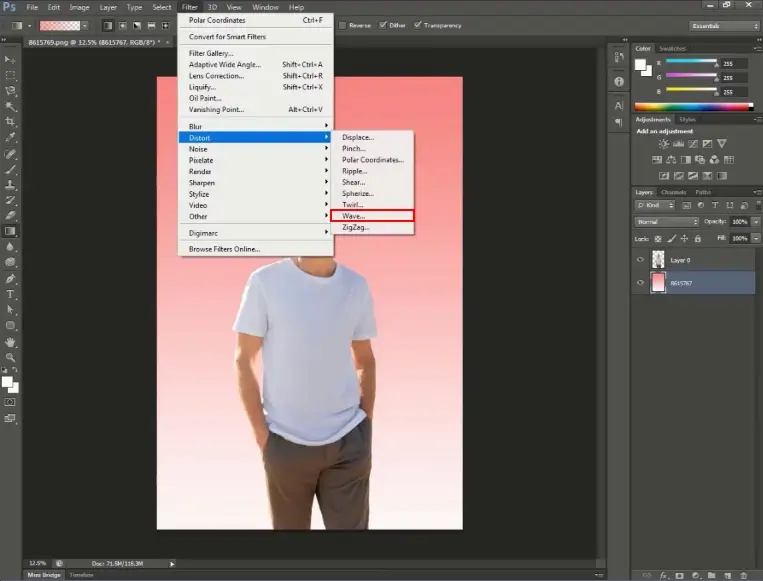
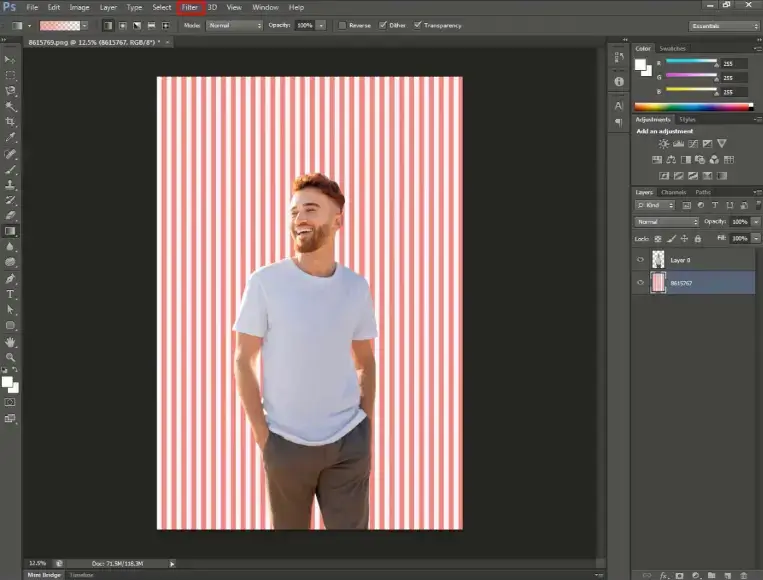
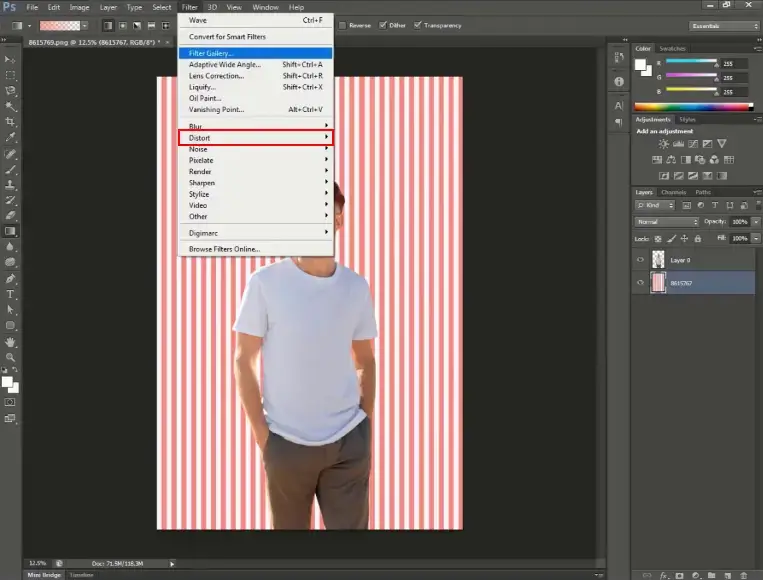
Click the ‘Filter’ tab in the top ribbon, select ‘Distort’ from the list, and then choose the ‘Wave’ filter from the options.
Step 5:
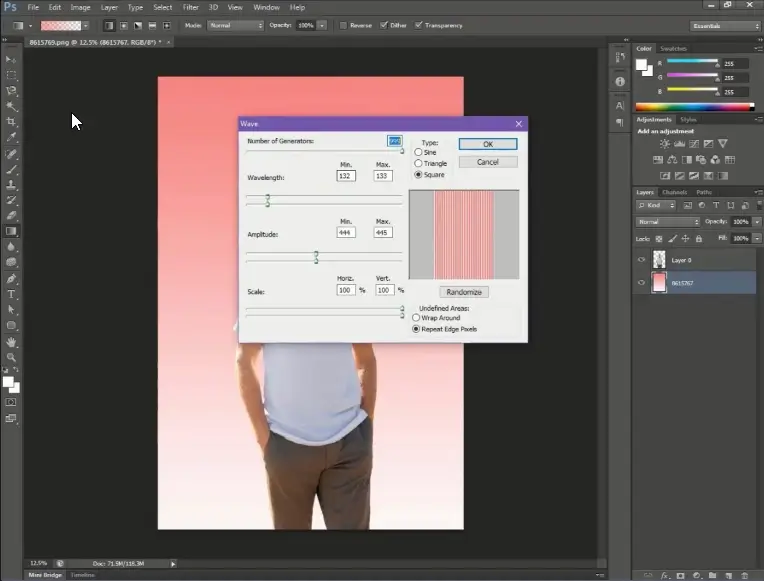
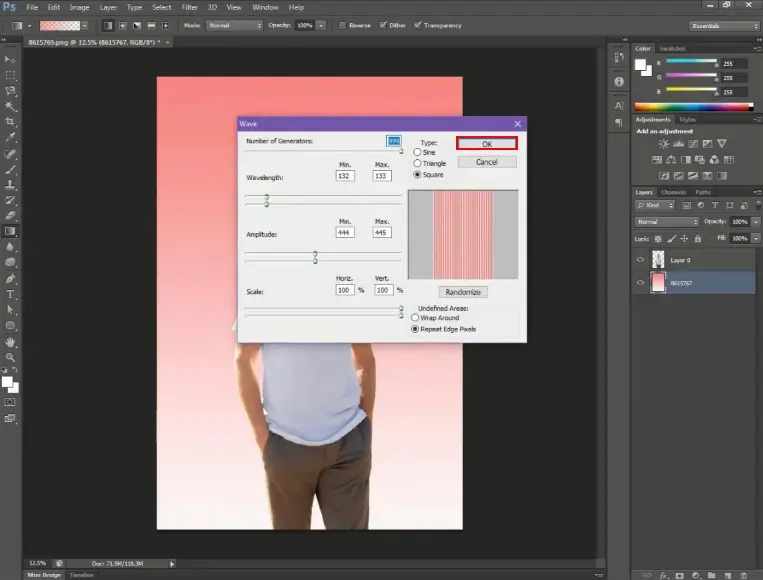
Adjust the values as needed, and then click ‘OK’.
Step 6:
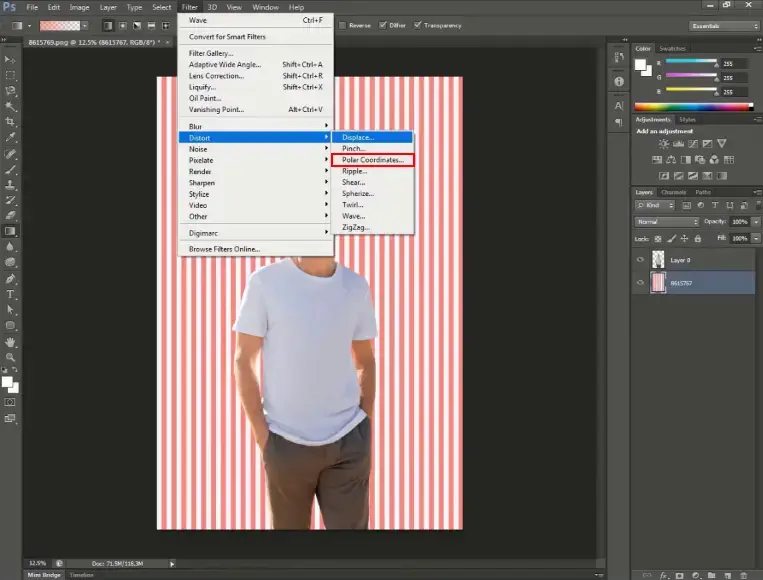
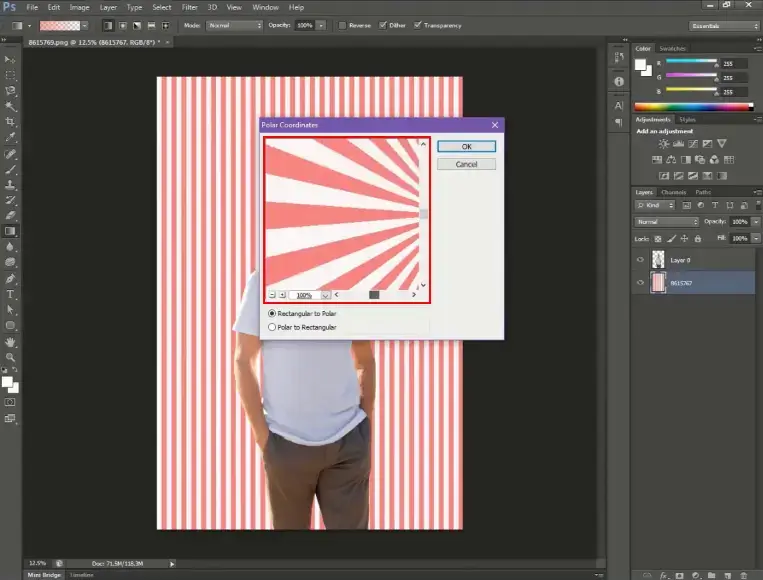
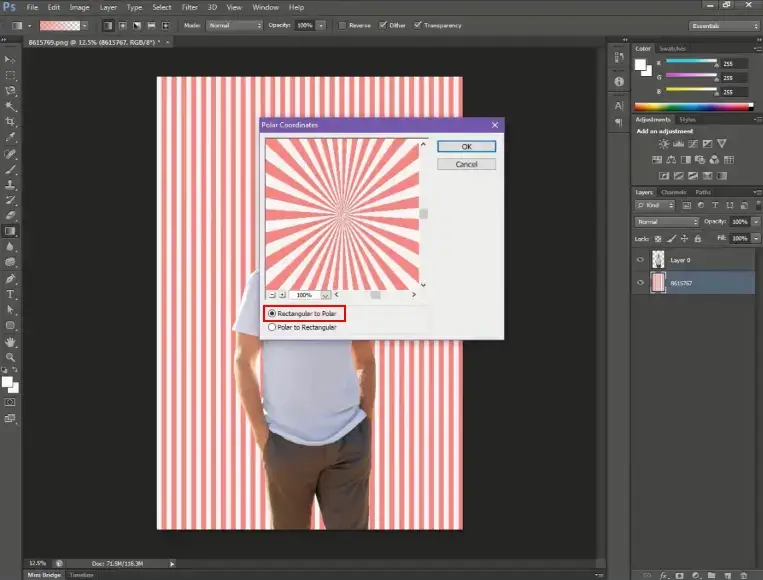
Click the ‘Filter’ tab in the top ribbon, select ‘Distort’ from the list, and then choose the ‘Polar Coordinates’ filter from the options.
Step 7:
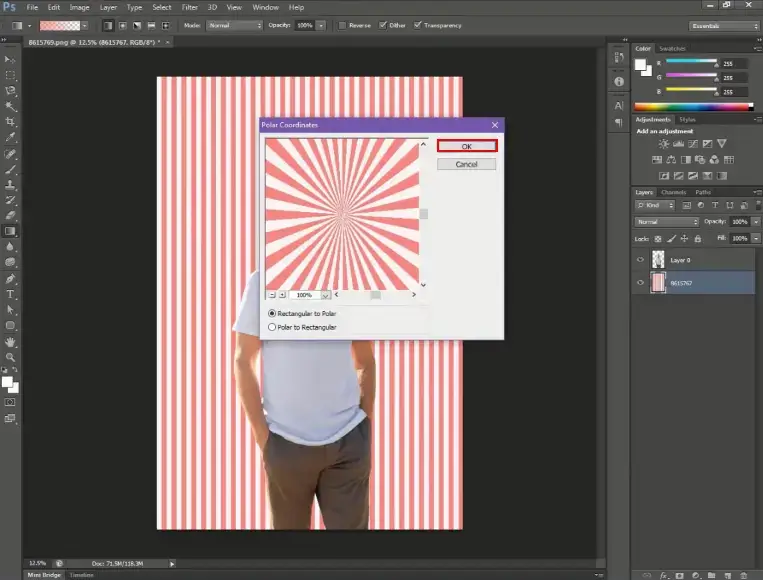
Within the ‘Polar Coordinates’ window, select ‘Rectangular to Polar’ and adjust the background as needed.
Step 8:
After completing all the settings as per the requirements, click ‘OK’.
Step 9:
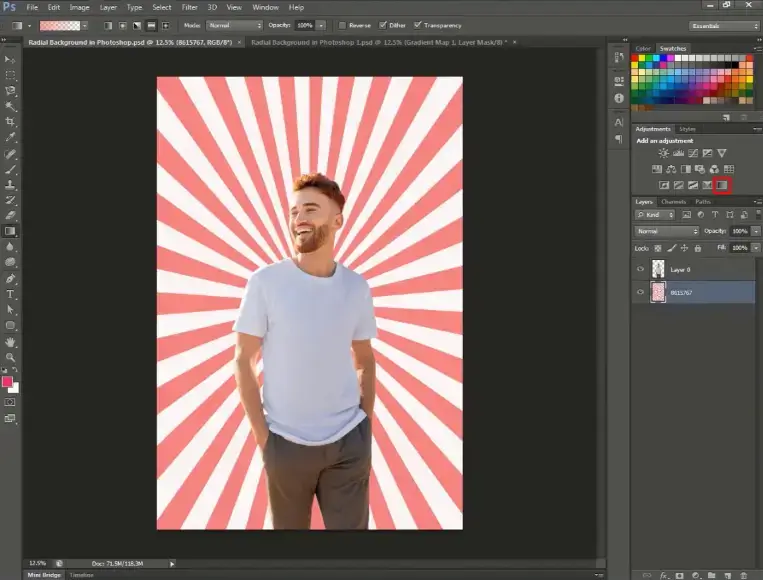
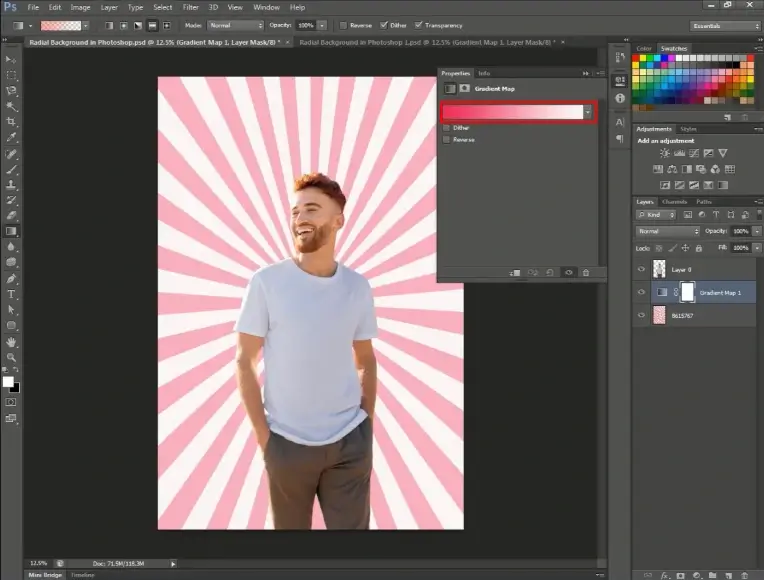
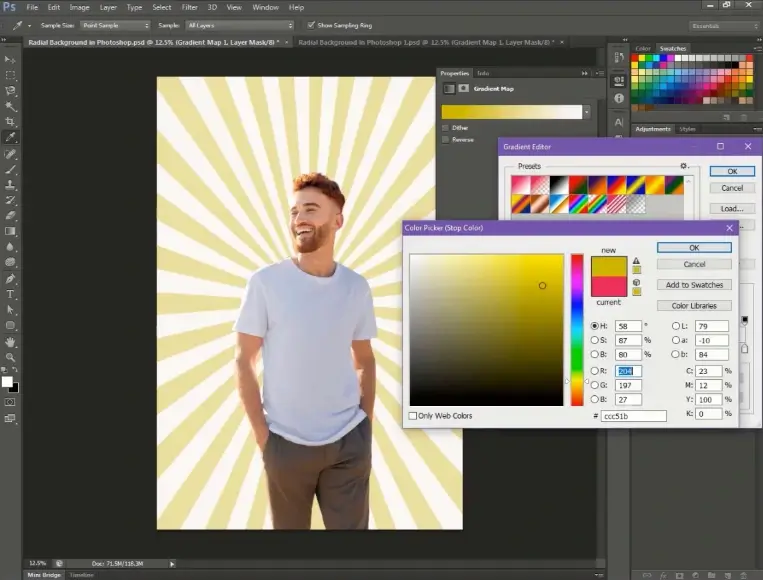
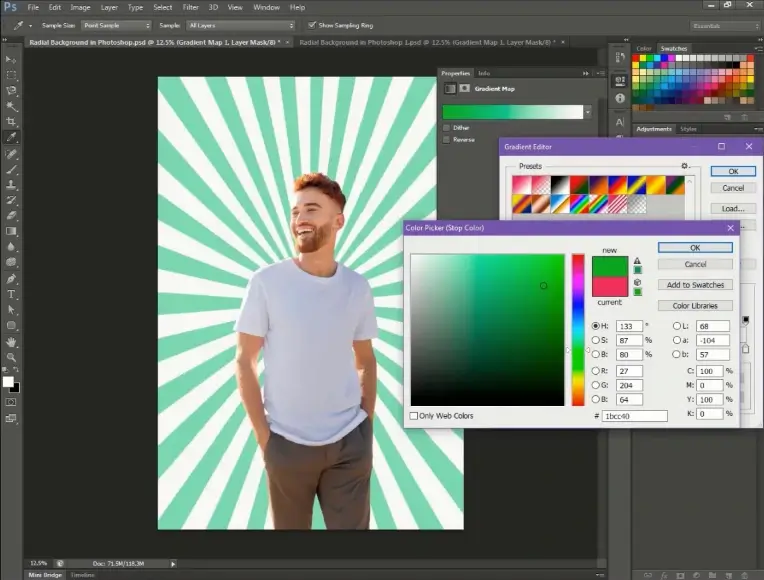
If you want to change the gradient colour, simply click on the ‘Gradient’ icon in the right side panel.
Step 10:
Choose the gradient colour and adjust it as needed.
Conclusion:
In conclusion, mastering the art of creating a radial gradient background in Adobe Photoshop is a valuable skill for designers seeking to enhance their eLearning development projects with visual impact and depth.
Radial gradients offer an elegant and effective way to draw attention to your custom eLearning content, providing a professional and polished look to your graphics. This technique is versatile and can be applied to a wide range of design contexts, allowing you to infuse your eLearning content development work with a sense of dimension and sophistication.
As you experiment with various color combinations and settings, you’ll discover that Adobe Photoshop’s powerful tools enable you to unleash your creativity in the custom eLearning development process and achieve your desired visual effects.
So, whether you’re a seasoned designer in eLearning development or just starting your creative journey, radial gradients are a simple yet powerful tool that can elevate your designs to new heights in the realm of custom eLearning development.
Frequently Asked Questions (Faq’s)
Q1. What is a radial gradient in Adobe Photoshop?
A: A radial gradient is a type of gradient where colors radiate outward from a central point, creating a circular or elliptical blend.
Q2. Where is the gradient tool in Adobe Photoshop?
A: Gradient Tool is located in the toolbar on the left side of the screen. It is represented by an icon that looks like a rectangle fading from one color to another.
Q3. What are the types of gradients in Adobe Photoshop?
A: Gradient types in the Tool Options bar are Linear, Radial, Angle, Reflected, Diamond.
Q4. How can I change the center of the radial gradient?
A. After selecting the Gradient Tool, click and drag on the canvas. While dragging, hold down the “Shift” key to maintain a perfect circle and position the center as desired.
Q5. Can I adjust the size of the radial gradient?
A: Yes, you can. When applying the radial gradient, simply extend or reduce the length of your drag to control the size of the gradient.
Q6. Is it possible to add transparency to the radial gradient?
A: Absolutely. In the Gradient Editor, adjust the opacity of individual color stops to introduce transparency to the radial gradient.
Q7. How do I save my gradient for future use?
A: After customizing your gradient, click on the “New” button in the Gradient Editor. This will save your gradient as a new preset that you can access in future projects.
Q8. Can I use images instead of colors in a radial gradient
A: Photoshop allows you to use images as gradients. In the Gradient Editor, choose the “Image” option and select the desired image.
Q9. Are there shortcuts for the Gradient Tool?
A: Yes, pressing “G” on your keyboard activates the Gradient Tool. Additionally, pressing “D” resets the foreground and background colors to default, useful for creating a black-to-white radial gradient.
Q10. Does the radial gradient work in all Photoshop versions?
A: Yes, radial gradients are a standard feature in all recent versions of Adobe Photoshop, ensuring compatibility across various releases.


