How to Create a Vignette Effect in Camtasia
Click or tap on the play button below to watch the video for easier understanding.
Creating a vignette effect in Camtasia can significantly enhance the visual appeal of your videos by drawing the viewer’s attention to a specific area while subtly darkening the periphery. This effect is often used to add a cinematic touch or focus on a particular subject within a frame.
In the realm of rapid eLearning solutions, incorporating the vignette effect in Camtasia can considerably boost the quality of corporate eLearning solutions.
Moreover, the utilization of this effect within custom eLearning course development allows for a more dynamic and visually appealing presentation of eLearning content development.
In this guide, we will explore the step-by-step process of adding a vignette effect to your videos using Camtasia, a popular video editing software.
Step 1:
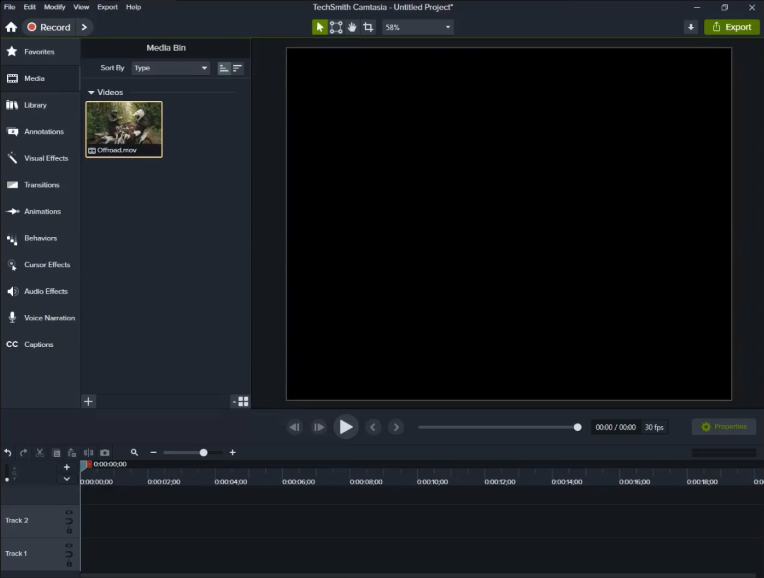
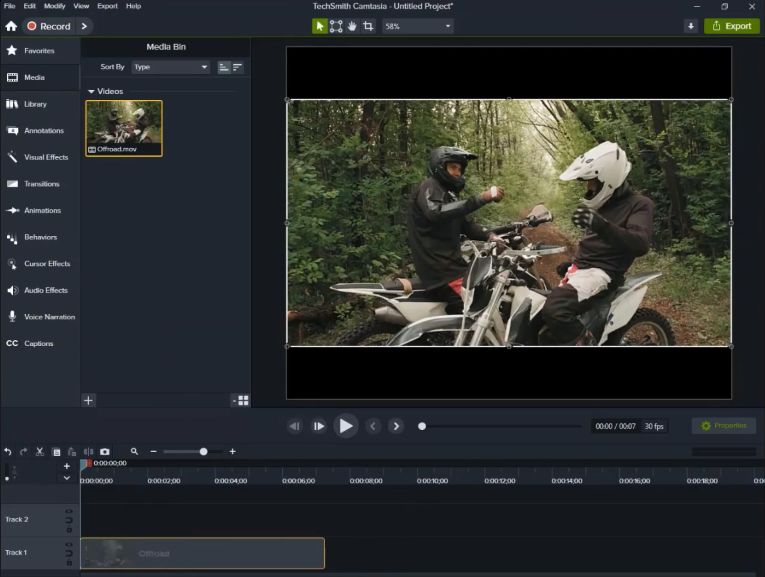
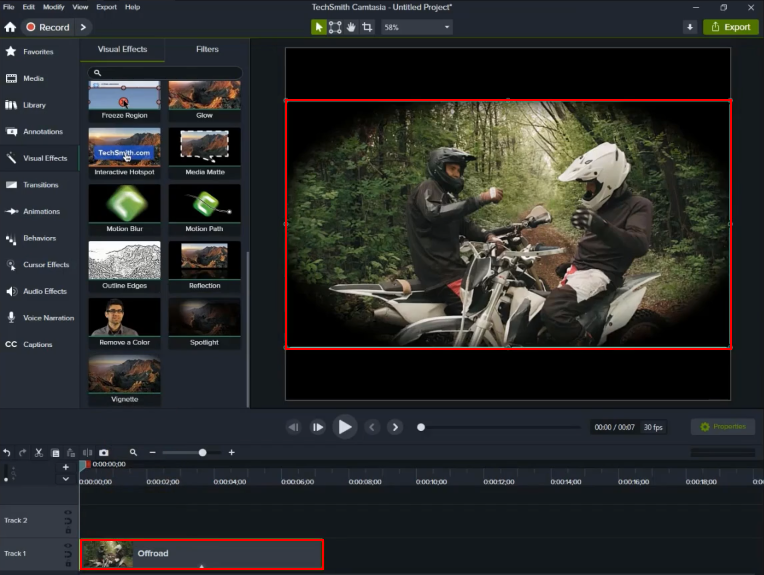
Launch the ‘Camtasia’ software and add the video or image to the timeline.
In this example, we’re applying a vignette effect to the video.
Step 2:
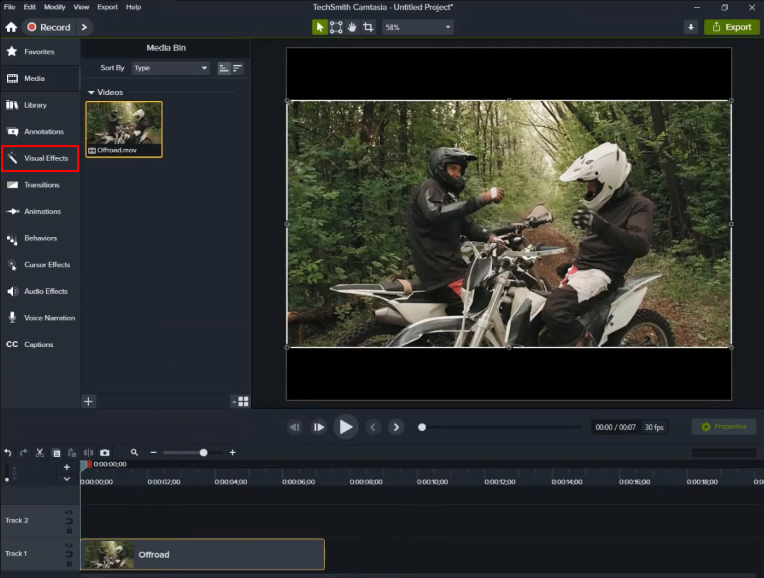
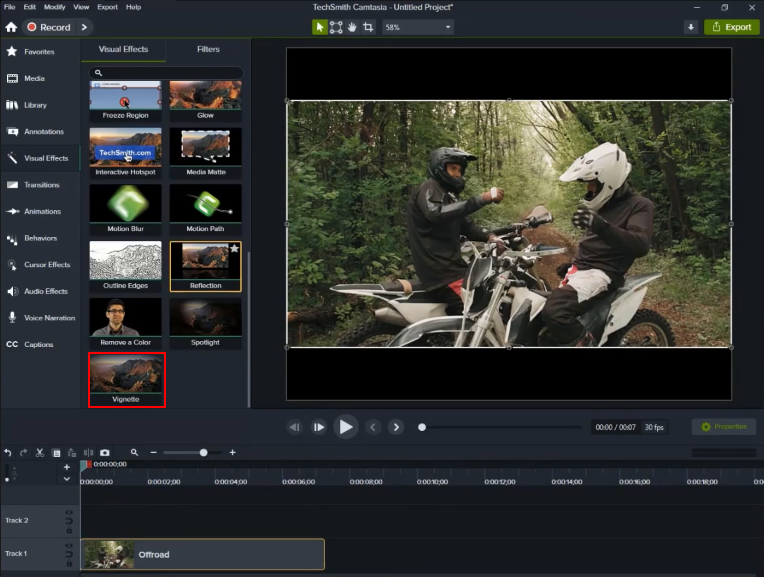
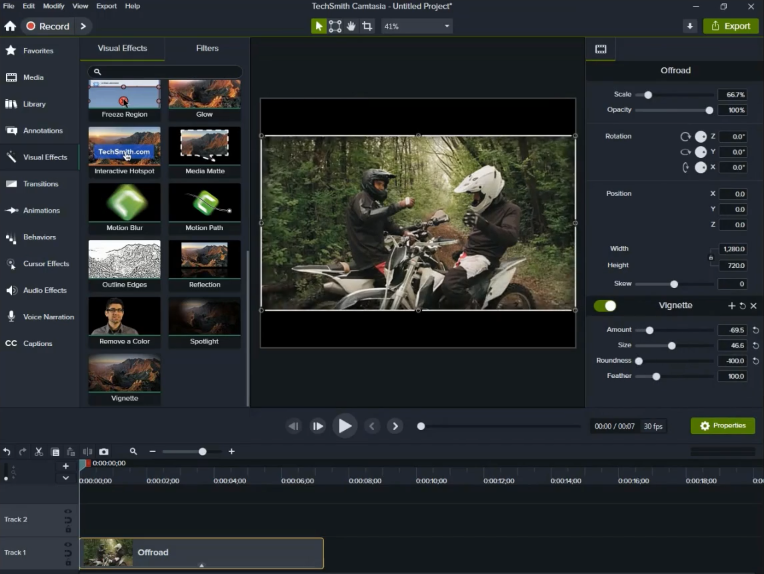
Navigate to the ‘Visual Effects’ section in the left-side panel, and from the list of options, select the ‘vignette effect’. Apply this effect to the image or video.
Step 3:
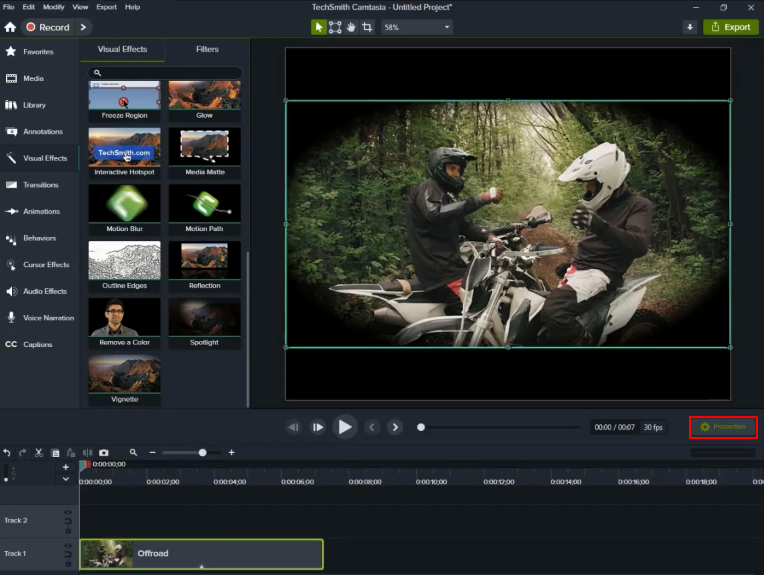
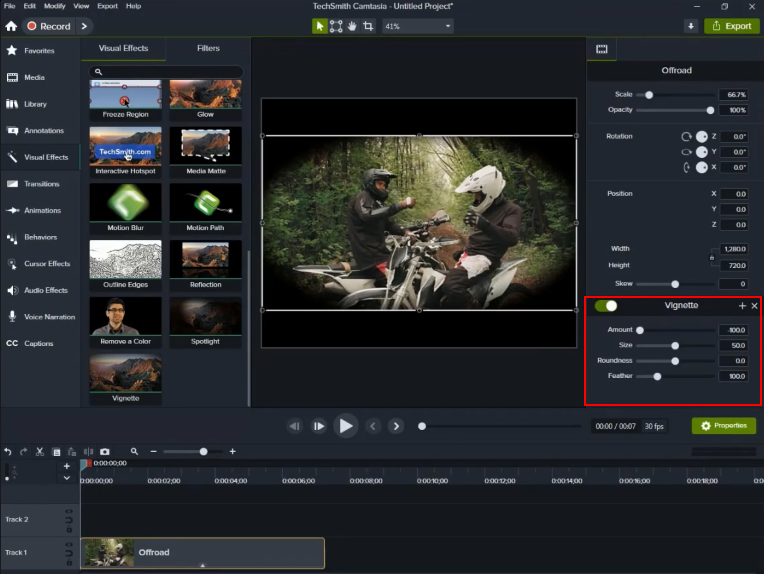
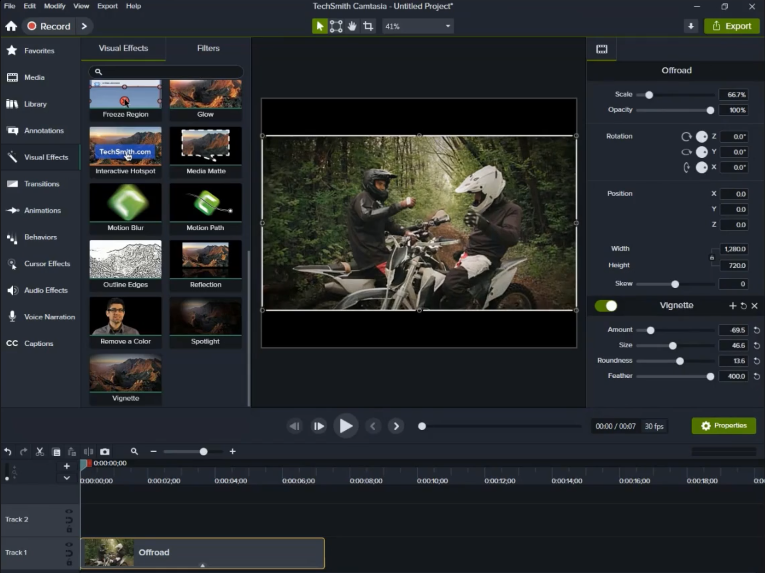
You can customise the vignette effect by clicking the ‘Properties’ button on the right-side interface.
Step 4:
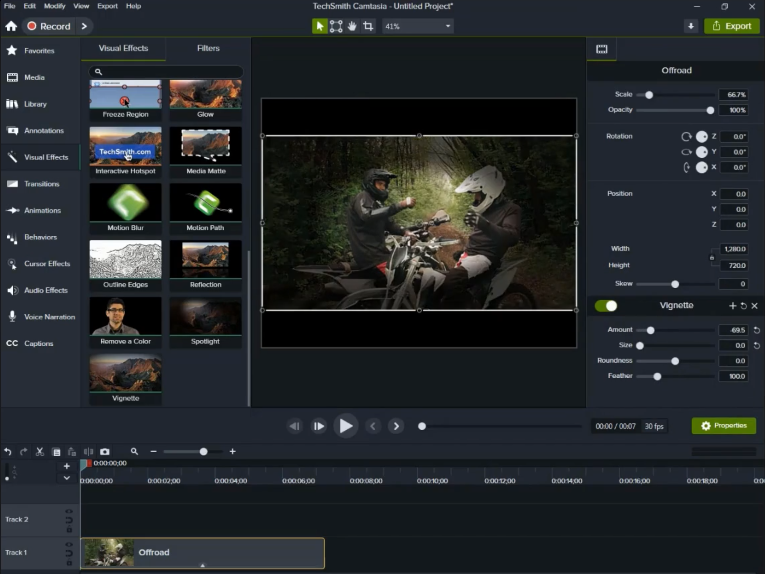
Adjust the properties as needed.
Step 5:
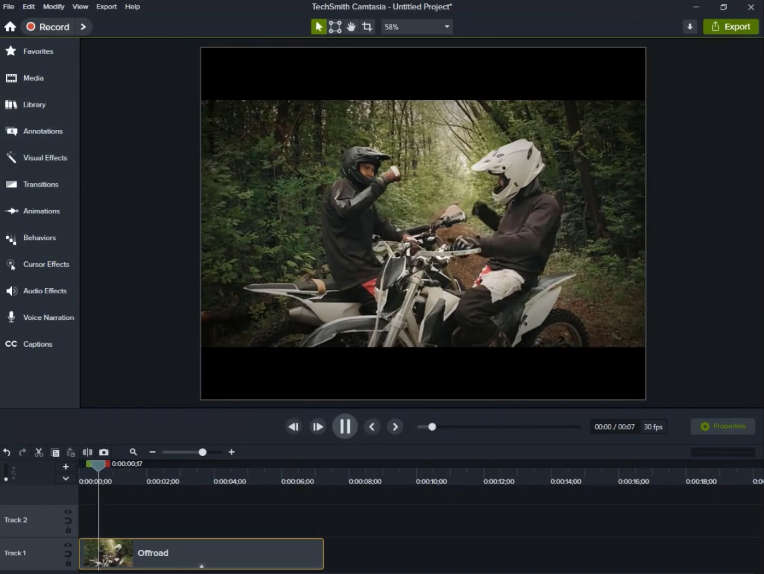
After making the necessary adjustments, preview your work to see the vignette effect on the video or image.
Conclusion:
The ability to create a vignette effect in Camtasia is a valuable skill for video creators. It adds depth and focus to your videos, making them more visually engaging. Whether you’re a YouTuber, educator, or marketer, mastering this technique will undoubtedly help you create more captivating and professional-looking videos. So, go ahead and experiment with this effect to see how it can transform your video projects.
Also, integrating the vignette effect into the corporate eLearning solutions workflow serves as a powerful custom eLearning design strategy. Through this technique, the visual emphasis on crucial learning points within custom eLearning course development can be heightened, thereby augmenting the overall impact of eLearning content development.
By utilising Camtasia’s capabilities for the vignette effect, eLearning professionals can effectively enhance the learning experience and ensure a more compelling and effective educational journey.



Leave a Reply
Want to join the discussion?Feel free to contribute!