Difference between Master Slides and Layouts – Tips on how to use them in Articulate Storyline 360
In the realm of eLearning content development, Articulate Storyline 360 stands tall as a versatile and robust tool, empowering creators to craft engaging and interactive courses.
Now, let’s dive into the specifics of Master Slides and Layouts and explore how they contribute to the art of eLearning content development.
eLearning content development involves the strategic use of authoring tools like Storyline 360 to design courses that captivate learners and facilitate effective knowledge transfer.
1. Using an analogy of a family, we can better understand the distinction between master slides and layout slides in Articulate Storyline 360.
2. Just as a parent may have multiple children who each possess unique physical traits and personalities, each layout slide in Storyline 360 inherits certain properties from its corresponding master slide.
3. However, these layout slides are not identical to one another or to the master slide, and they can be further customized to meet specific design needs.
What is the slide master in Articulate Storyline?
Slide masters in Articulate Storyline function similarly to those in Microsoft PowerPoint, allowing you to control default themes, colors, fonts, text, and objects for slides across your course. Every course has at least one slide master, and you can use as many as you need.
One major advantage of slide masters is that they can be applied to an existing course, either to the entire course or specific slides, making them particularly useful for developers who prefer to focus on content before design.
What is the Layout in Articulate Storyline?
A slide layout is a specific variation of the slide master that is used for a particular type of slide. For example, a slide layout might include specific placeholders for text, images, and media that are appropriate for a quiz question, a video slide, or a title slide.
Each layout inherits properties from its corresponding slide master but can be customized to display content in a specific way.
What is the Difference between Slide Layout and Slide Master?
The main difference between slide layout and master layout in Articulate Storyline is that slide layouts are specific to individual slides, while master layouts are templates that define the overall design and structure of your course or presentation.
Slide Master
Slide Master, on the other hand, are templates that define the design and layout of multiple slides in your project. They can be used to create a consistent look and feel across your entire course or presentation. By editing the master layout, you can apply changes to all the slides in your project that are based on that master layout.
Slide layouts
Slide layouts are pre-designed arrangements of placeholders for content such as text, images, and multimedia elements on a single slide. When you create a new slide, you can choose a slide layout that best fits the type of content you want to present. Each slide layout has its own set of placeholders, which can be customized and edited to suit your needs.
In summary, slide layouts are used to define the structure of individual slides, while master layouts are used to define the overall design and structure of your entire course or presentation.
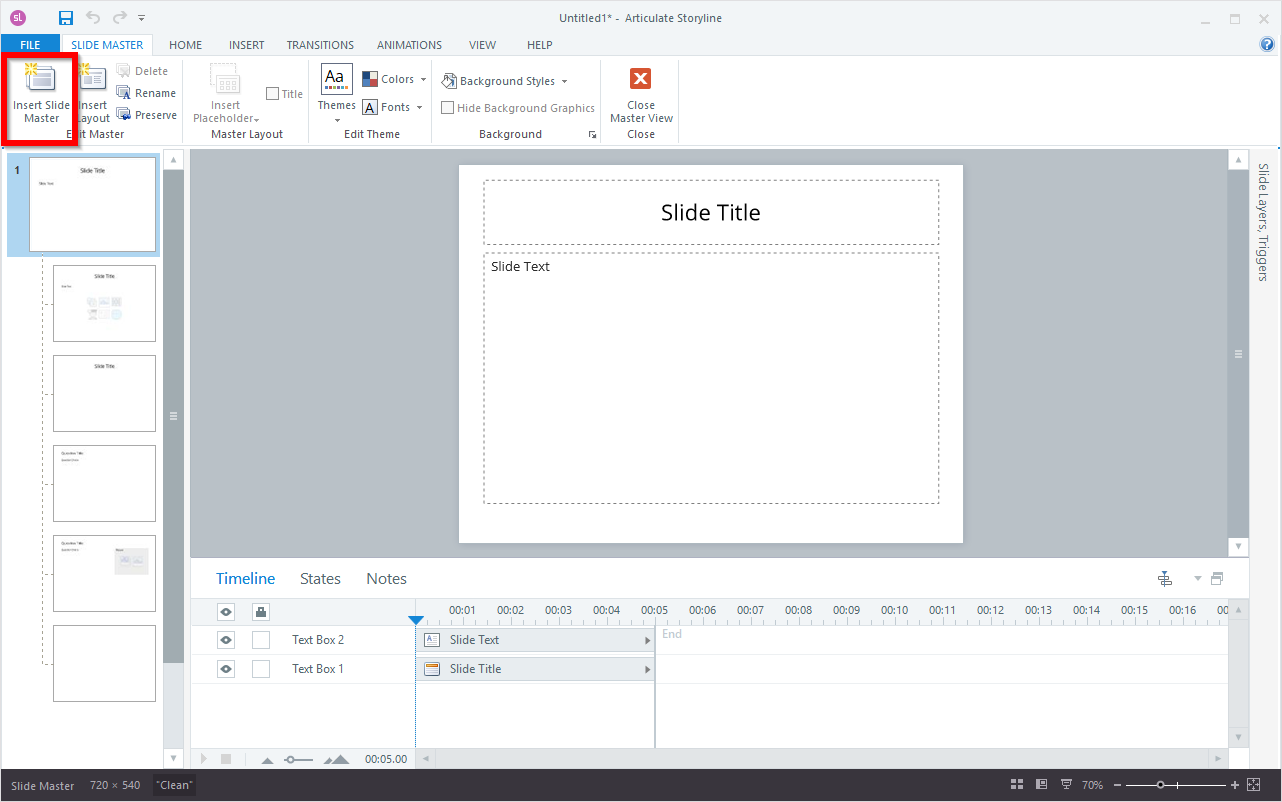
How to Access Slide Master View in Storyline 360?
Accessing the slide master view in Articulate Storyline, simply go to the View tab on the toolbar and click on Slide Master.
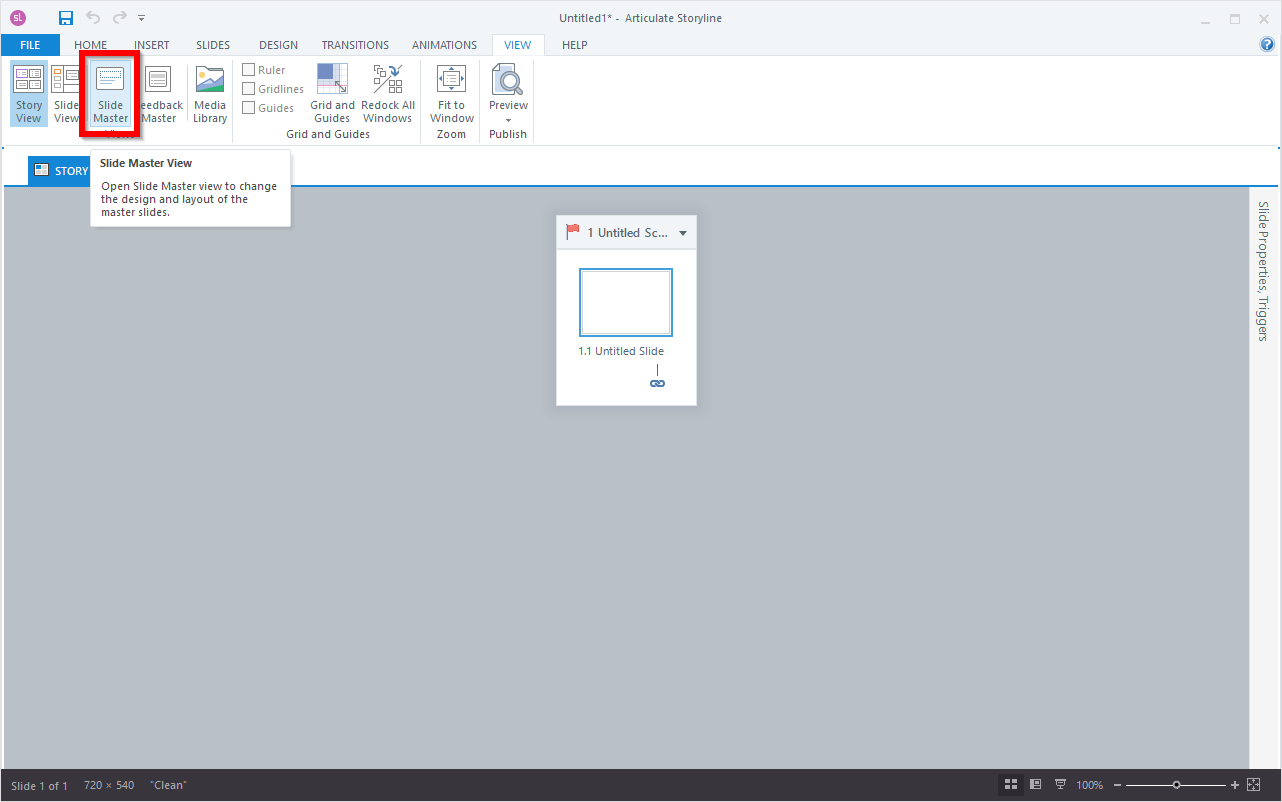
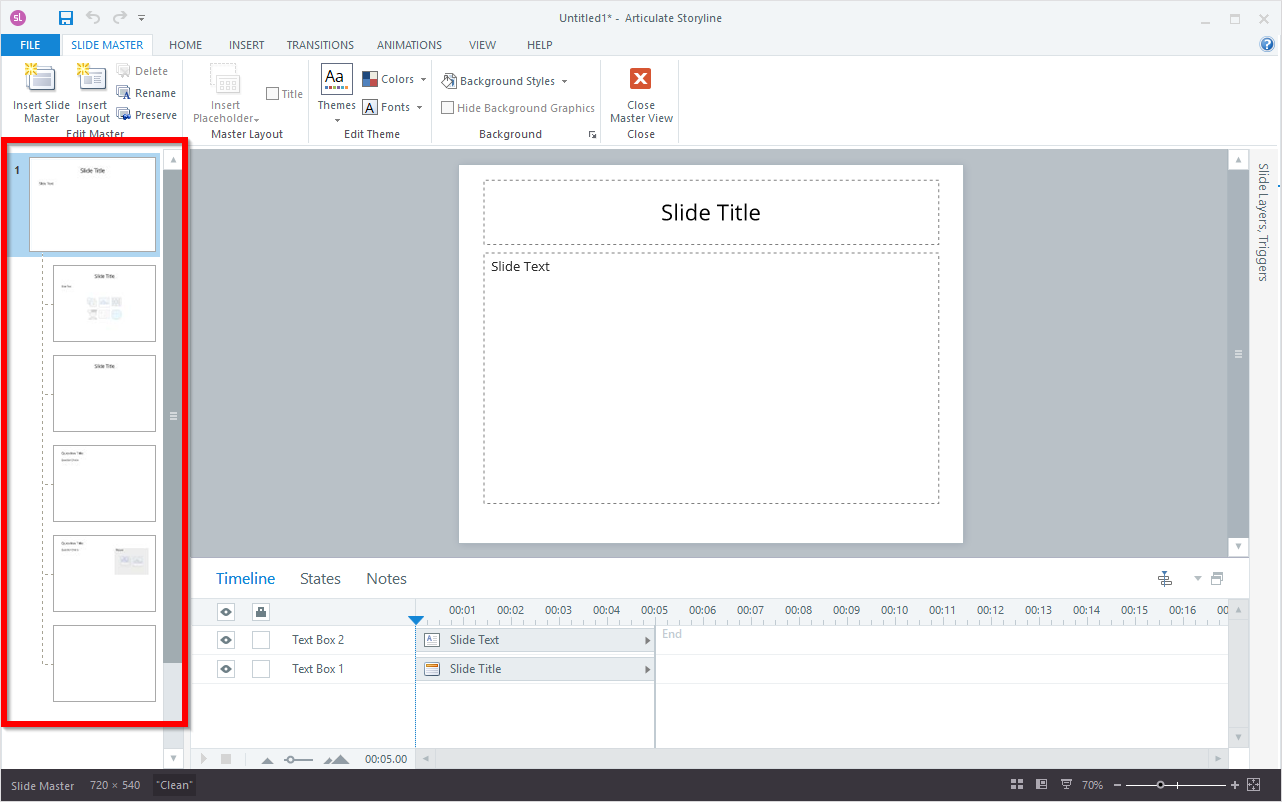
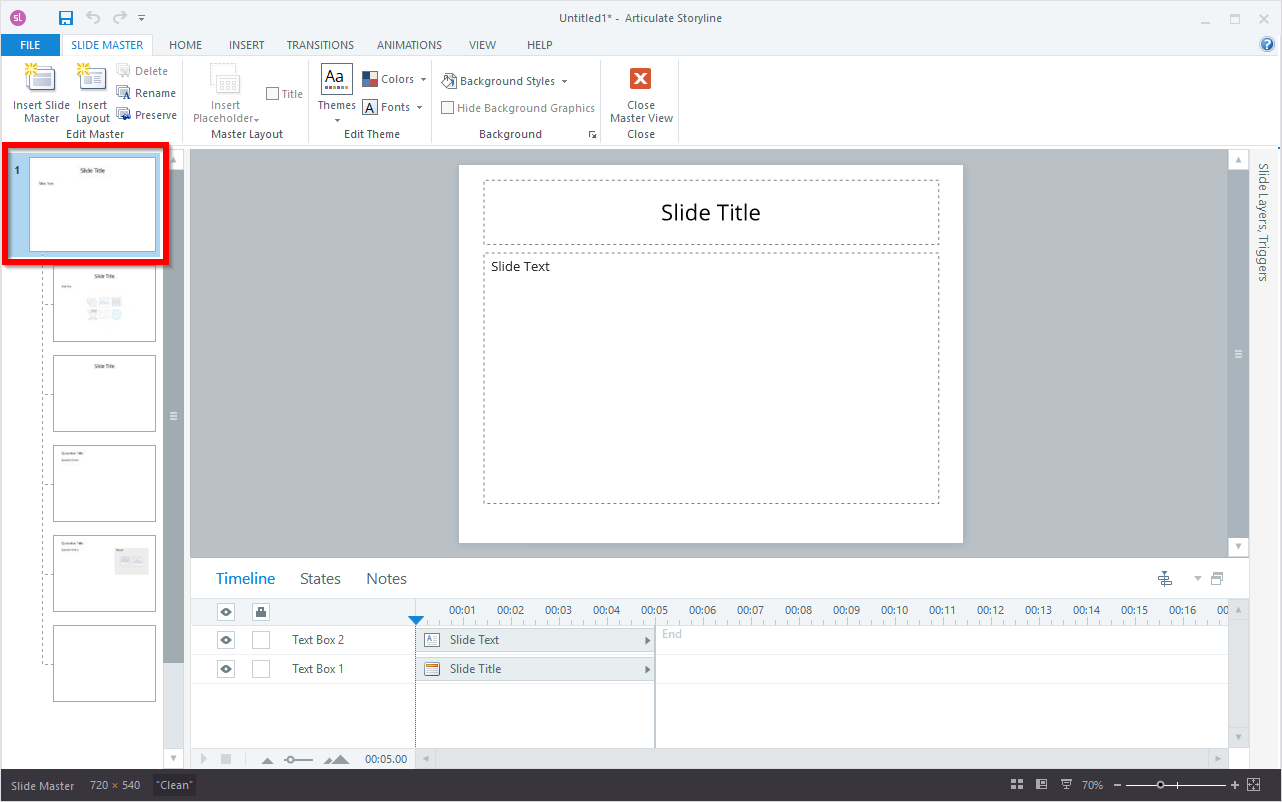
In the slide master view of Articulate Storyline, the left column displays previously created slide masters, or just the default slide master if none have been created yet.
How Do You Make/Create a Slide Master in Storyline 360?
In Articulate Storyline, a slide master is a collection of layouts. The slide master thumbnail in the left navigation pane appears larger than the individual layout thumbnails.
In Articulate Storyline 360, it is possible to create multiple slide masters within the same course, to do this follow these steps.
Step 1: Click on the “Insert Slide Master” button in the toolbar
Step 2: Right-click anywhere in the left navigation pane and choose “Insert Slide Master” from the context menu.
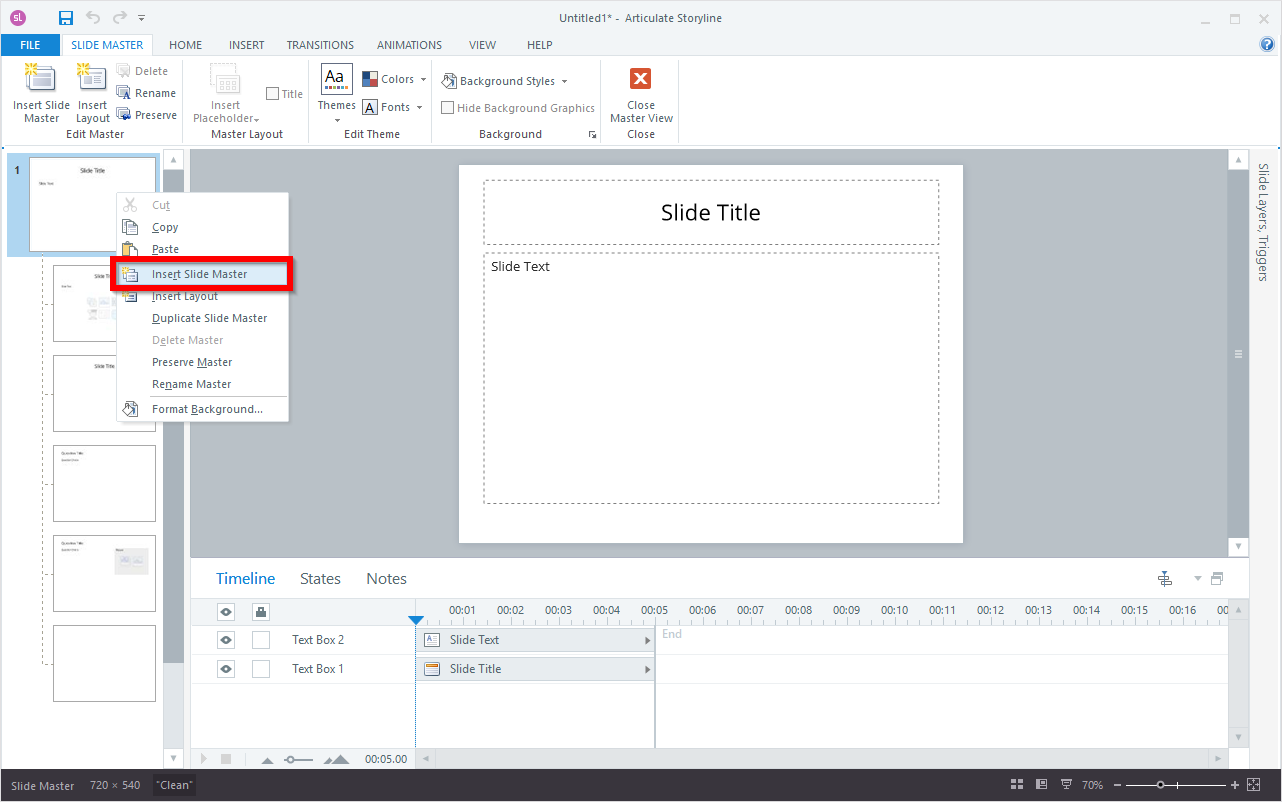
This will add a new slide master with default layouts at the bottom of the navigation pane.
How Do You Make/Create Layouts in Storyline 360?
Layouts in Articulate Storyline inherit all properties from their corresponding slide master but can be customized to display content in a specific manner. This allows you to design unique layouts for different types of slides such as a title slide, content slide or quiz slide.
In Articulate Storyline, you can add more layouts to each slide master. Here’s how:
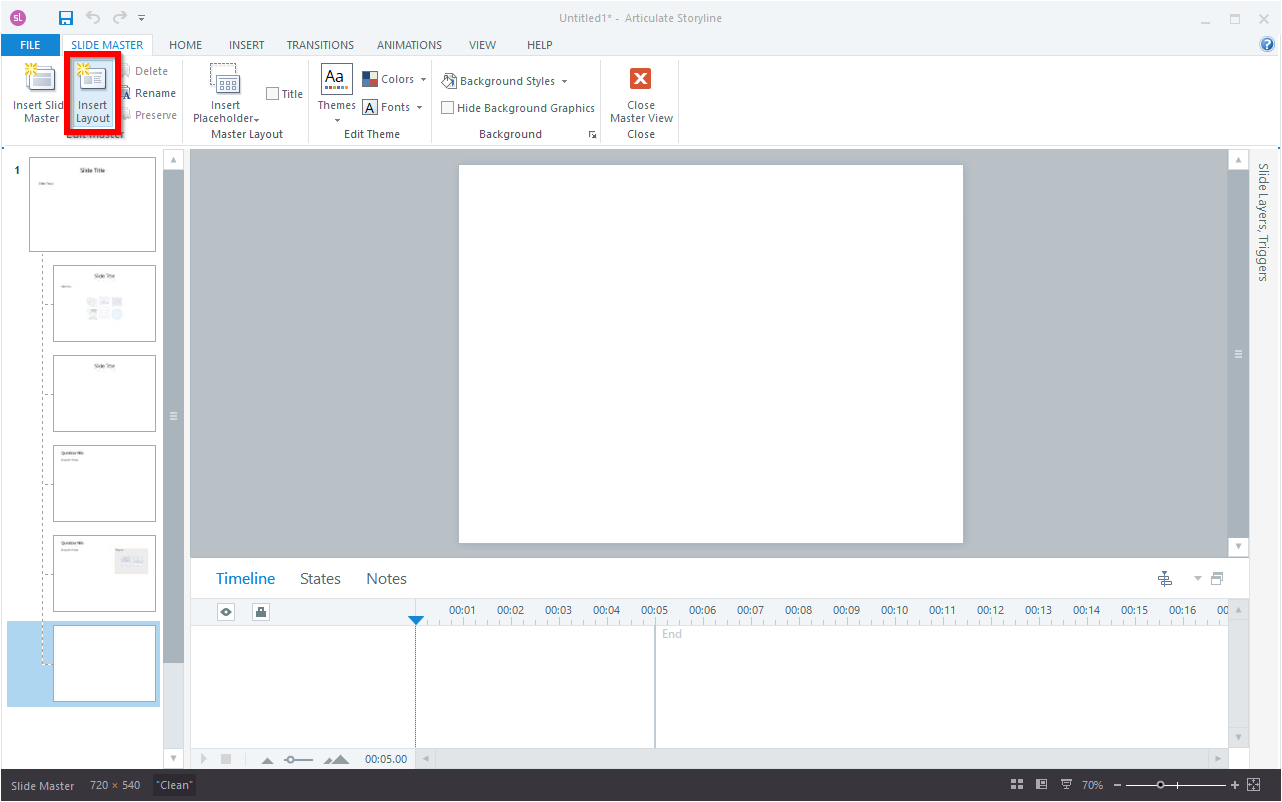
To add a new layout to a slide master in Articulate Storyline, select the insert layout besides slide master from the left navigation pane.
Right-click anywhere in the left navigation pane and choose “Insert Layout” from the context menu.
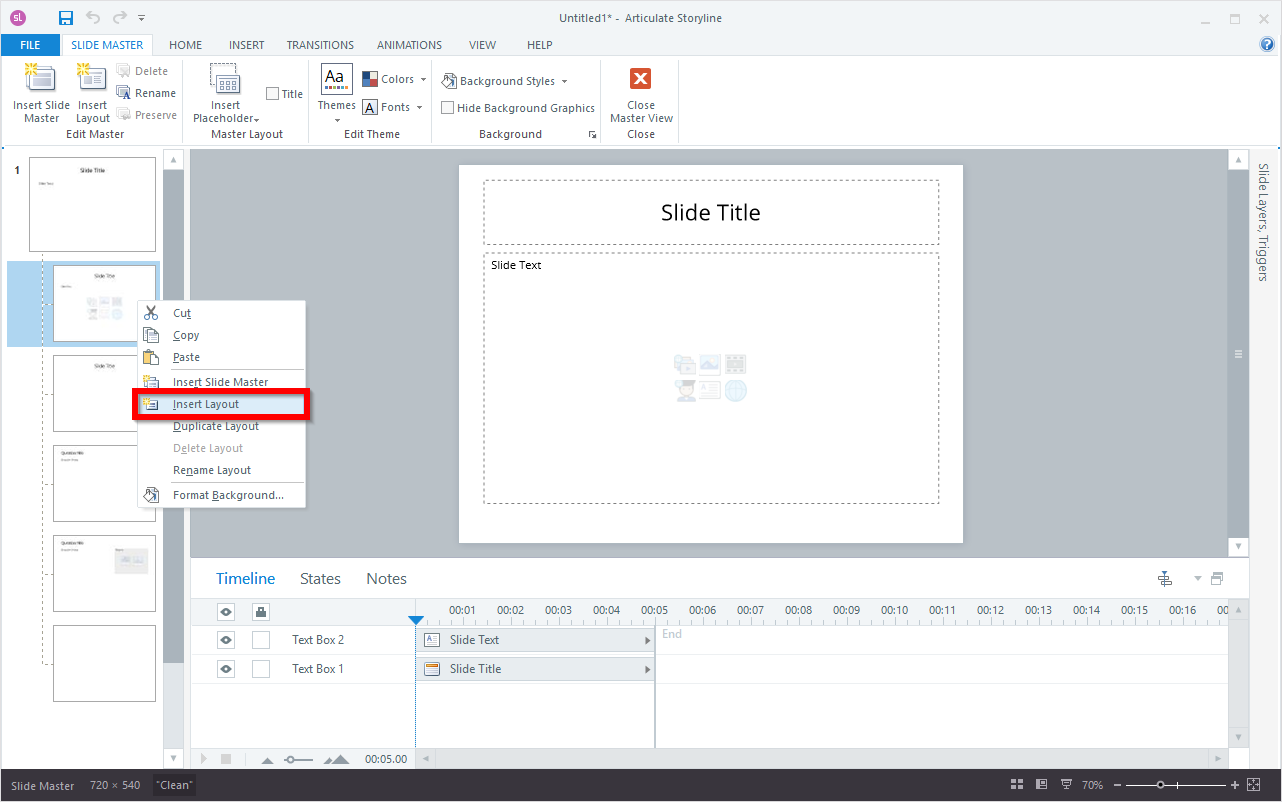
After you insert a new layout, it will be added to the end of the list of layouts for the selected slide master. This layout will inherit the properties of the slide master and will come with a Title text box by default, which can be deleted or disabled if desired.
How do you optimize Slide Masters and Layouts?
You can manage your slide masters and layouts by performing actions such as delete, rename, preserve and duplicate. Here are the steps to do so:
Delete
To delete a slide master along with all its corresponding layouts, select the slide master from the left navigation pane and click on the Delete button in the toolbar.
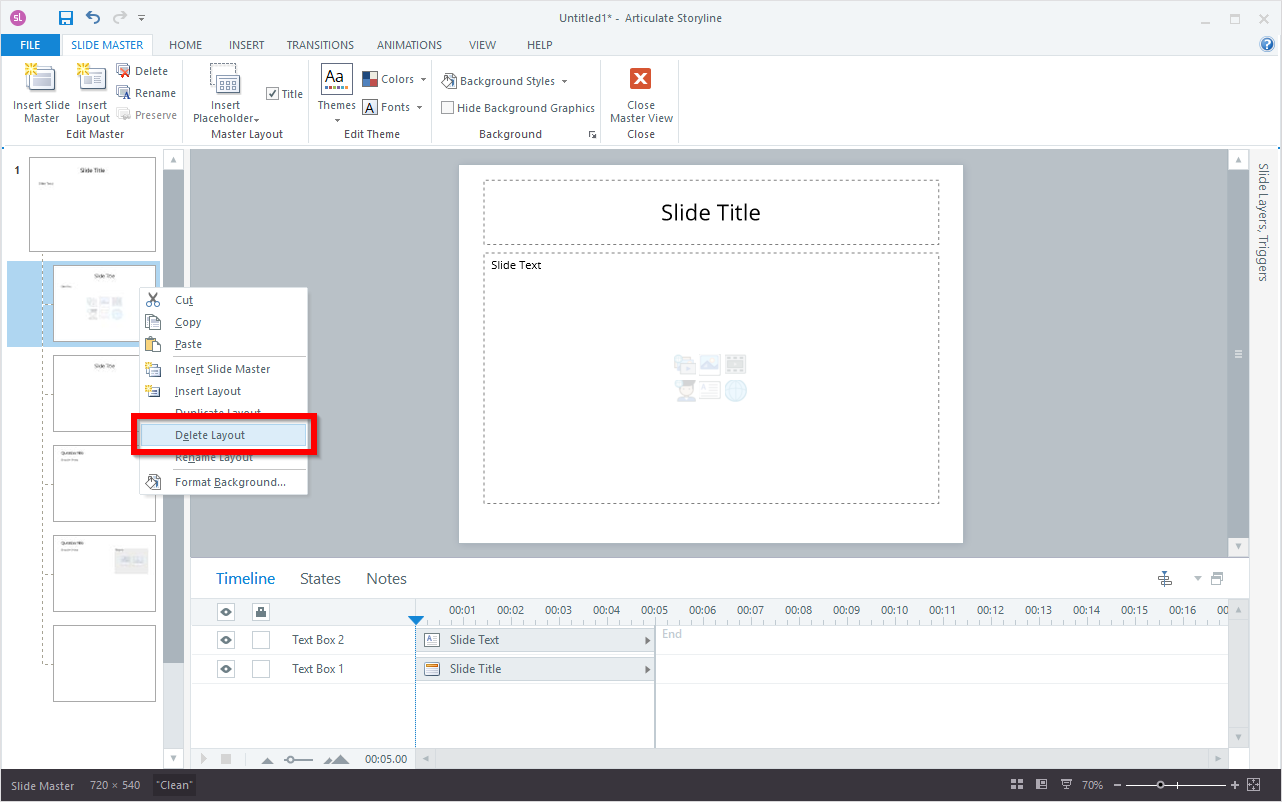
Alternatively, if you want to delete only a layout without deleting its slide master, select the layout from the left navigation pane and use the Delete button in the toolbar.
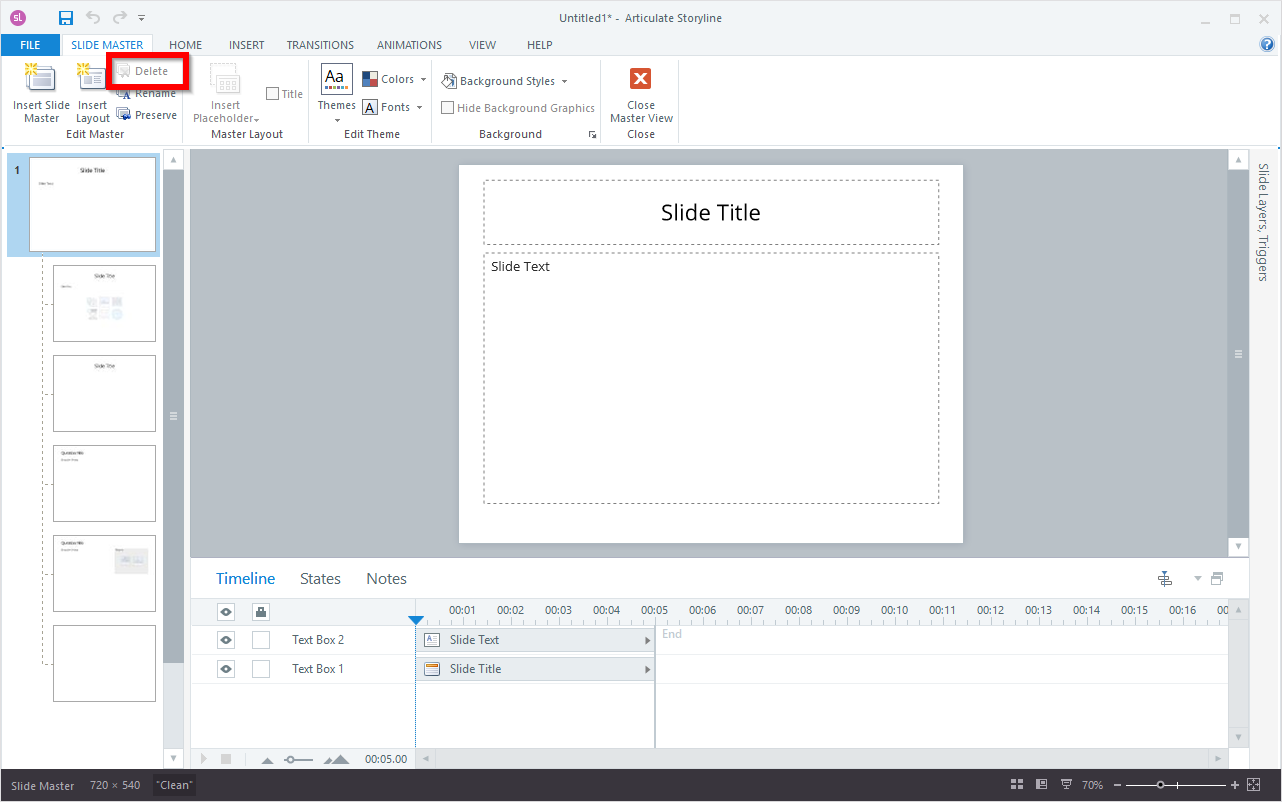
In addition to using the Delete button on the toolbar, you can also right-click on a slide master or layout in the left navigation pane and choose “Delete Slide Master”.
Alternatively, you can simply press the Delete key on your keyboard to remove the selected slide master or layout.
Note:
You cannot delete a slide master or layout that is currently in use by one or more slides in your Story file.
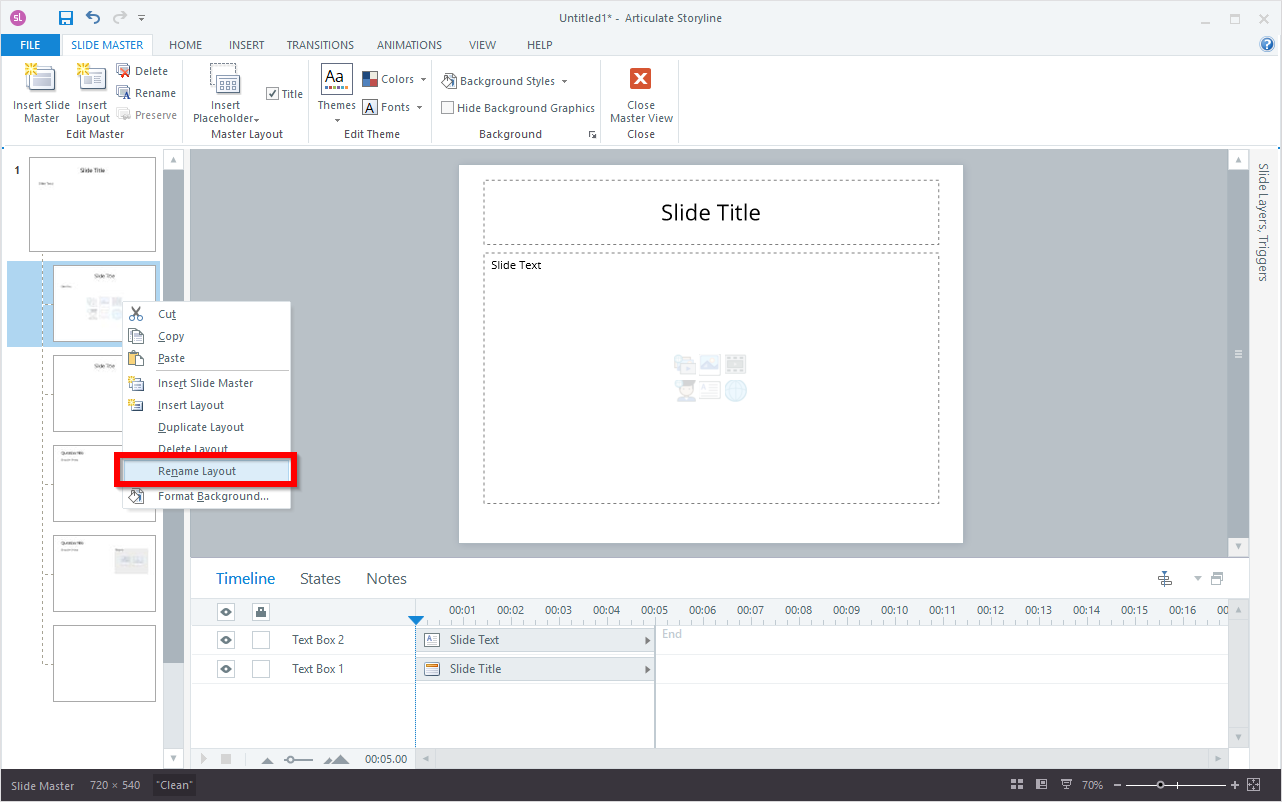
Rename
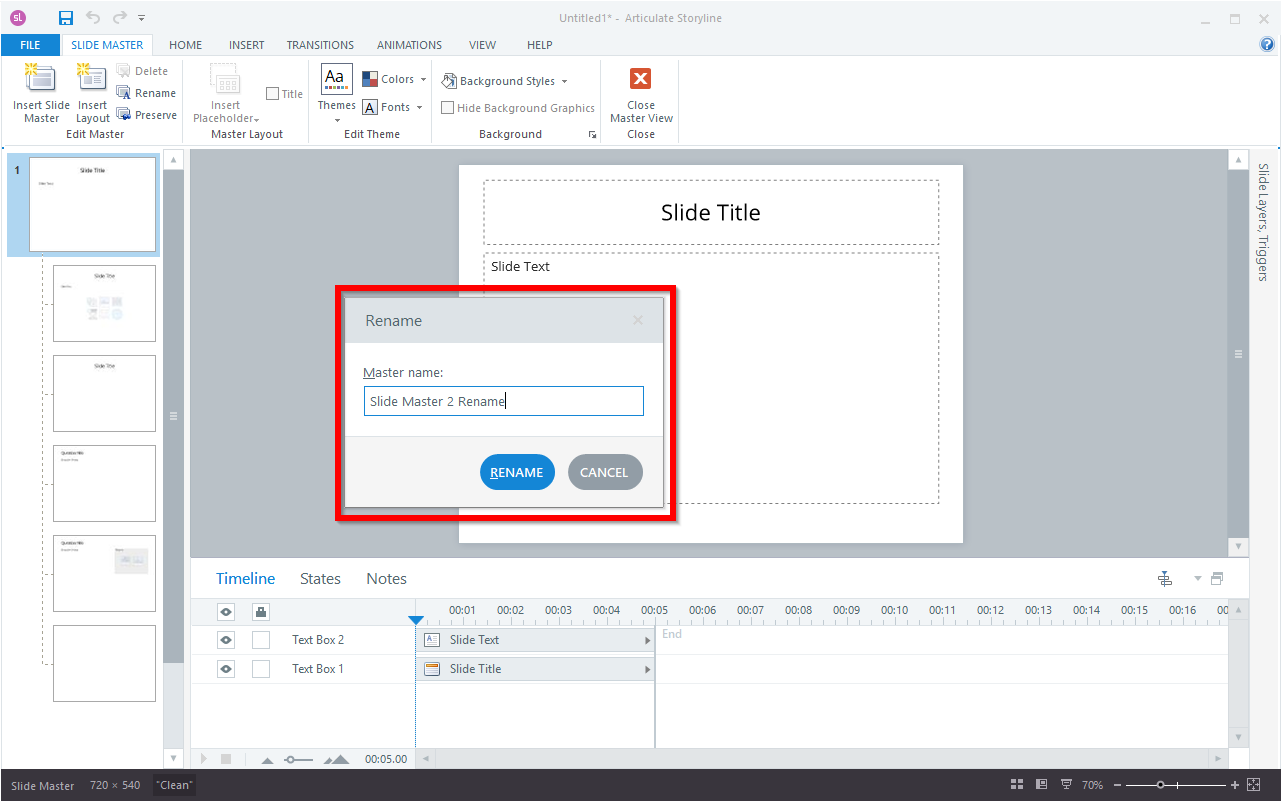
Providing easily recognizable names for your slide masters and layouts is recommended, especially if you intend to use several similar masters or layouts in your presentation. This will make it easier for you to identify and apply them later. To rename a slide master or layout, simply select it from the left navigation pane and use the Rename button on the toolbar.
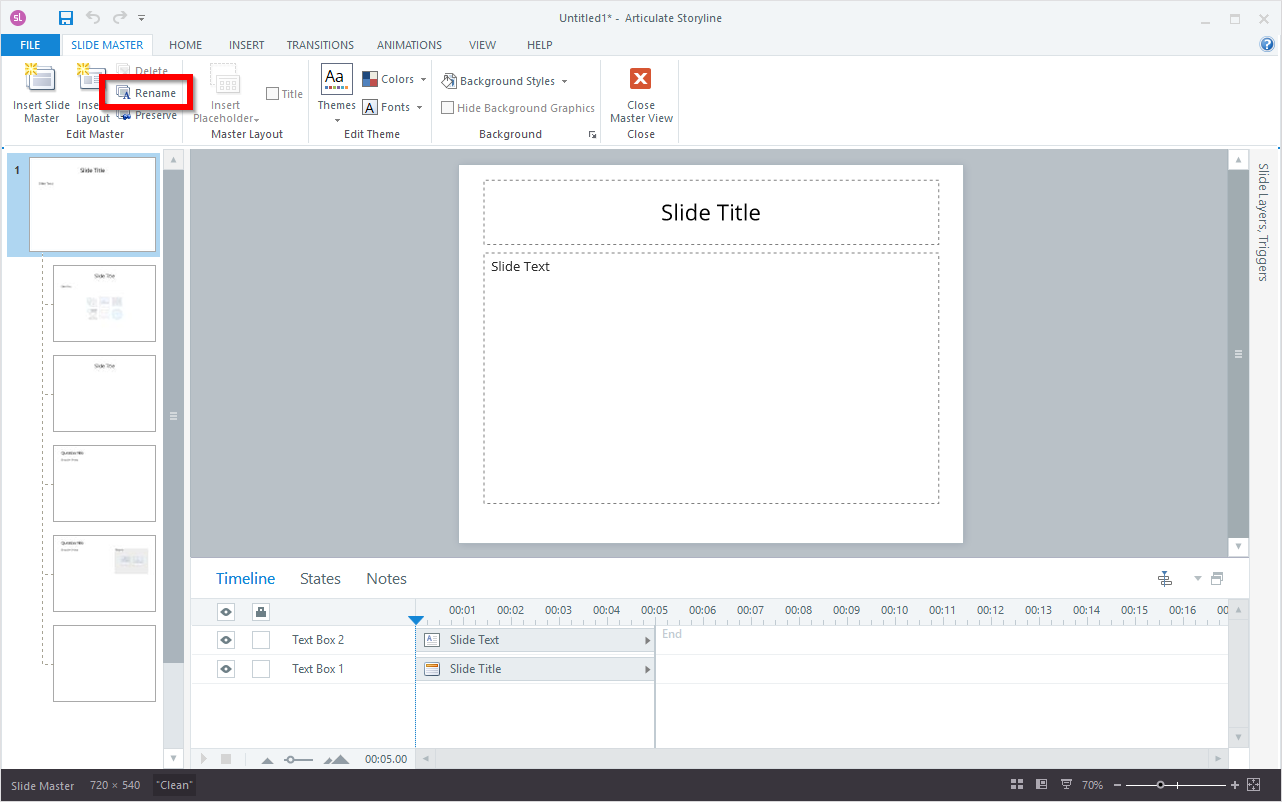
After selecting the slide master or layout you want to rename, assign the desired name and click the Rename button to complete the process.
An alternative method for renaming slide masters or layouts is to right-click on them in the left navigation pane and select either “Rename Master” or “Rename Layout” from the context menu and follow the above step.
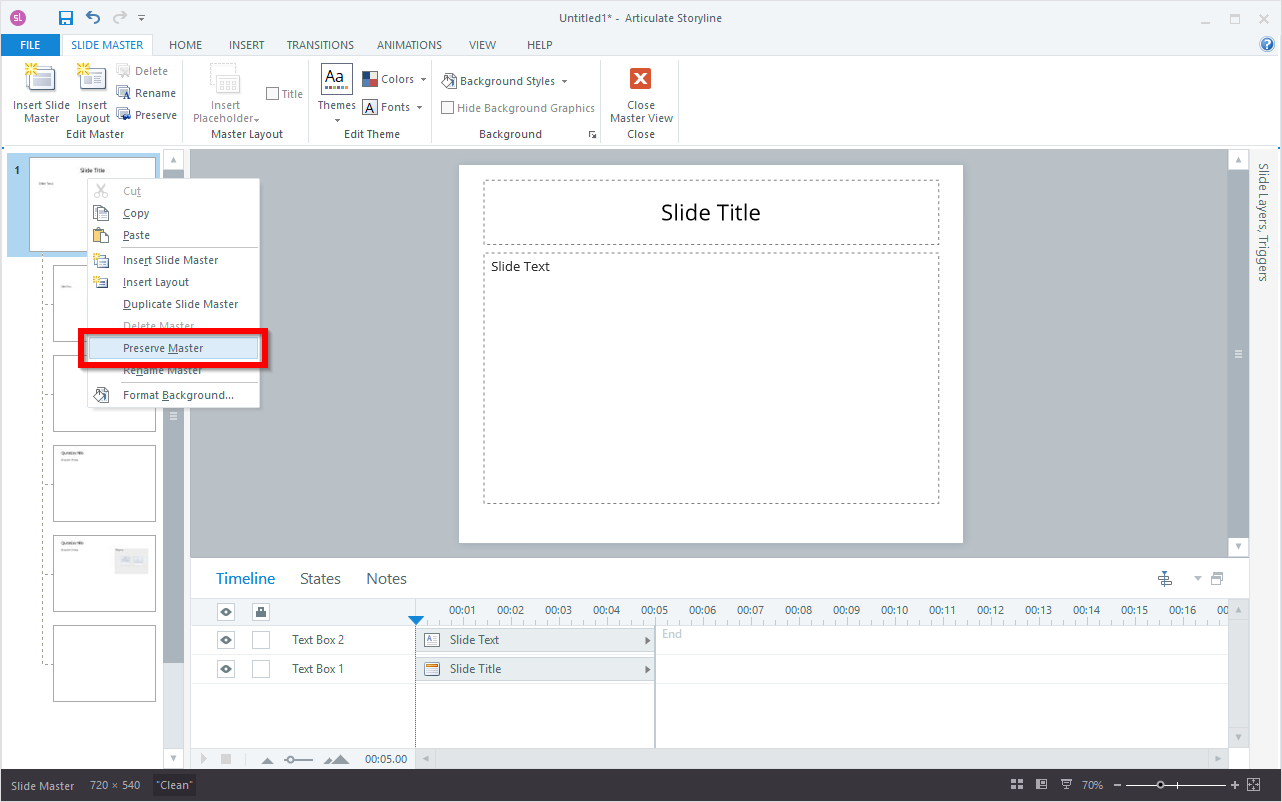
Preserve
If you have a slide master in your presentation that is not currently in use but you want to keep it for future use, you can preserve it. Simply select the slide master from the left navigation pane and use the Preserve button in the toolbar.
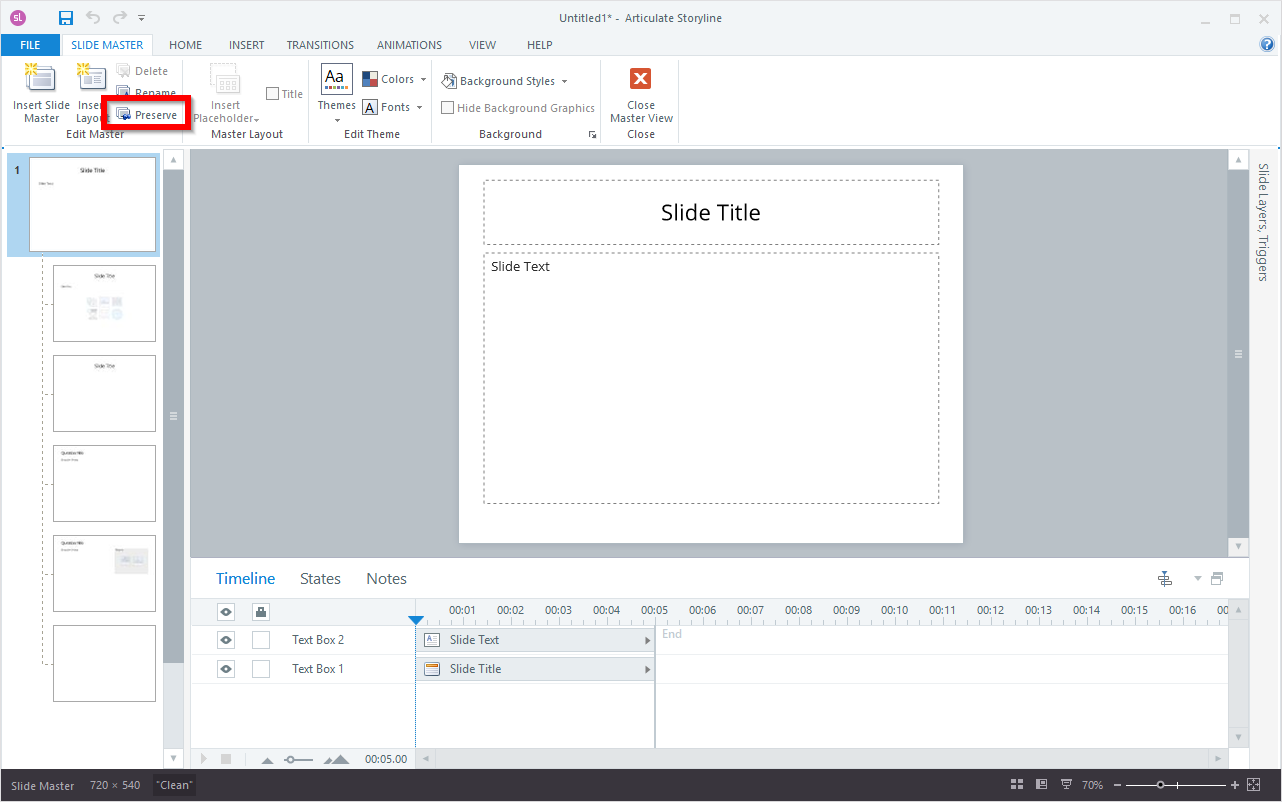
In addition to using the Preserve button on the toolbar, you can also right-click on the slide master in the left navigation pane and select “Preserve Master” from the context menu.
Duplicate
To simplify the process of creating similar slide masters or layouts, you can duplicate them. Right-click on the slide master or layout you want to duplicate in the left navigation pane and select “Duplicate Slide Master” or “Duplicate Layout” from the context menu.

Conclusion
Mastering the use of Master Slides and Layouts in Articulate Storyline 360 empowers you to create visually stunning and consistent e-learning experiences.
Our Services
As a game-based learning provider, we use elements of game design and mechanics, such as challenges, rewards, and interactive scenarios, to create educational experiences that are both engaging and effective. Read More
As an LMS service provider, we offer a comprehensive platform for creating, managing, and delivering educational courses and training programs. Our LMS software enables your organization to track learner progress while maintaining data security and meeting industry compliance standards. Read More
FAQs about slide master and slide layout?
Articulate Storyline 360: Free Step-by-Step Tutorials
Welcome to our collection of free step-by-step tutorials for Articulate Storyline 360! Whether you’re new to e-learning development or looking to enhance your skills, these tutorials provide clear and concise guidance on using Storyline 360. Dive in to discover how you can create interactive, dynamic courses that engage and inspire learners.
Please click on the below link to view Articulate Storyline training videos.


Trackbacks & Pingbacks
This article greatly helped me understand the difference between master slides and layouts in Articulate Storyline 360. I’ve been using both but sometimes found it confusing. The examples you gave made it very clear. Thanks for sharing!
Leave a Reply
Want to join the discussion?Feel free to contribute!