How to Record Screen Actions on a PC with Adobe Captivate in High-Density Screen
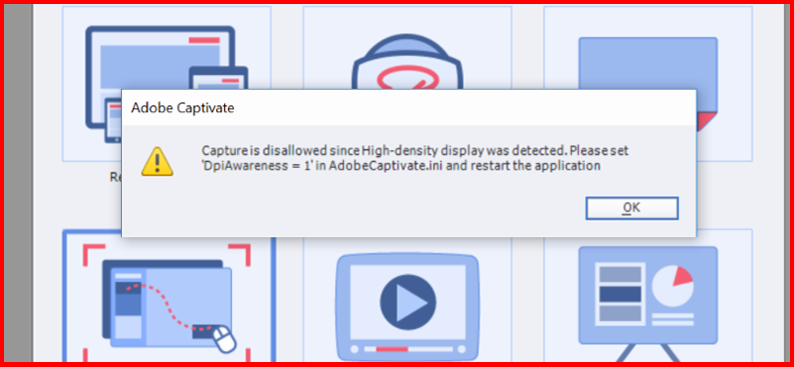
In this blog we are going to see the process on how to fix the alert message “Capture is disallowed since High-density displaying was detected. Please set ‘DPIAwareness = 1’ in AdobeCaptivate.ini and restart the application”.
The “AdobeCaptivate.ini” file had to be manually modified. To find the.ini file, you had to dig deep into the Adobe Captivate program archives. By using a text editor, update the value and reset the DPI to 1.
Below is the step-by-step procedure involved in the High-density screen recording:
Step 1:
Right-click your desktop and choose Display Settings. Change the size of text, apps, and other items to 100% (even if not recommended) and then close the Display Settings.
Step 2:
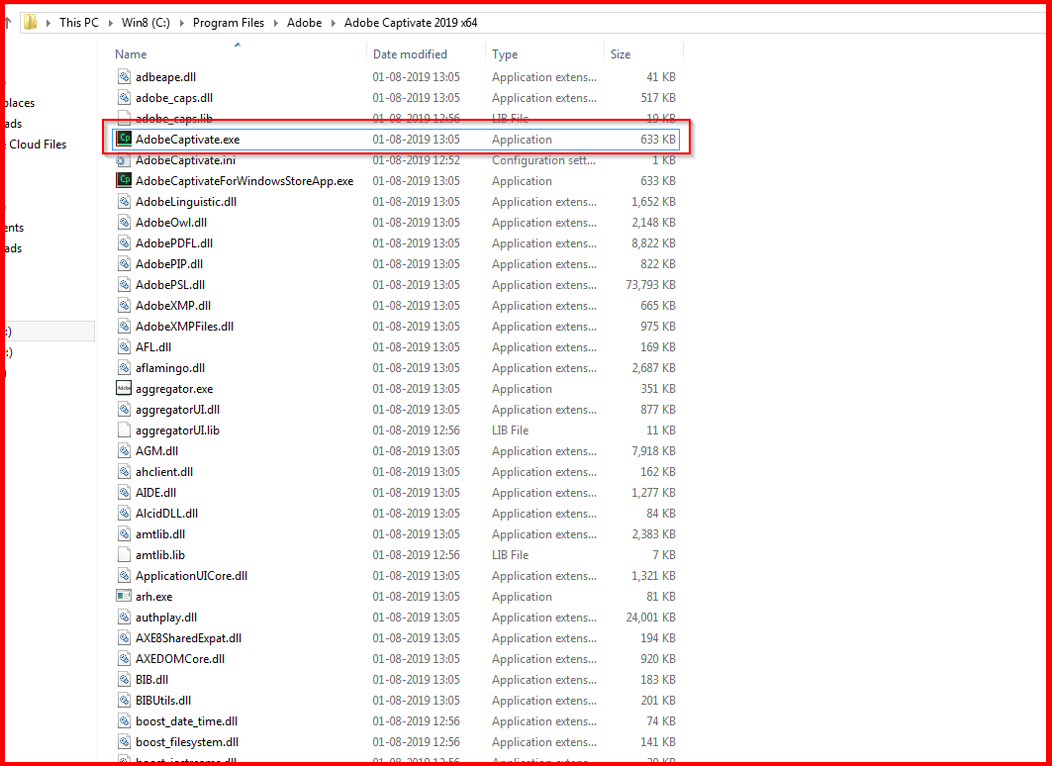
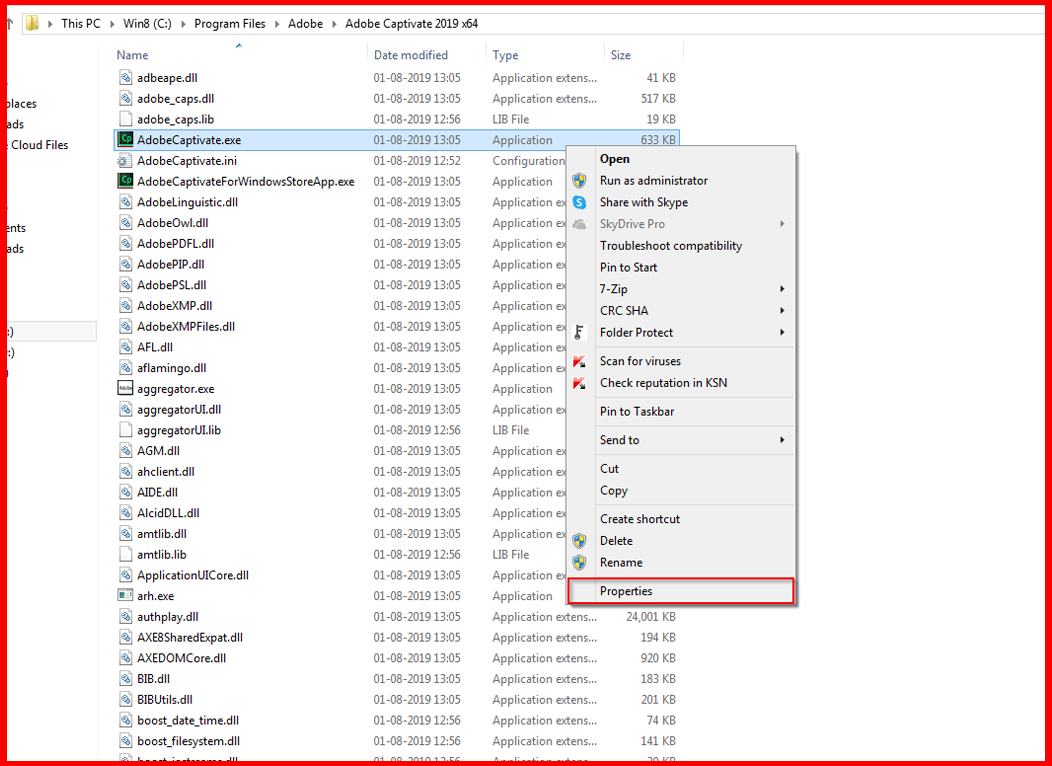
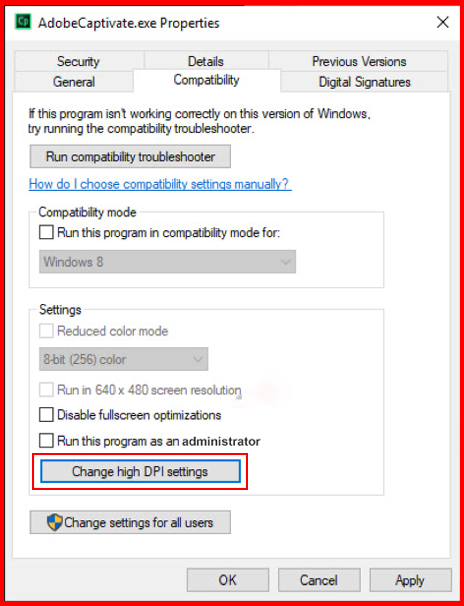
Restart Captivate and see if you can perform software simulation screen recording. If yes, then proceed with the recording. But if you still cannot record the screen then, find the Captivate.exe file (it’s usually in Program Files > Adobe > Adobe Captivate 2019). Right-click and choose Properties.
Step 3:
Click the Change high DPI settings button from the Compatibility tab.
Step 4:
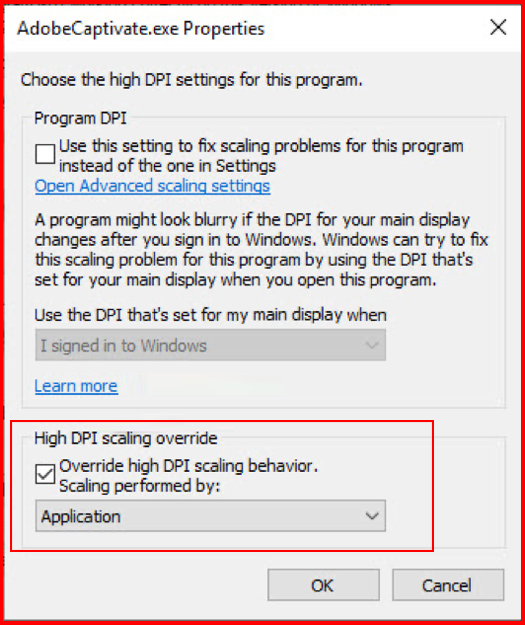
Select the Override high DPI scaling behaviour checkbox. In the ‘Scaling performed by’ drop-down, make sure ‘Application’ option is selected.
Click OK to each of the two dialog boxes to confirm your changes.
You should now be able to record screen actions on your high-density display.




Leave a Reply
Want to join the discussion?Feel free to contribute!