How to Create Accessibility Course in Adobe Captivate.
Click or tap on the play button below to watch the video for easier understanding.
Adobe Captivate latest version lets you easily create accessible eLearning content that meets Section 508 and WCAG 2.0 standards. It also features a new accessibility inspector.
Welcome to our step-by-step tutorial on creating an Accessibility Course in Adobe Captivate.
Step 1:
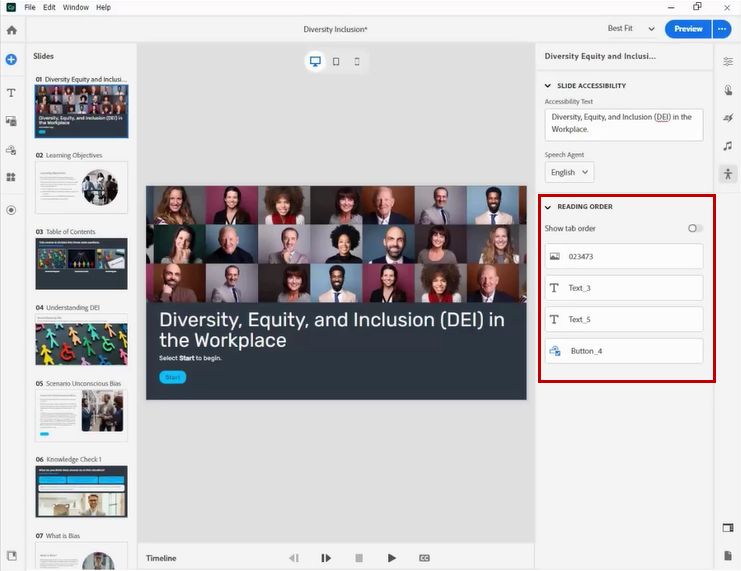
Open the Adobe Captivate course and click the new accessibility icon in the right slide panel.
Step 2:
The Accessibility inspector has two sections. The top section lets you add accessibility text and select the language for the entire slide.
Step 3:
The Reading order section lists all the components on the selected slide.
Step 4:
Click the image on the Reading order list to add its accessibility text and select the language.
Step 5:
If you don’t need the image to be accessible, you can hide it from the screen order using the Hide from screen order option.
Step 6:
You can follow the same process to add accessibility text and choose a language for other screen elements.


Leave a Reply
Want to join the discussion?Feel free to contribute!