How to Use the Motion Path Feature in Camtasia
Click or tap on the play button below to watch the video for easier understanding.
Camtasia, a versatile screen recording and video editing software, is an invaluable tool for those in the eLearning industry. It offers a Motion Path feature that empowers eLearning content developers to create captivating animations and dynamic motion within their videos.
This feature can be a game-changer for eLearning solutions, as it allows for the creation of engaging and interactive content, perfect for emphasizing key points and guiding learners’ attention. Whether you’re involved in eLearning content development or providing custom eLearning solutions, Camtasia’s Motion Path feature can help you craft compelling educational material.
Unlock the potential of animation and elevate your eLearning presentations with Camtasia’s Motion Path feature. In this guide tailored for Custom eLearning Development Services, we’ll navigate through the intricacies of using this dynamic tool to enhance your eLearning content. From Custom eLearning Solutions to bespoke eLearning content development, Camtasia’s Motion Path feature can be a vital asset in creating more engaging and professional eLearning experiences.
In this comprehensive guide, we’ll walk you through the step-by-step process of effectively utilizing the ‘Motion Path’ feature in Camtasia, designed to meet the specific needs of eLearning professionals.
Whether you’re engaged in Custom eLearning Solutions, developing eLearning content, or offering Custom eLearning Development Services, this tool will allow you to create animations that reinforce educational material, ensuring that your eLearning content is not only informative but also visually captivating.
By the end of this guide, you’ll have the knowledge and skills necessary to deliver high-quality eLearning solutions that engage and educate your target audience effectively.
Here are the steps on how to use the motion path features in Camtasia:
Step 1:
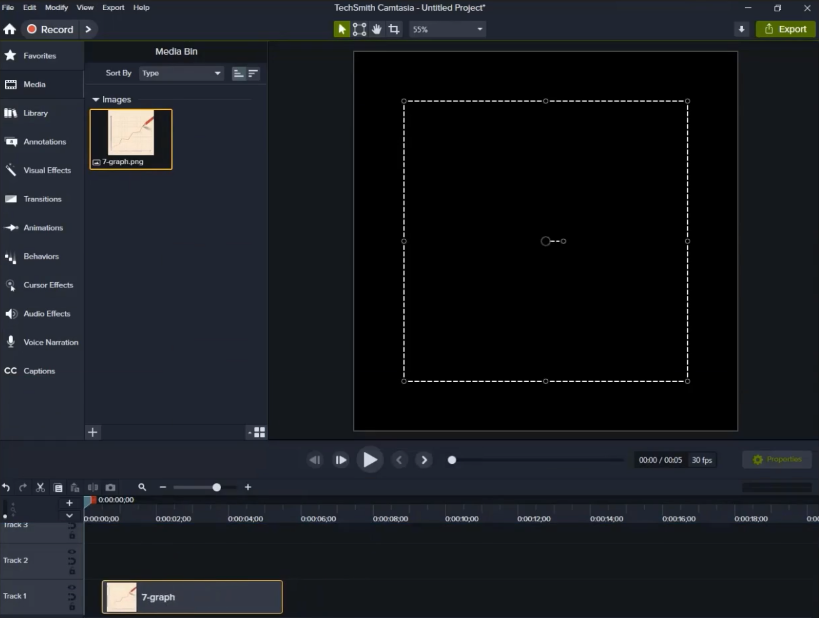
Open the ‘Camtasia’ software and import an image.
Step 2:
Go to the ‘Library’ section on the left-side panel and select the preferred icon from the ‘Icon and Glyphs’ category. For instance, in this example, we’re including an arrow mark icon.
Step 3:
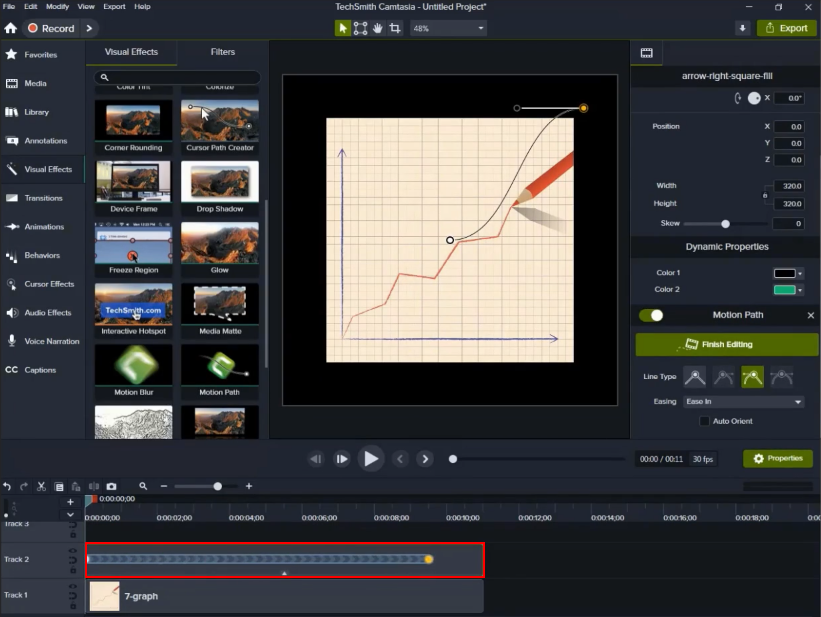
Afterward, go to the ‘Visual Effects’ tab on the left-hand panel and implement the motion path effect onto the arrow mark icon.
Step 4:
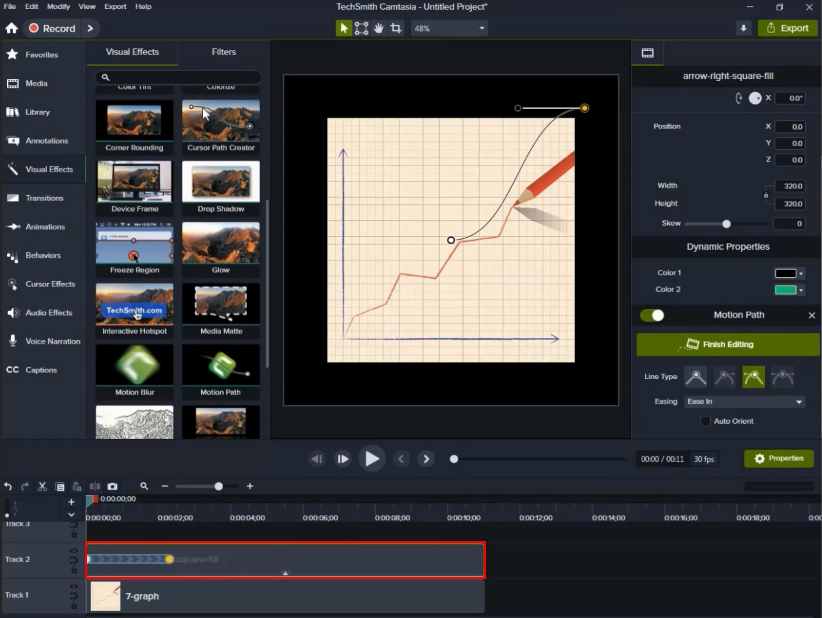
You can modify or adjust the motion path timeline by dragging the pointers/markers.
Step 5:
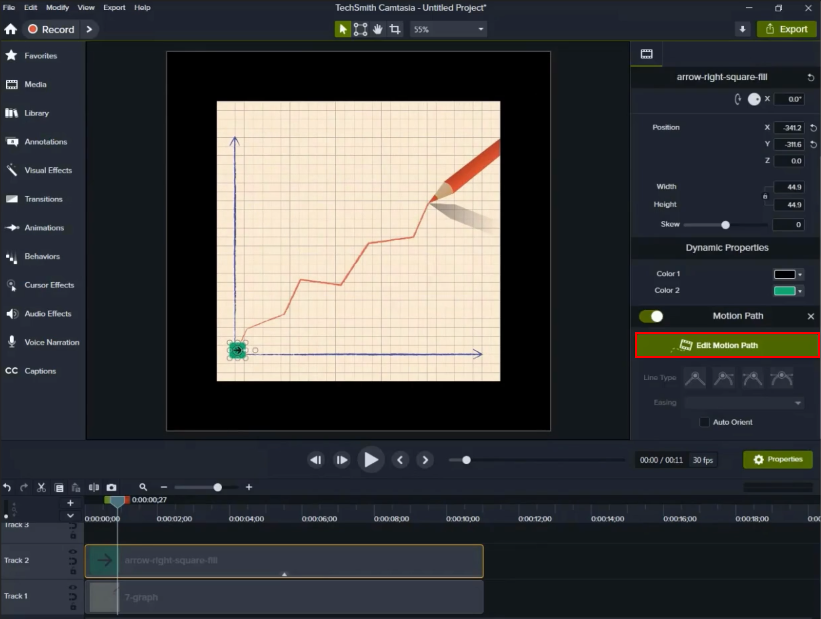
To alter the motion path direction, click on the ‘Edit Motion Path’ button located in the right-hand panel.
Step 6:
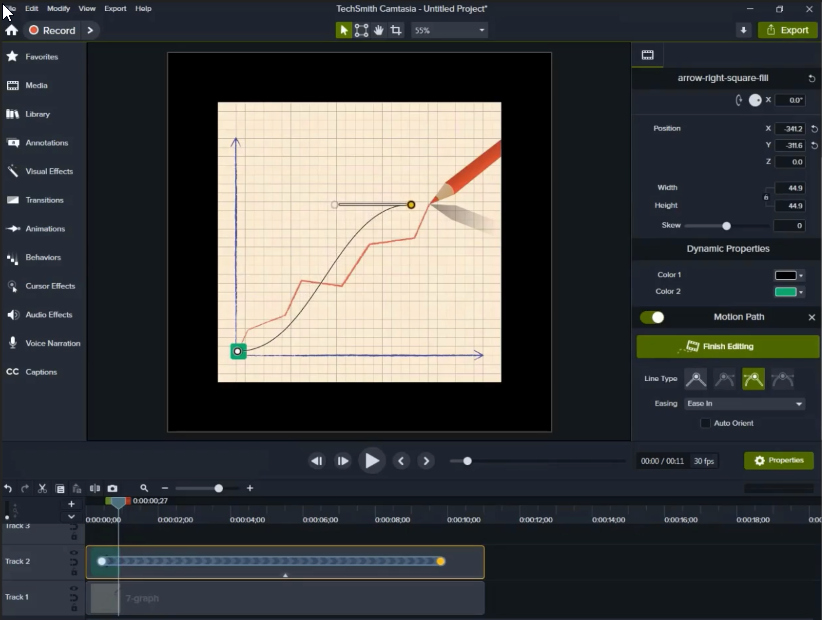
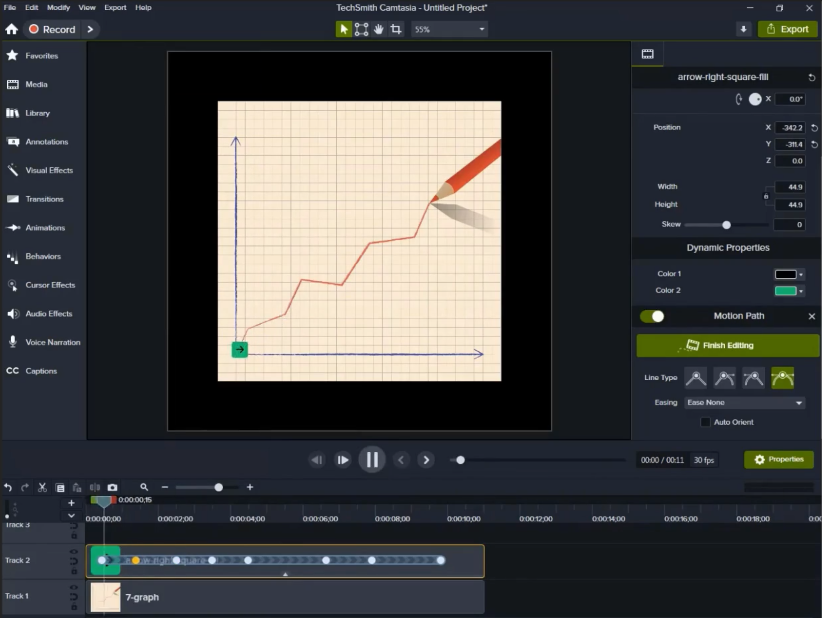
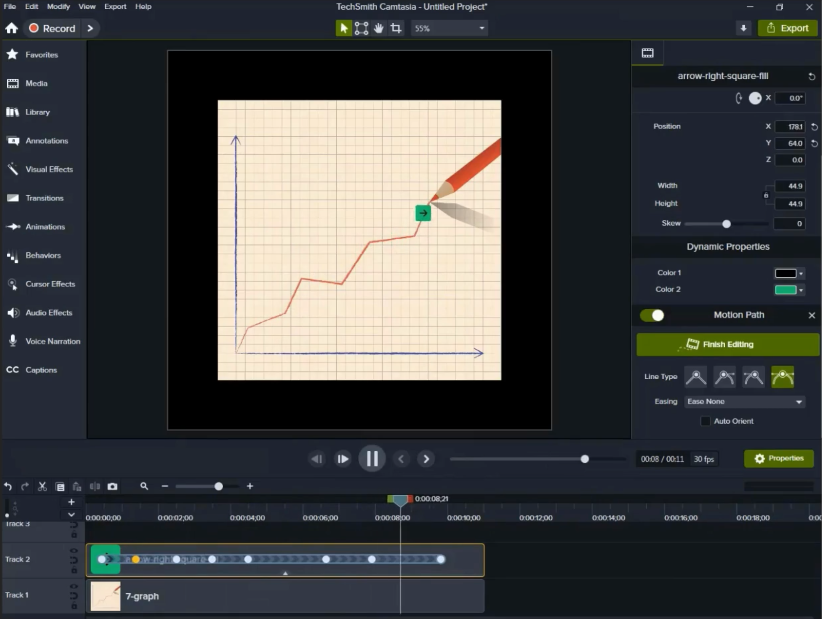
Position the end marker at the conclusion of the graph line by dragging it.
Step 7:
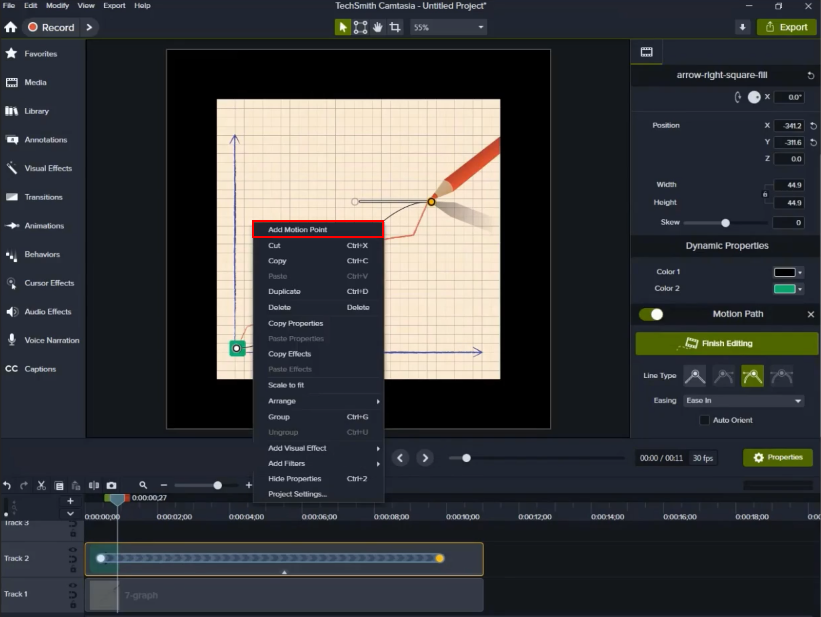
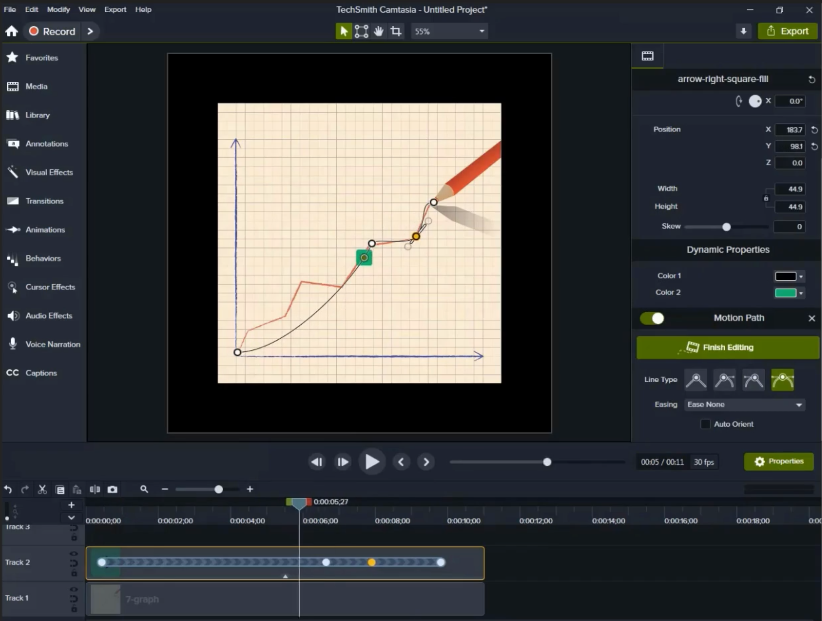
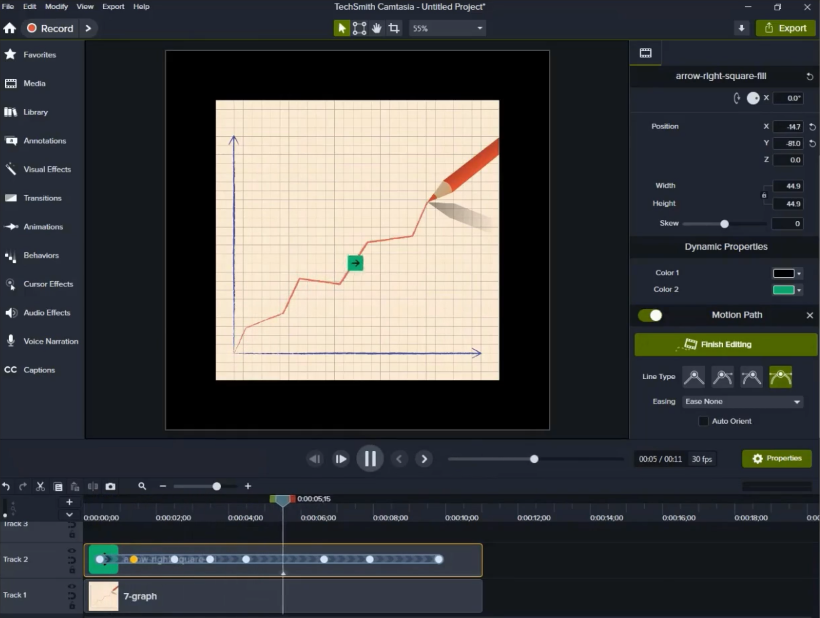
To add additional points, right-click on the motion path, choose ‘Add Motion Point’, and adjust the points towards the graph line.
Step 8:
If you have more pointers, please follow the same process for the points.
Step 9:
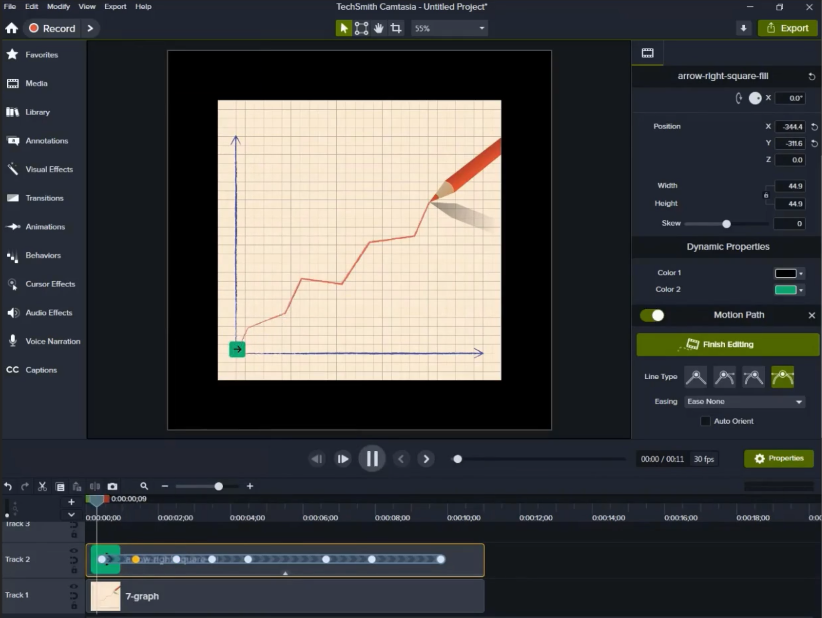
Let’s preview the video by clicking the play button. You’ll be able to see the motion path animation of the arrow mark icon.
Step 10:
If you want an arrow to dynamically show the direction towards the graph line, check the ‘Auto Orient’ checkbox in the right-side or hand panel.
Step 11:
Let’s preview it once more, and you will observe the motion path and direction of the arrow mark.
Step 12:
Once you’ve finished all your edits, click the ‘Finish Editing’ button located on the right-side panel.
Conclusion:
Camtasia’s Motion Path feature is a powerful tool for video creators, educators, marketers, and anyone looking to elevate the quality of their video projects. By following the steps outlined in this guide, you can unleash the potential of animations, effectively guiding your viewers through your content and making it more visually appealing and engaging.
Whether you’re a seasoned content creator or just starting out, mastering the Motion Path feature in Camtasia can significantly enhance the impact of your video projects. It allows you to convey your message effectively, keeping your audience both informed and entertained, while also adding a professional touch to your content. With the Motion Path feature, you can turn your videos into engaging visual stories that leave a lasting impression on your viewers.






Leave a Reply
Want to join the discussion?Feel free to contribute!