How to Generate Subtitles for Videos in Animaker
Click or tap on the play button below to watch the video for easier understanding.
Generating subtitles for videos in Animaker is a crucial step in custom eLearning development to make your educational content more accessible and engaging. With Animaker’s user-friendly interface, adding subtitles becomes a seamless process that enhances the overall quality of your eLearning materials.
Whether you’re creating custom eLearning courses, tutorials, or instructional videos, providing subtitles ensures that your content caters to a diverse audience, including those with hearing impairments.
Furthermore, subtitles offer an additional layer of visual stimulation that can captivate your audience and maintain their attention throughout the learning process. Visual learners, in particular, can benefit from this dual sensory experience, as they can read and listen simultaneously, reinforcing their understanding of the subject matter.
Additionally, in custom eLearning development projects, where complex or technical terminology is often used, subtitles can provide a written reference that helps learners better comprehend the material. This added clarity can lead to improved retention and a more effective learning experience overall.
So, in this comprehensive guide, we will walk you through the step-by-step process of generating subtitles in Animaker. Also, by the end of this guide, you’ll be equipped with the knowledge and tools to seamlessly incorporate subtitles into your videos.
Key Steps to Generate Subtitles for Videos in Animaker
Step 1:
Open ‘Animaker’ in your web browser and login using your credentials.
Step 2:
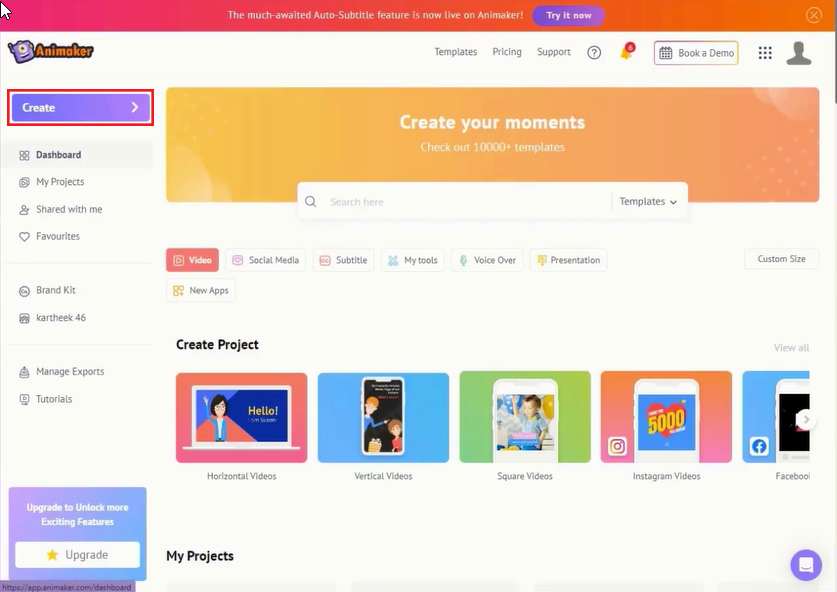
Click on the ‘Create’ tab on the left side menu.
Step 3:
Click on the ‘Create Subtitle’ from the options list shown.
Step 4:
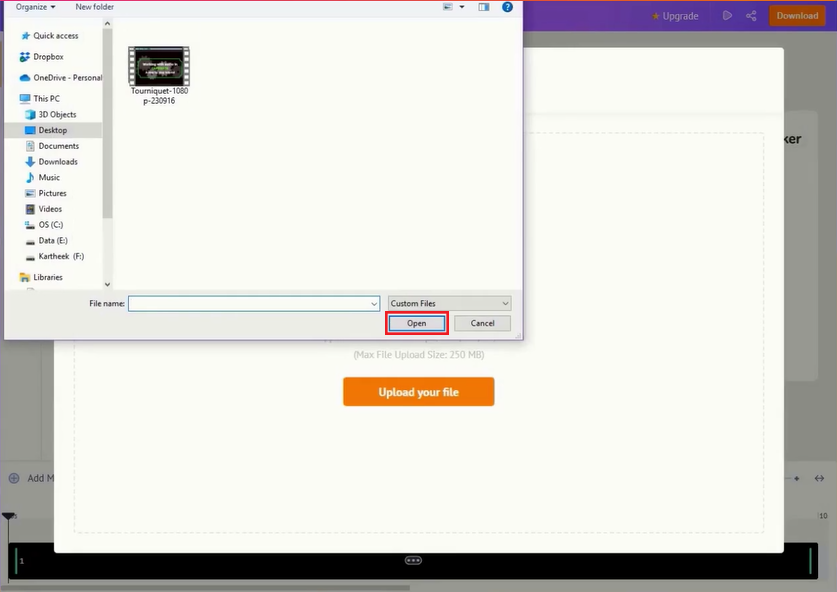
Upload the required video by clicking the ‘Upload your file’ button.
Step 5:
Choose a ‘Video’ and then click ‘Open’.
Step 6:
Choose an ‘Auto Subtitle’ tab from the left side panel.
Step 7:
Click the ‘Generate Subtitles’ button.
Step 8:
Subtitles will be generated based on the narration of the video. After generating the subtitles for the video, you have the flexibility to make the edits as necessary.
Conclusion:
Incorporating subtitles into your Animaker videos is an essential practice in the realm of custom eLearning development. By following the steps outlined in this guide, you can easily enhance the accessibility and engagement of your educational content.
Subtitles not only make your materials more inclusive by accommodating a broader audience but also contribute to better comprehension, which is a fundamental goal of custom eLearning development.
As you continue to harness the power of Animaker for your eLearning projects, remember that subtitles are a valuable tool that can significantly impact the effectiveness of your educational content, making it more accessible and engaging for all learners.


Leave a Reply
Want to join the discussion?Feel free to contribute!