What can you do with the 360° images feature in Articulate Storyline 360?
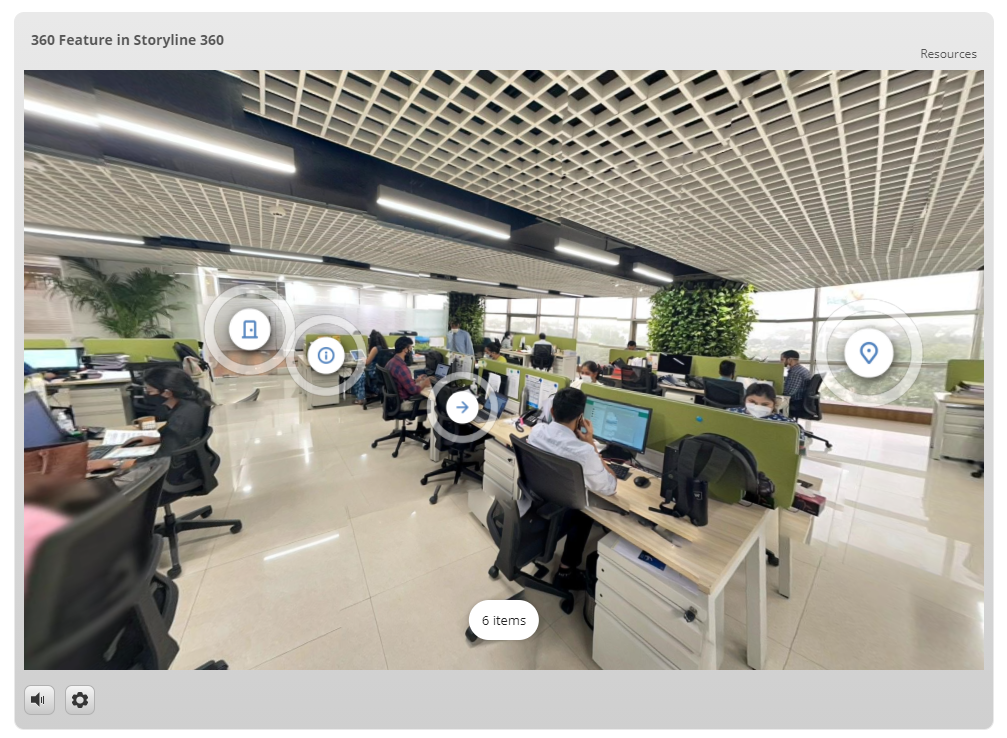
Articulate Storyline 360 has added a new feature known as 360° images which allow the eLearning developers to add 360° images in Storyline. With this feature learner can navigate through the image in all the directions and explore by clicking markers and hotspots. We can also customize the markers, add audio or video in the pop up of marker or hotspot.
How to Add 360 Image in Articulate Storyline 360?
This process allows you to seamlessly incorporate immersive 360 images into your Articulate Storyline 360 project.
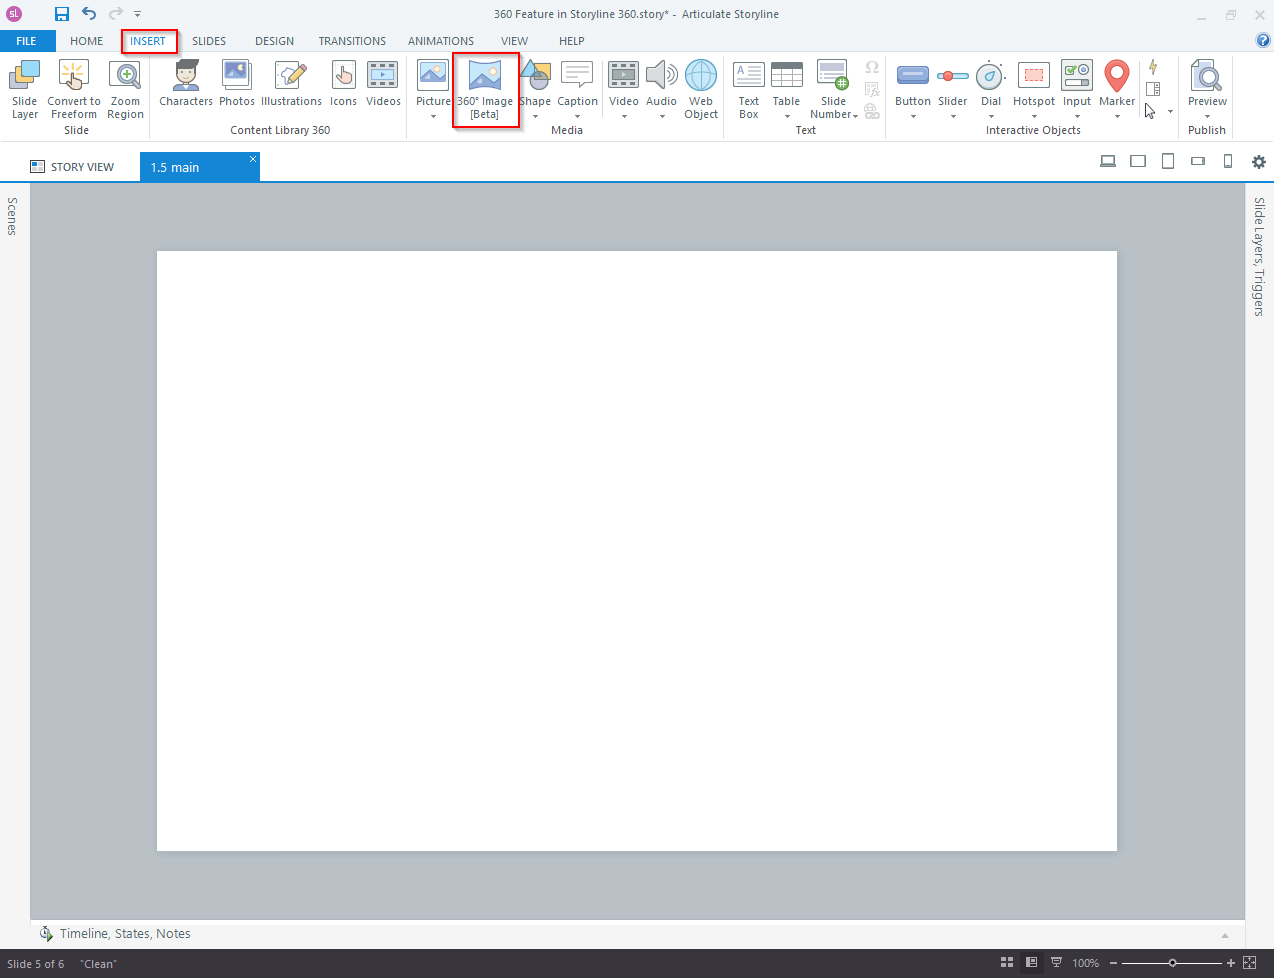
Step 1: Click on Insert and select 360° Image [Beta] option and select the image.
Steps To Add and Edit Markers and Hotspot
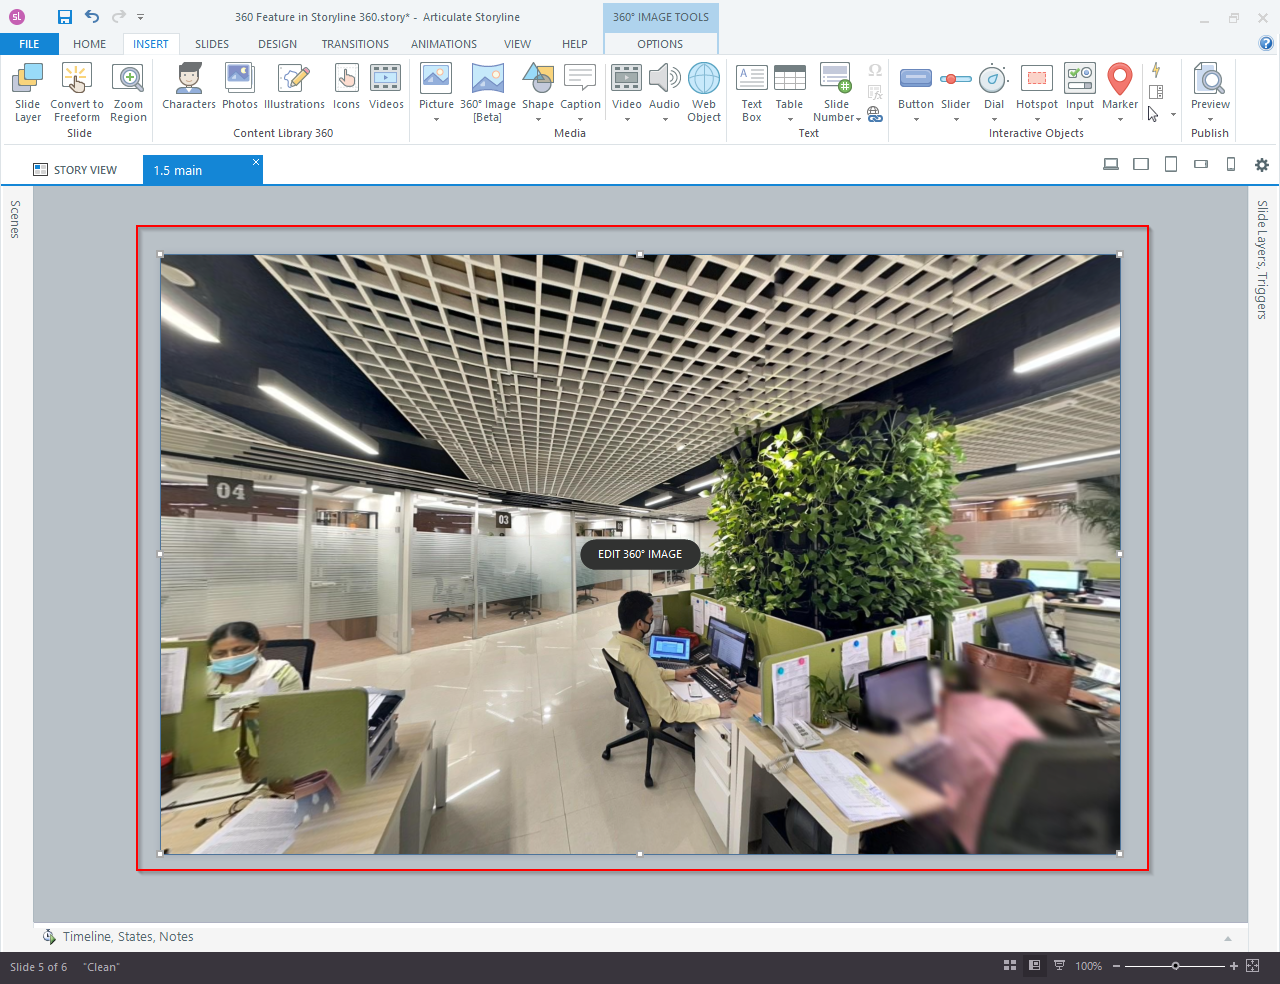
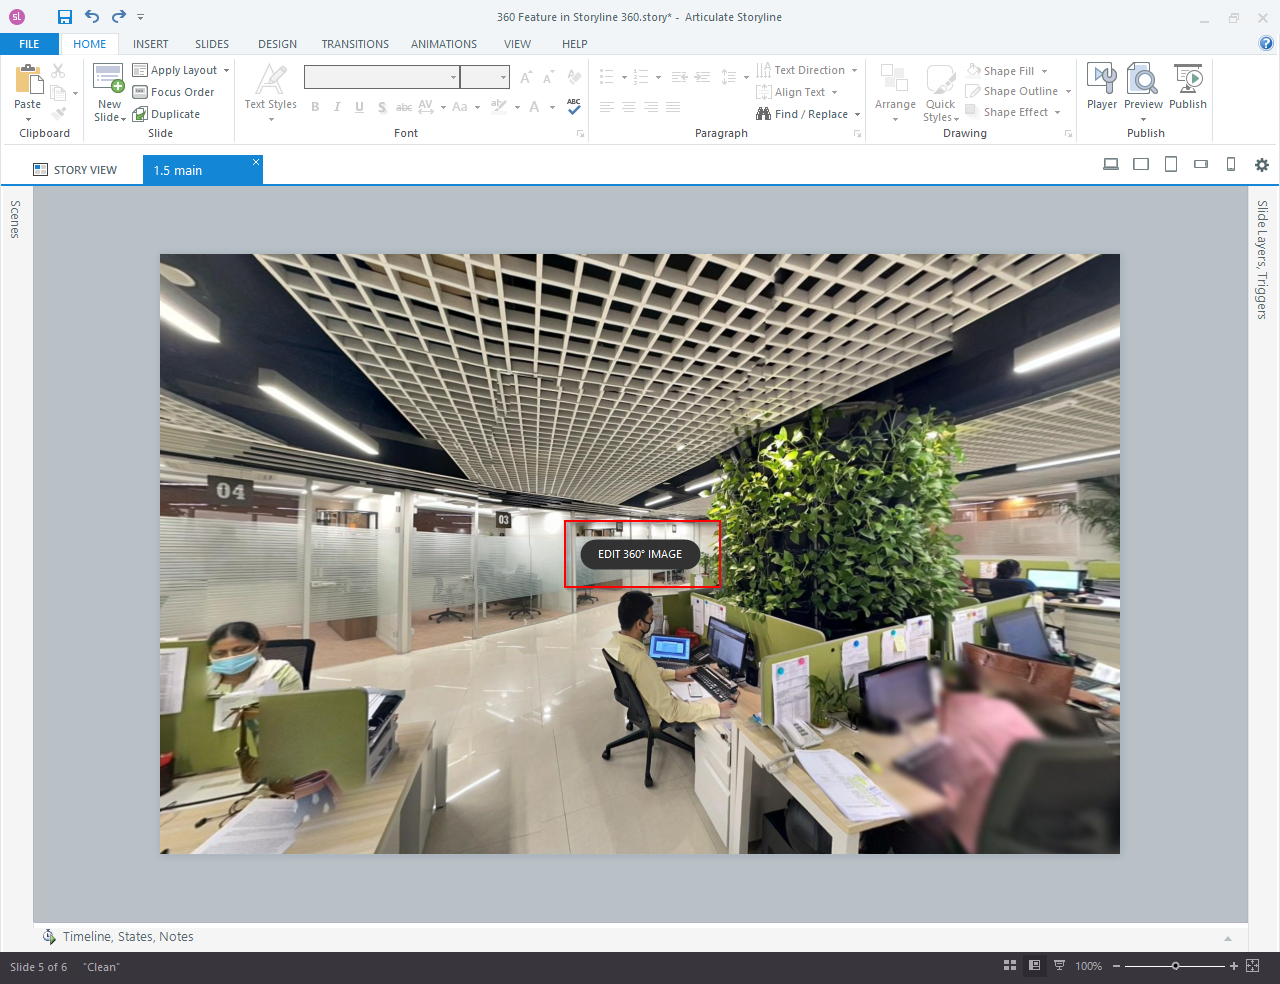
Step 2: For adding a marker, click on the EDIT 360° IMAGE button on the image.
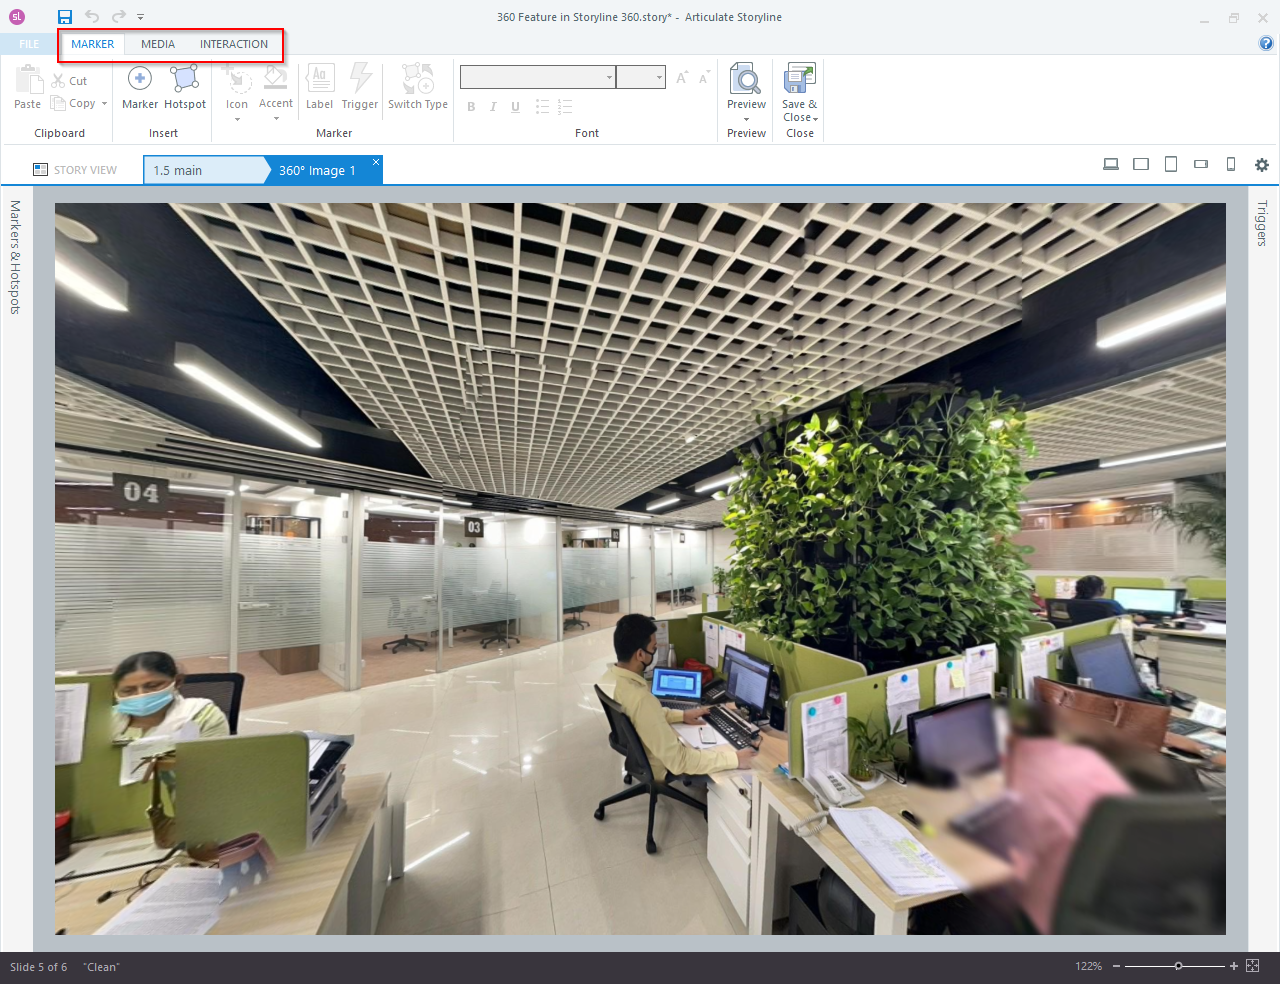
Step 3: You will see three options.
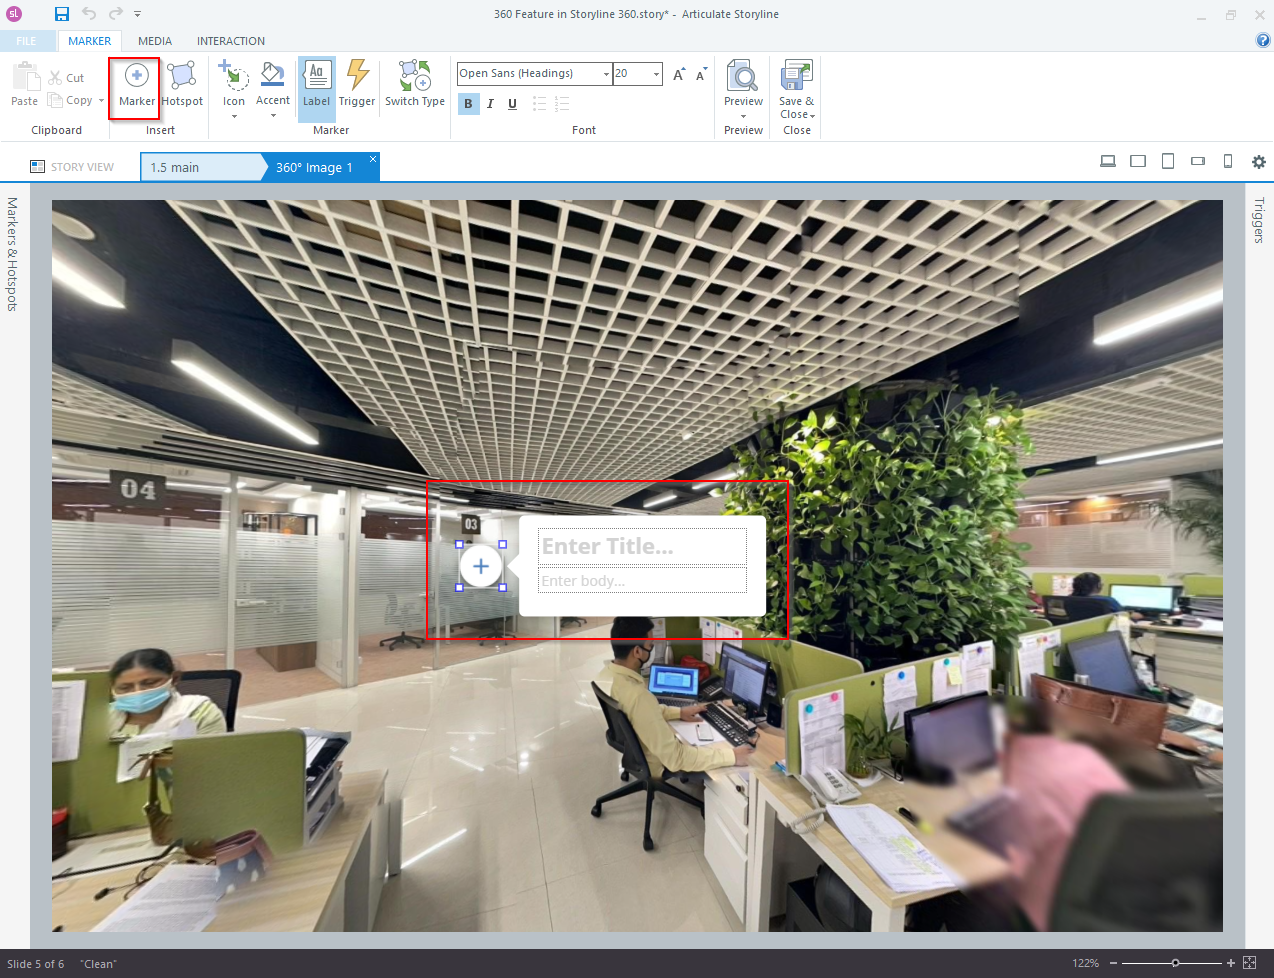
Step 4: Select the marker or hotspot and click on the area where you want to add the marker or hotspot.
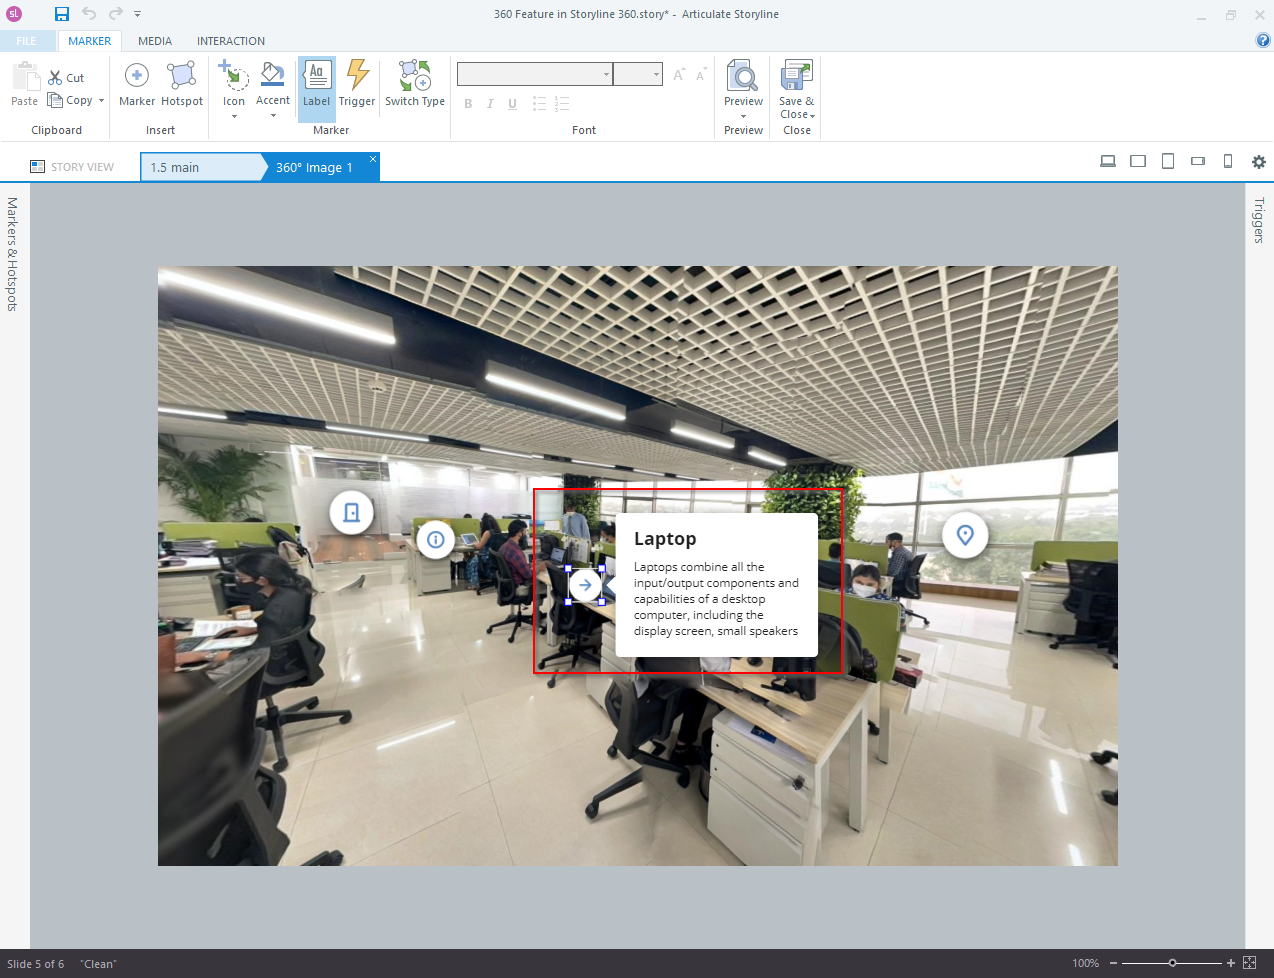
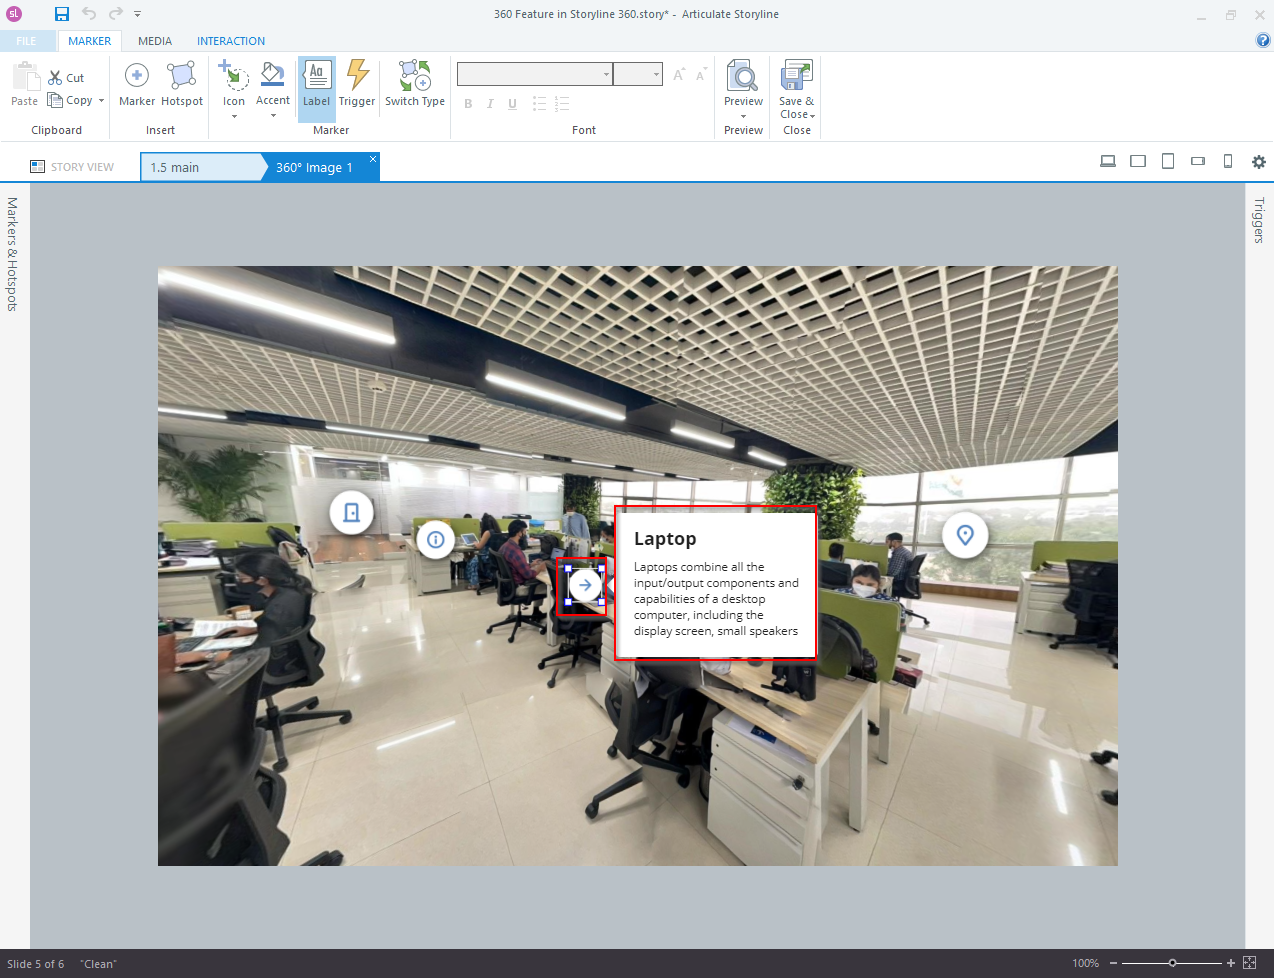
Step 5: You can add the title and body text in the placeholders.
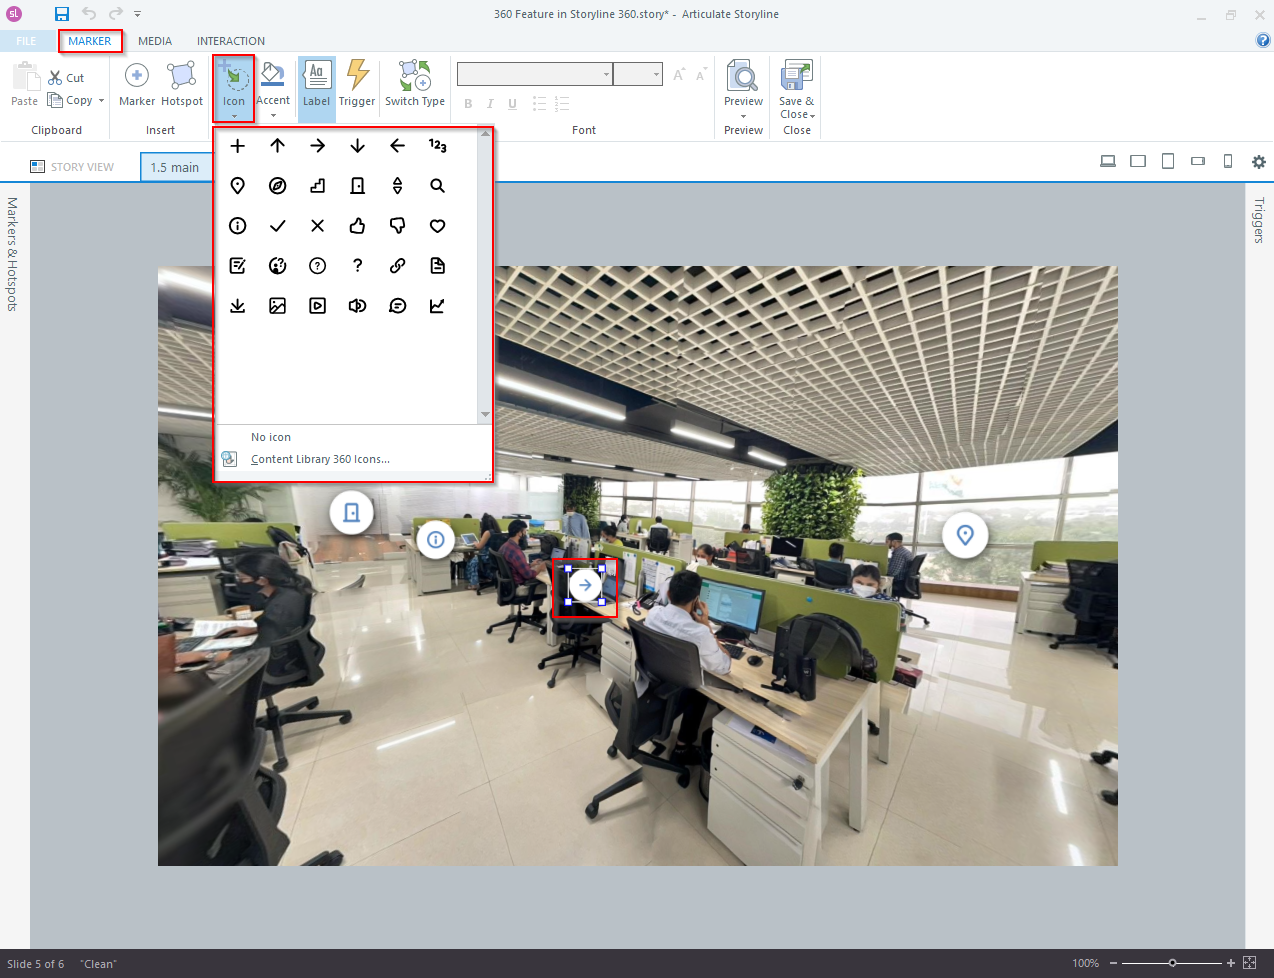
You can change the icon of the marker from MARKER > Icon.
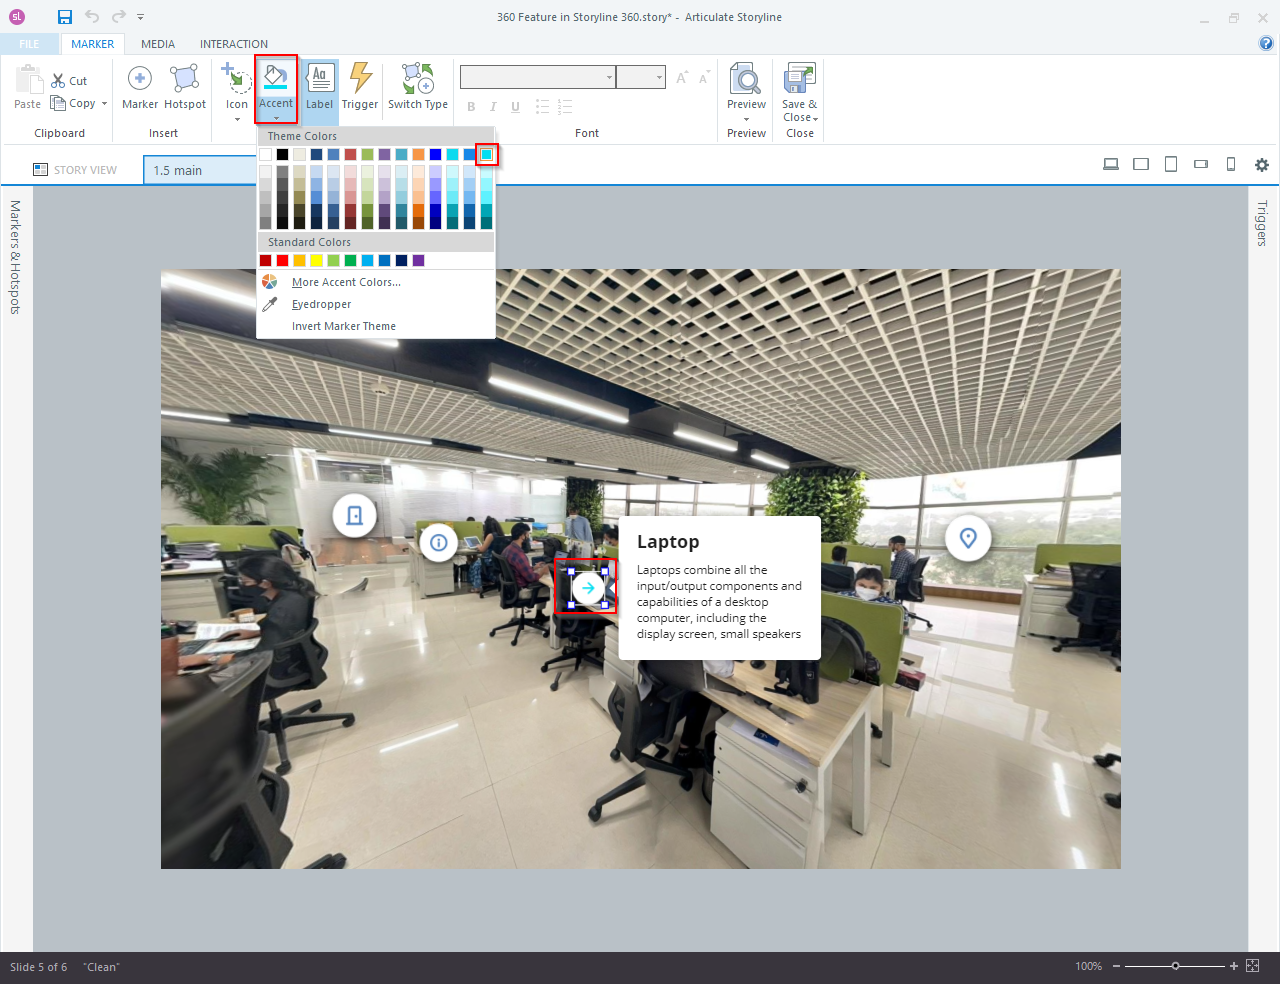
To change the colour of the icon, click the “accent” option and select the colour.
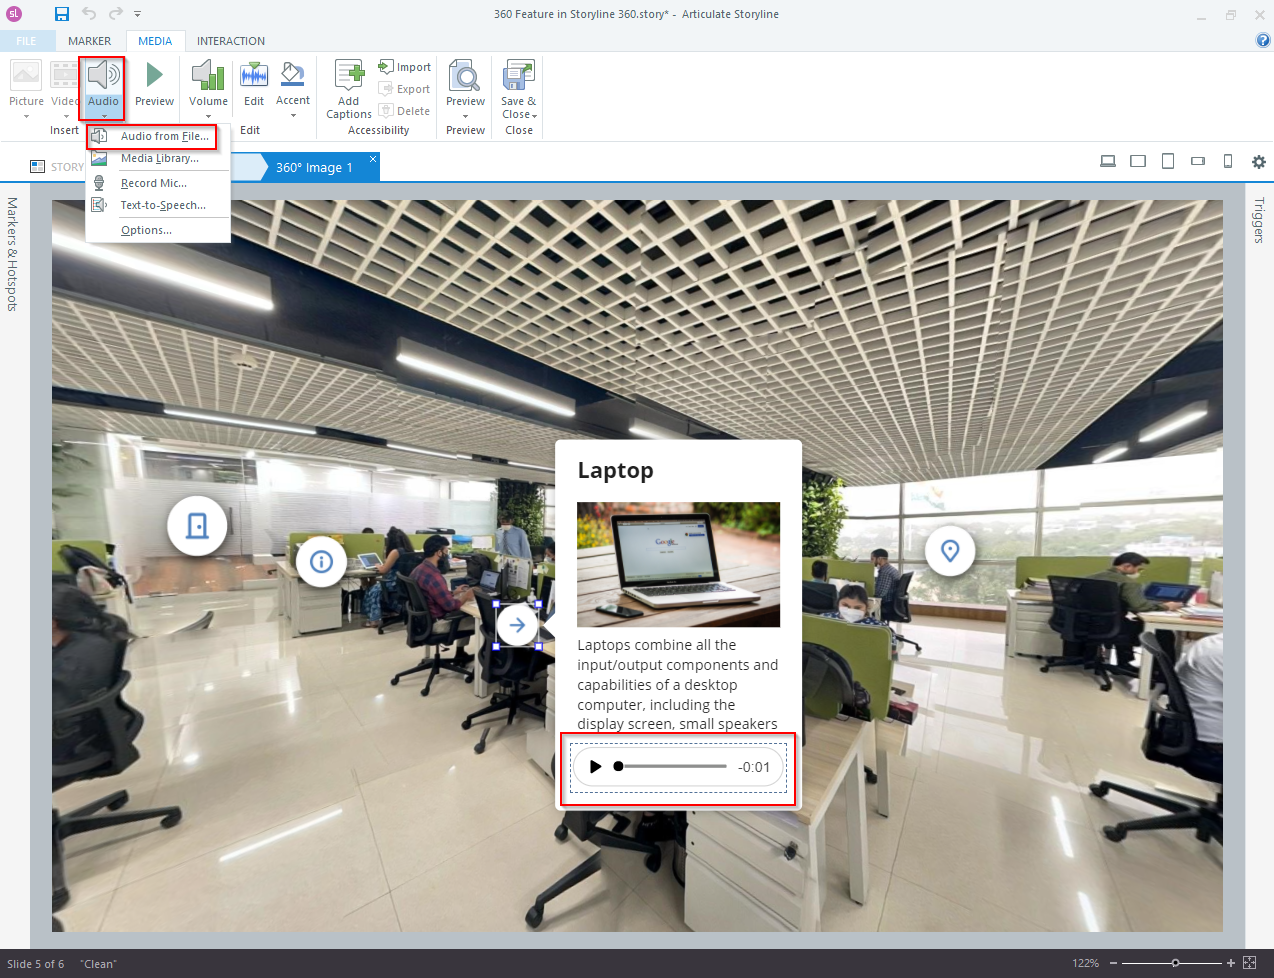
Steps to Add Audio, video, and image in the popup.
Step 6: Select the popup where you want to add the audio, video, or image.
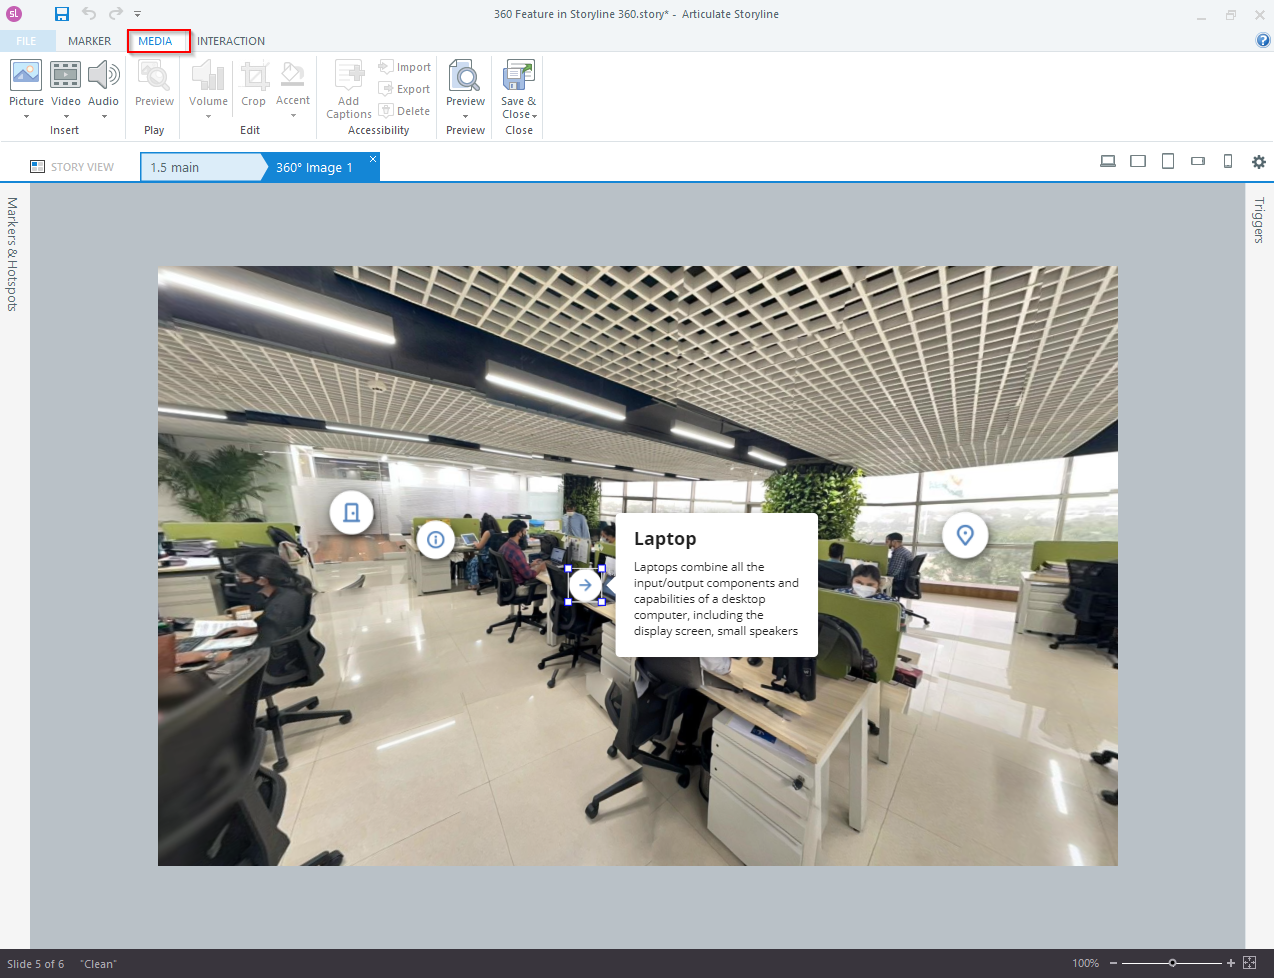
Step 7: Click on the media option from the top bar.
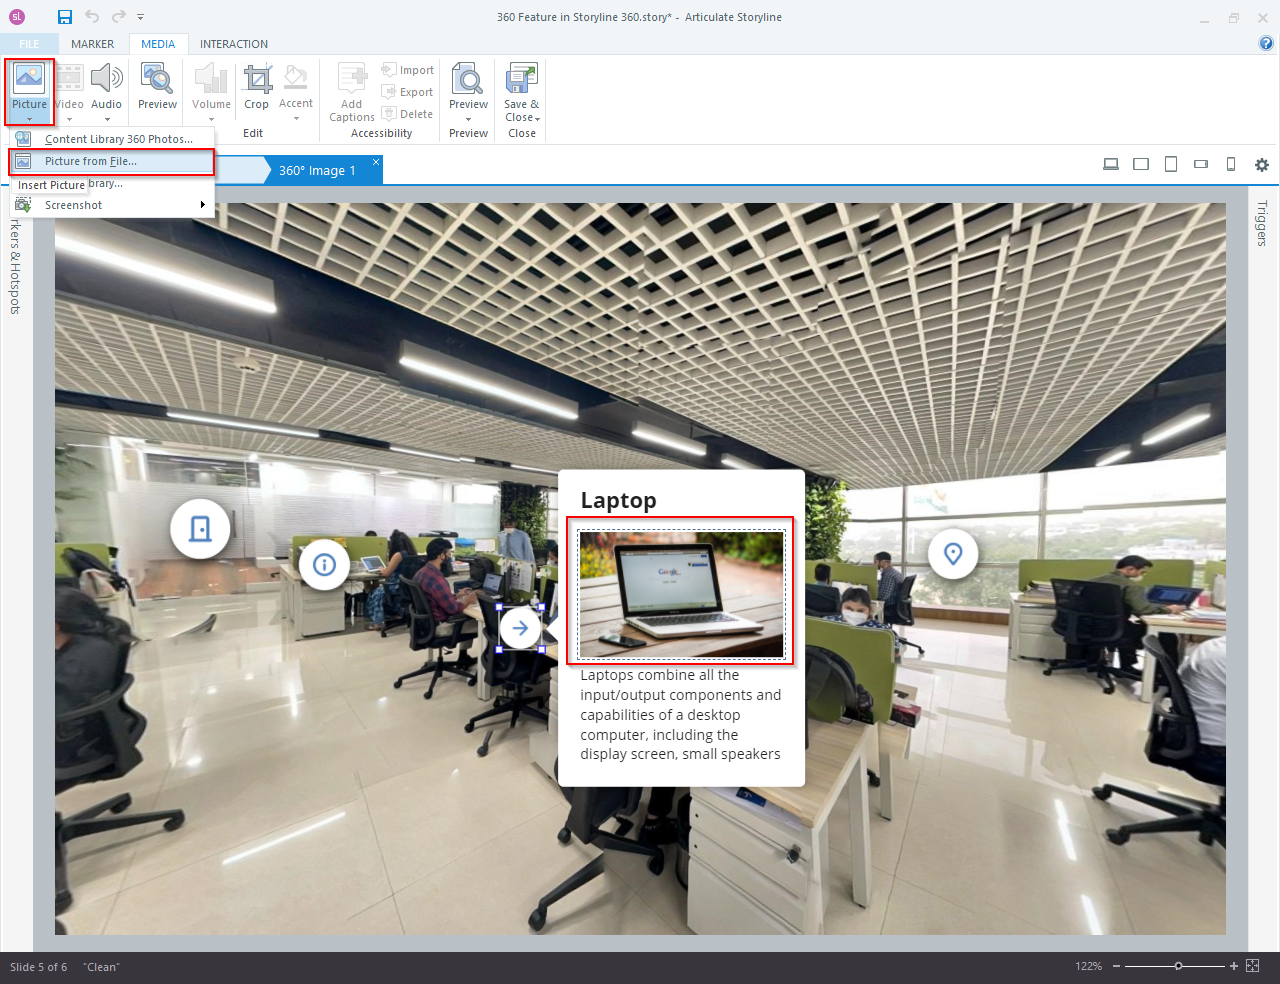
Step 8: Here you will see the picture video and audio button. Select the popup and add one element.
As we have inserted an image in this example, video option is disabled.
To add audio, go to MEDIA > Audio.
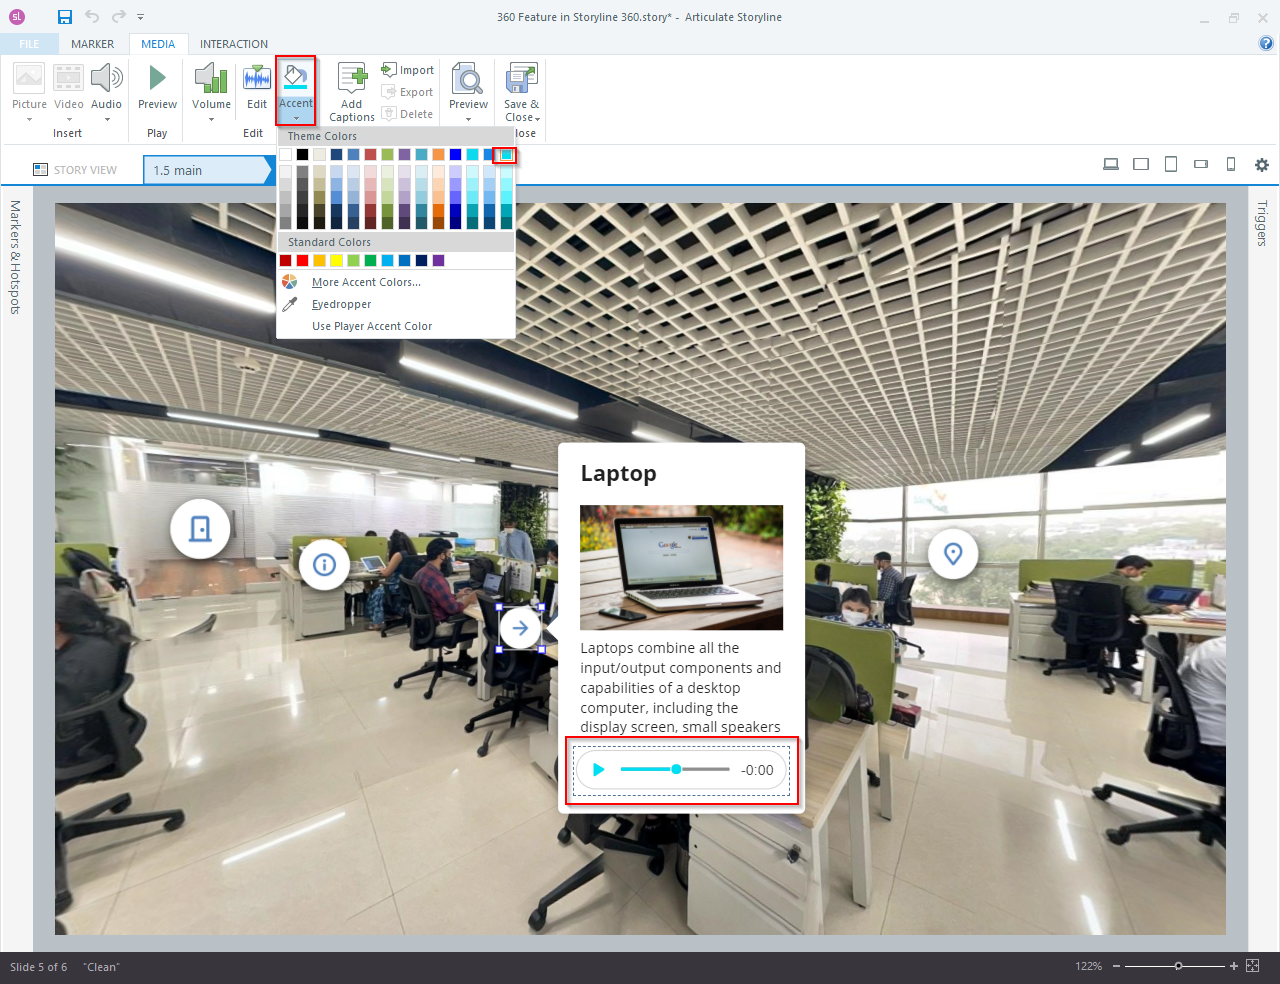
Step 9: For changing the audio button colour, click on Accent from the media option and select colour.
Steps to change the style and effects of the marker and popup.
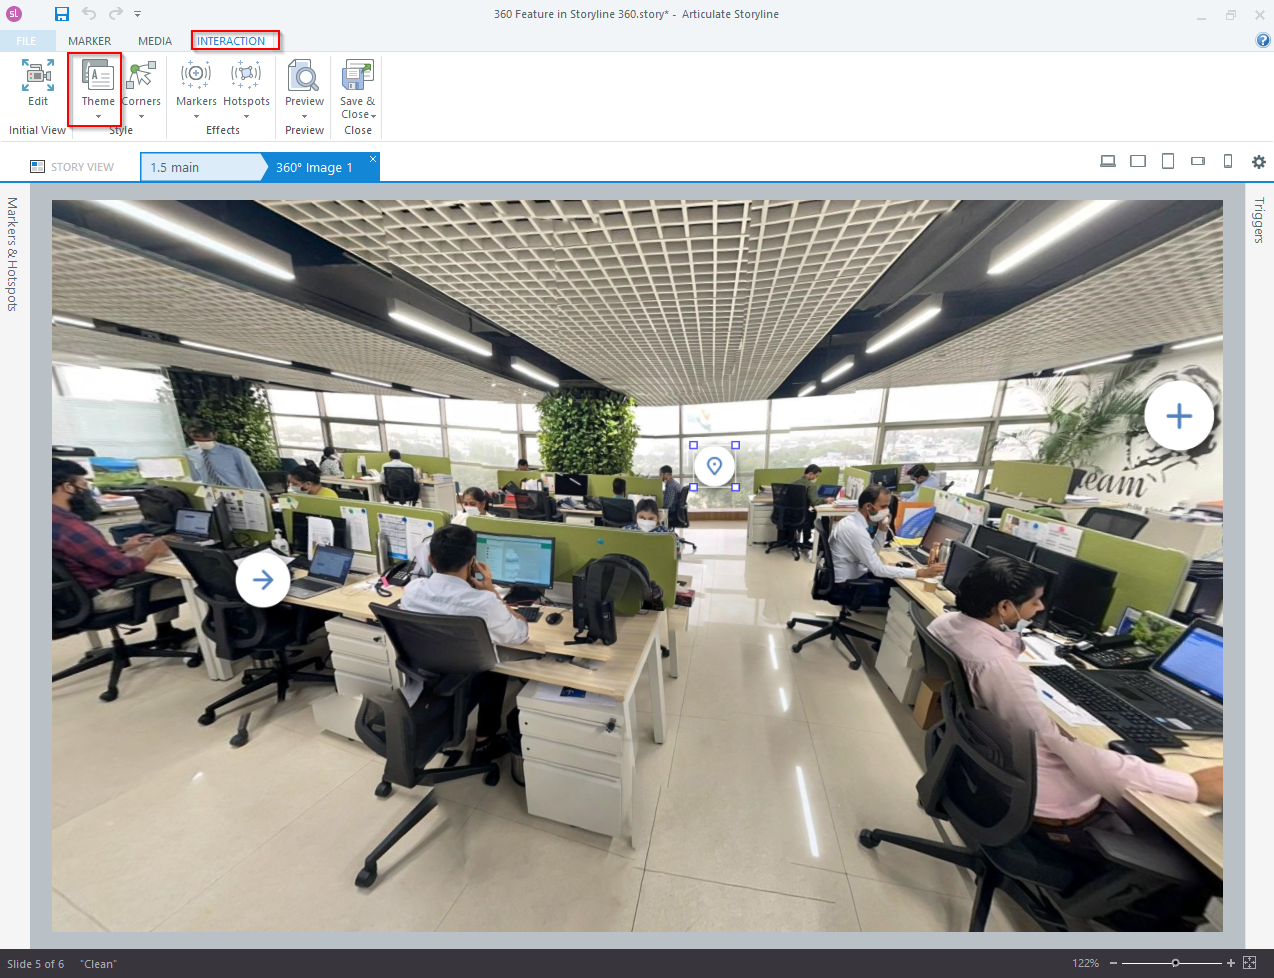
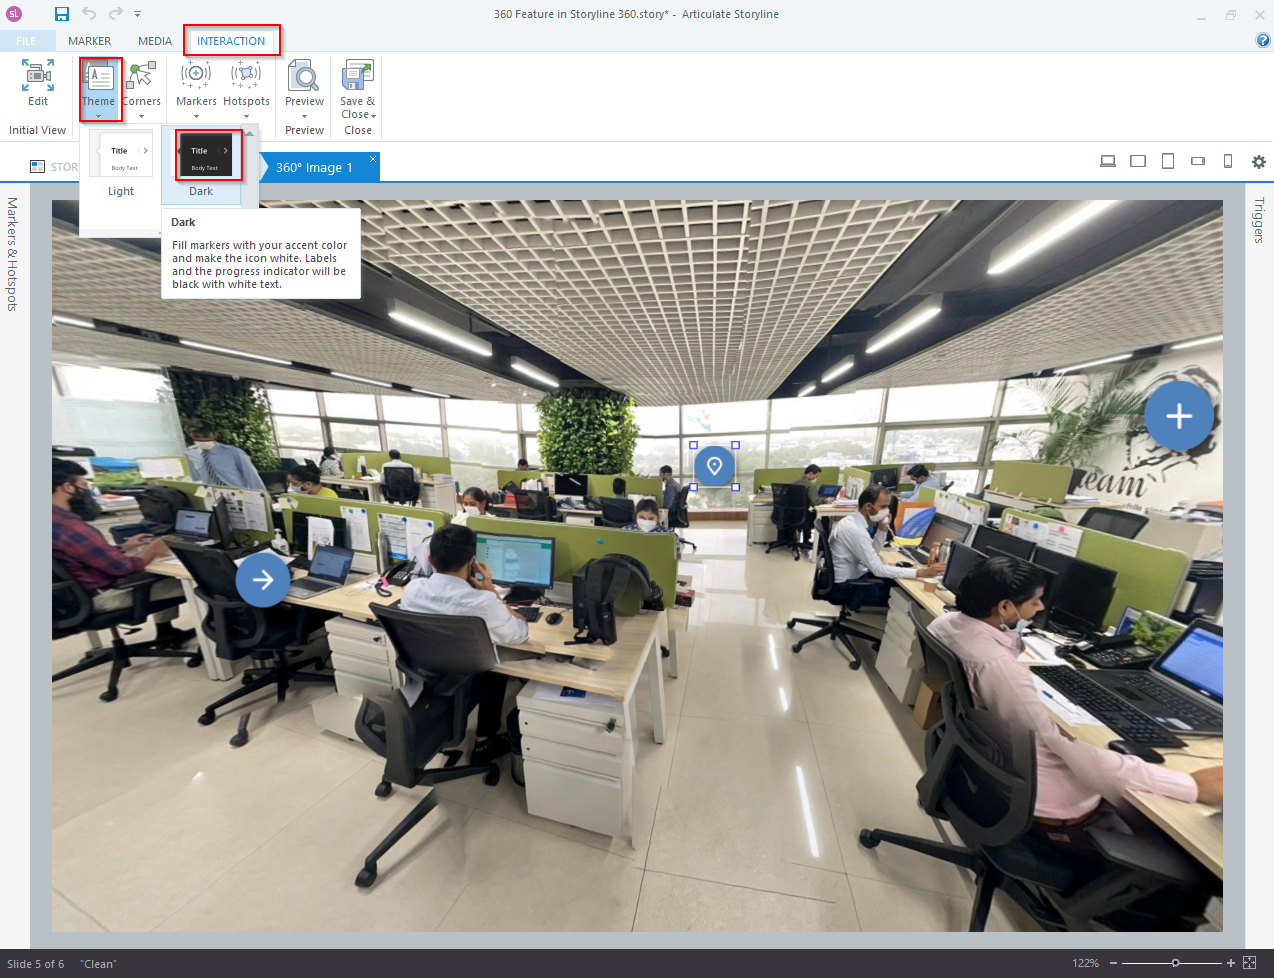
Step 10: Click on interaction tab and select “Theme”.
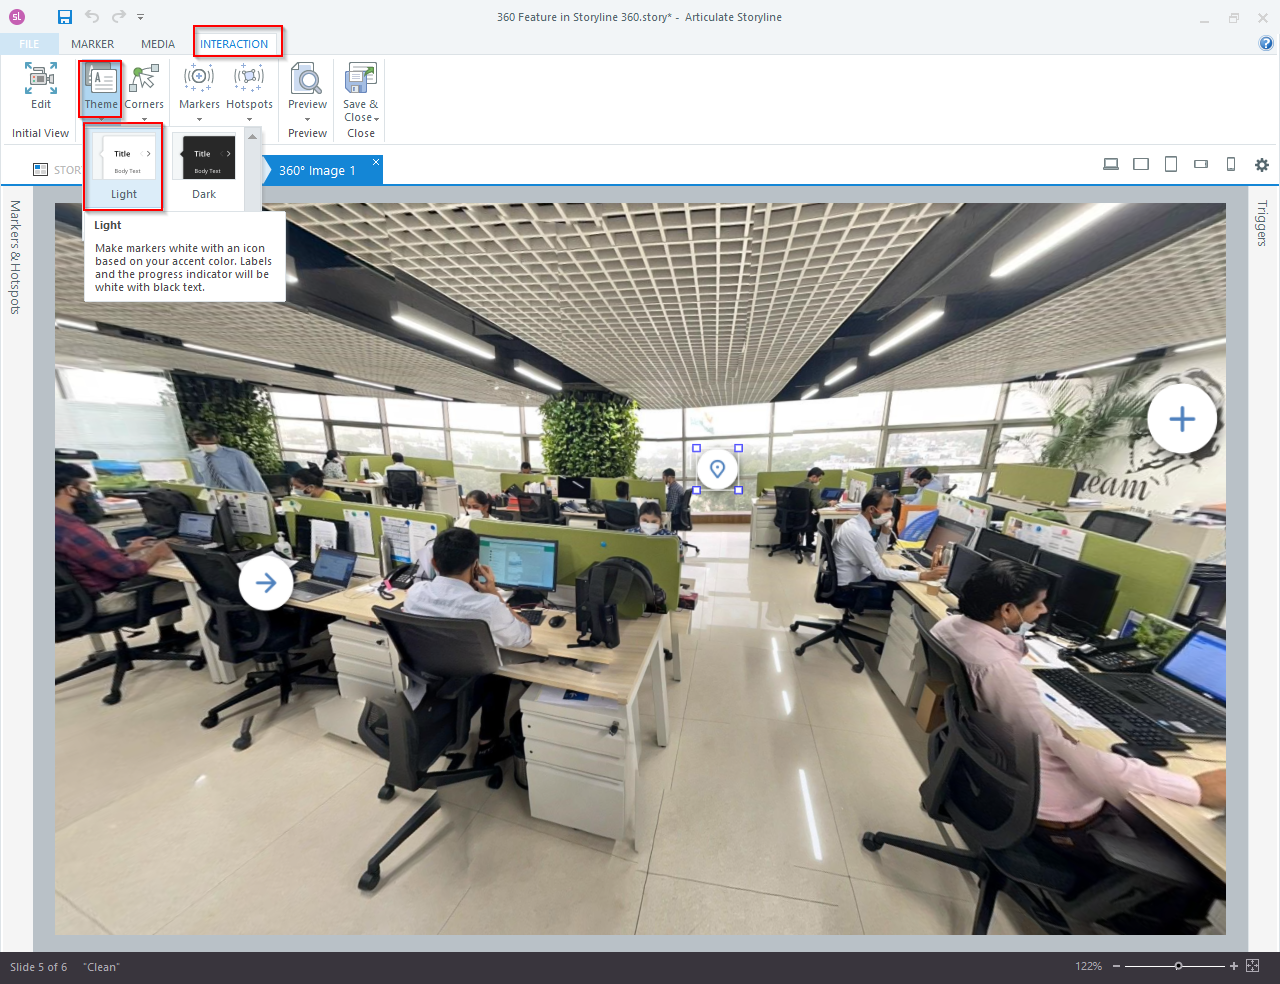
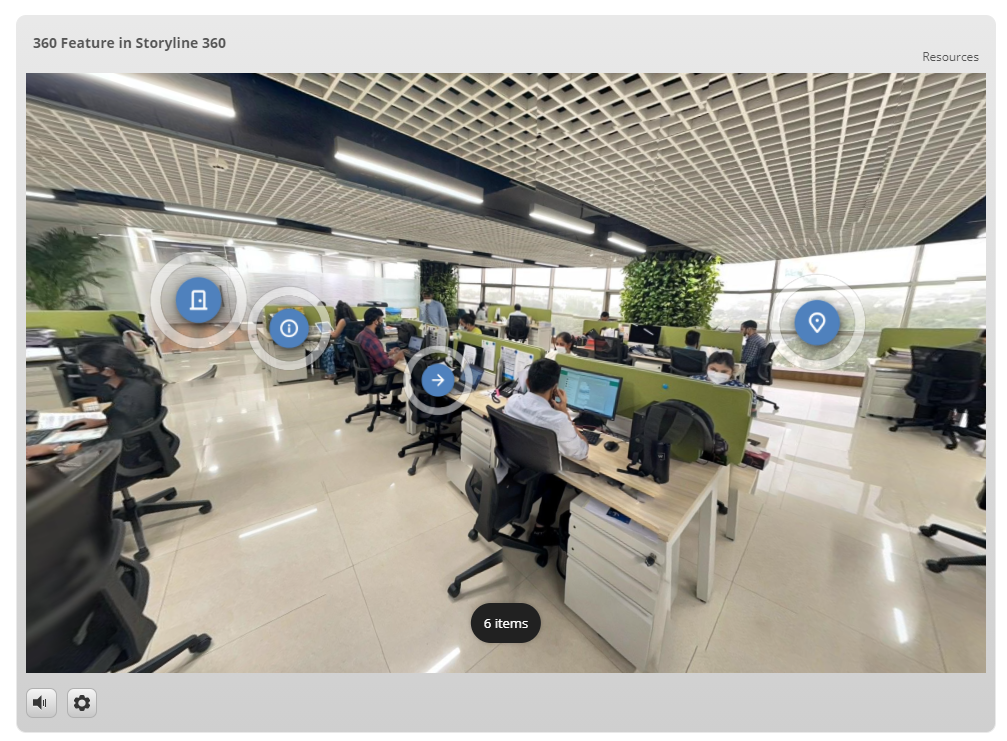
Step 11: Select the theme you want. This helps in customising the marker icons, markers, hotspot labels and progress indicator.
Select Dark theme to see the difference.
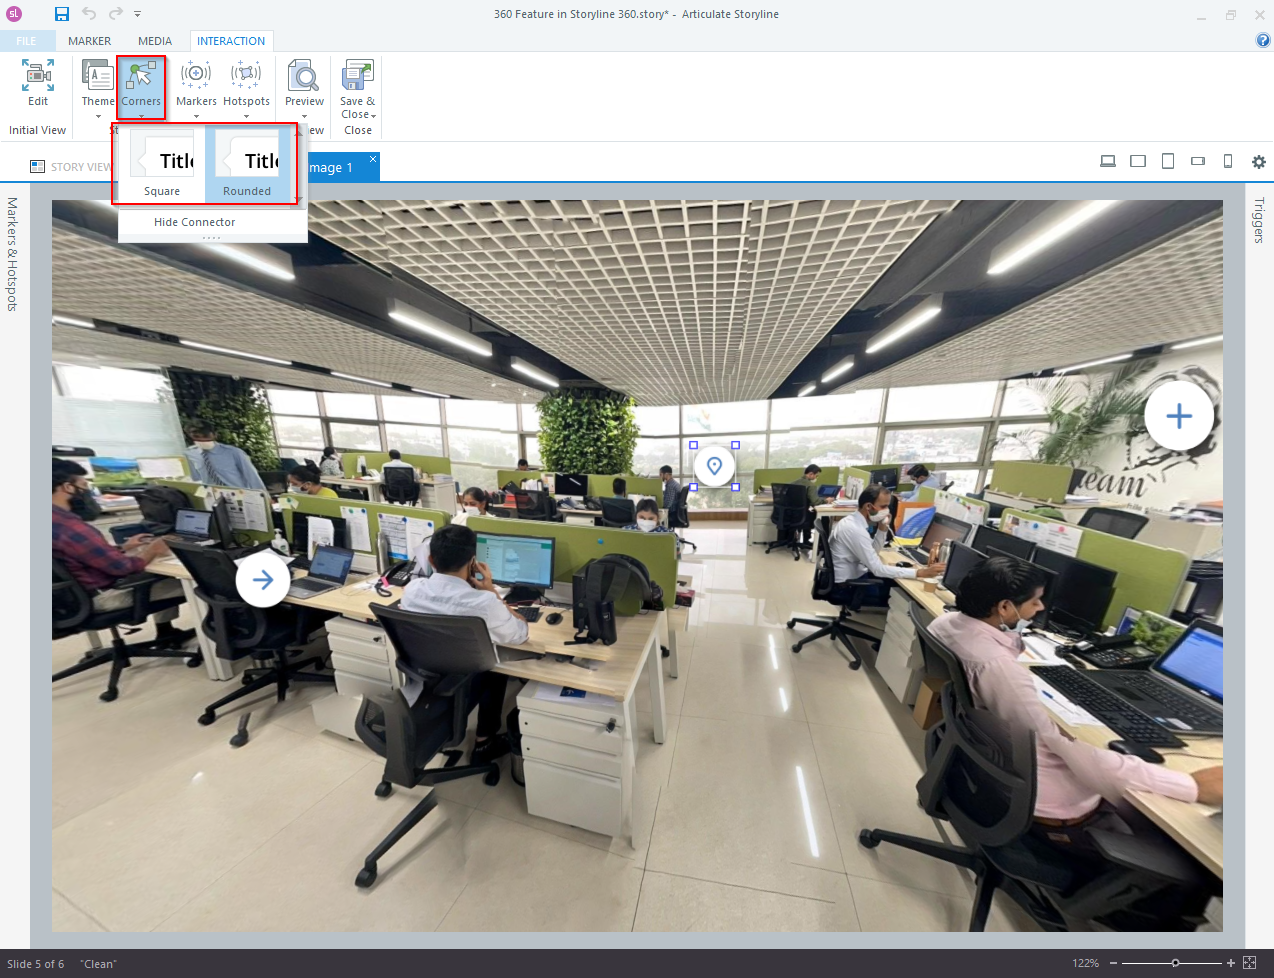
Step 12: For changing the corners of the popup, click the corners option and select the shape you want.
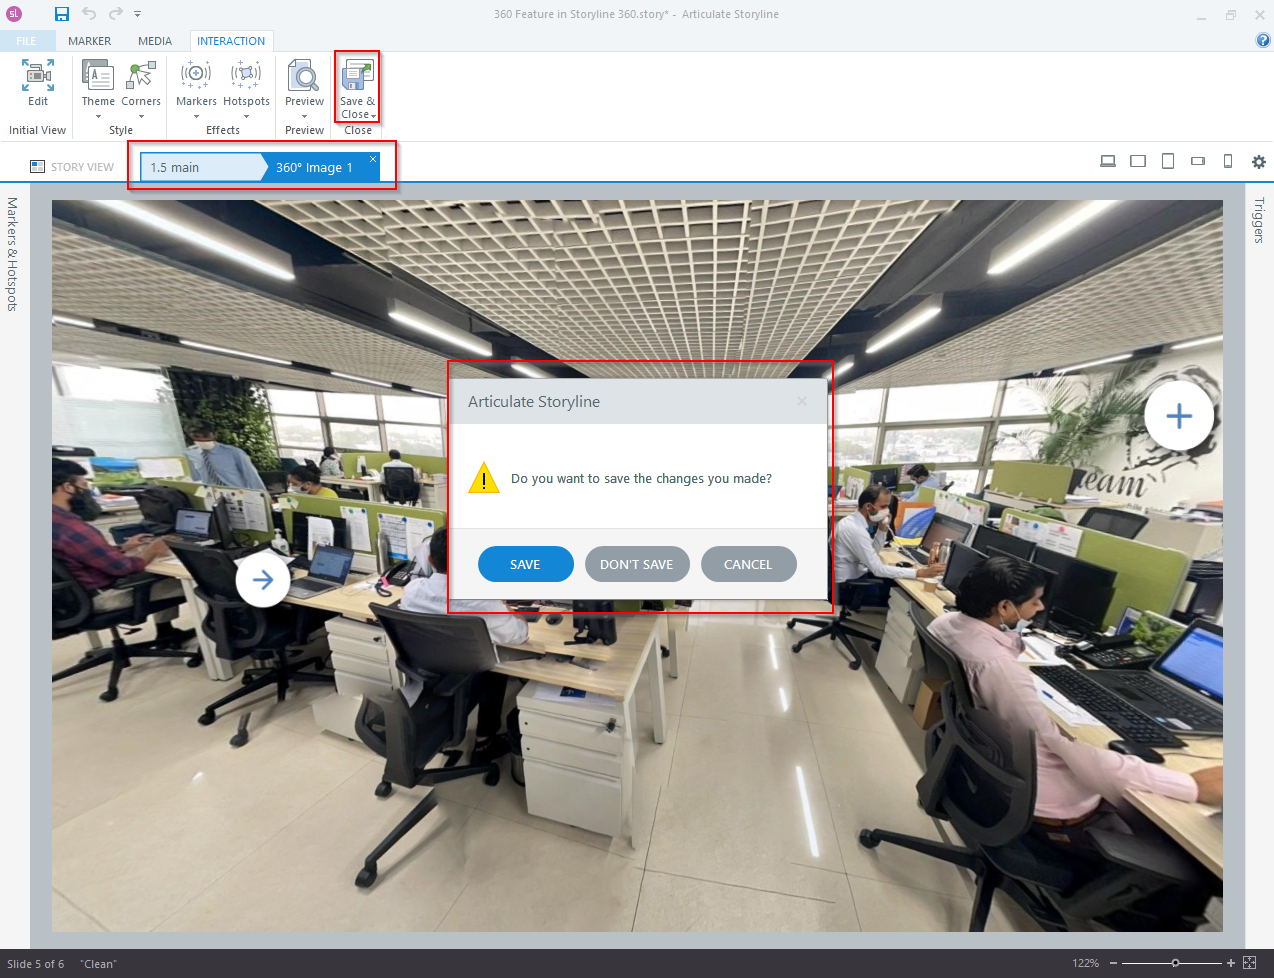
Step 13: Save changes and preview.
Advantages of Our Rapid eLearning Solutions
Rapid eLearning solutions are quick and efficient ways of creating and delivering online training.
Our rapid eLearning solutions offer streamlined, tailored content creation, swift deployment for rapid training program implementation, and high adaptability to evolving learning needs.
We focus on boosting learner engagement through dynamic, interactive content with seamless multimedia integration. Our eLearning solutions efficiently integrate with your existing Learning Management Systems (LMS) for a cohesive implementation of your training initiatives.
FREQUENTLY ASKED QUESTIONS (FAQS)
What types of projects benefit from incorporating 360 images in Articulate Storyline 360?
Projects that require a high level of visual engagement and simulation benefit most from incorporating 360 images in Articulate Storyline 360.
Can I use locally stored 360 images in Articulate Storyline 360?
Yes, you can use locally stored 360 images in Articulate Storyline 360. Instead of providing a web URL, choose the “Web Object” option, and then click on “Web” in the sidebar. Browse and select your local 360 image file.
What are the recommended image specifications for 360 images in Articulate Storyline 360?
For optimal performance, use 360 images with a resolution of 4096×2048 pixels. This ensures clarity and a seamless experience when integrating them into Articulate Storyline 360.
Why should I choose Articulate Storyline 360 for incorporating 360 images?
Articulate Storyline 360 stands out for its user-friendly interface and robust features, making it an excellent choice for incorporating 360 images. The platform allows for easy integration of interactive elements with 360 images, ensuring a seamless and engaging learning experience for your audience.
What are the Benefits of Incorporating 360 Images in Articulate Storyline 360?
Incorporating 360 images in Articulate Storyline 360 offers a dynamic and immersive learning experience for your audience.
How can I preview the 360 image interaction in Articulate Storyline 360?
To preview the 360 image interaction in Articulate Storyline 360, click on the “Preview” button located in the top toolbar. This allows you to experience the interactive elements and navigation as your learners would.
When publishing my course with a 360 image, what output formats are supported?
When publishing your course with a 360 image in Articulate Storyline 360, you can choose from various output formats, including HTML5, Flash, and others. Ensure compatibility with your intended delivery platform.
What browsers are required to view Articulate Storyline 360 projects containing 360 images?
Articulate Storyline 360 projects containing 360 images are best viewed on modern web browsers such as Chrome, Firefox, Safari, or Edge.
Are there training resources available for beginners who using Articulate Storyline 360?
Yes, we provide comprehensive training resources for beginners. These include video tutorials to help beginners effectively navigate and utilize the features of the platform.
Please click the link below to access Articulate Storyline 360 tutorials.
https://www.swiftelearningservices.com/articulate-storyline-360-free-tutorials/
What are the system requirements for Articulate Storyline 360?
The system requirements for Articulate Storyline 360 include a Windows operating system (Windows 10 recommended), a 1 GHz or faster processor, and 4 GB of RAM. Additionally, a minimum of 500 MB of free disk space and an internet connection is necessary for software activation and updates.

