Articulate Storyline – How To Add Animations To An Object States
Articulate Storyline is a powerful eLearning authoring tool that empowers instructional designers and content creators to develop engaging and interactive courses. One of its standout features is the ability to add animations to pictures, shapes, captions, text, characters, objects, and more, enhancing the overall user experience.
Animations play an important role in an eLearning course as it will make the course look engaging. Using animations conceptual elements can be presented in an easy and effective way.
In this blog we will demonstrate you on how to add animations to the “States”.
Step 1
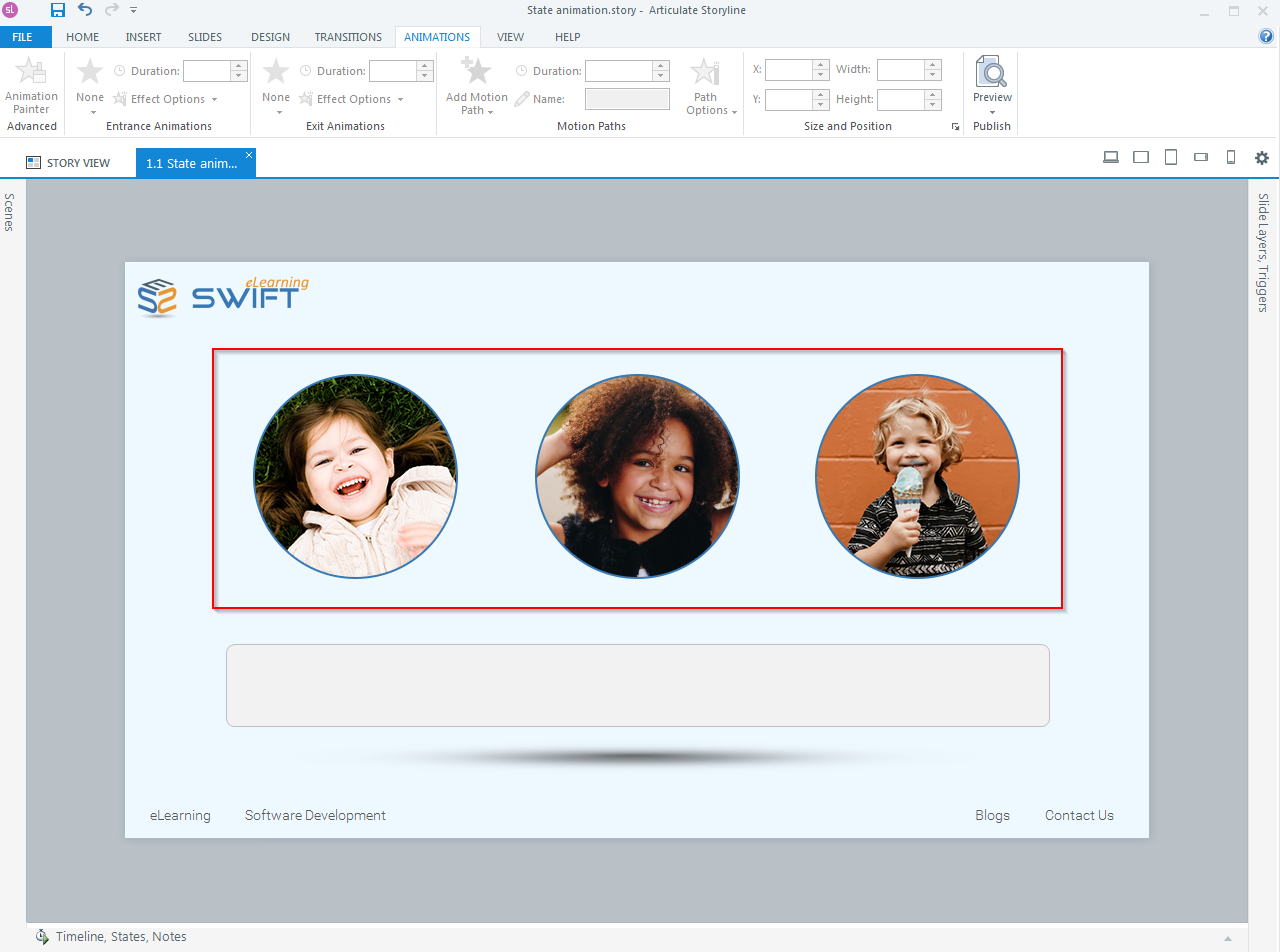
Create an image or shape.
Step 2
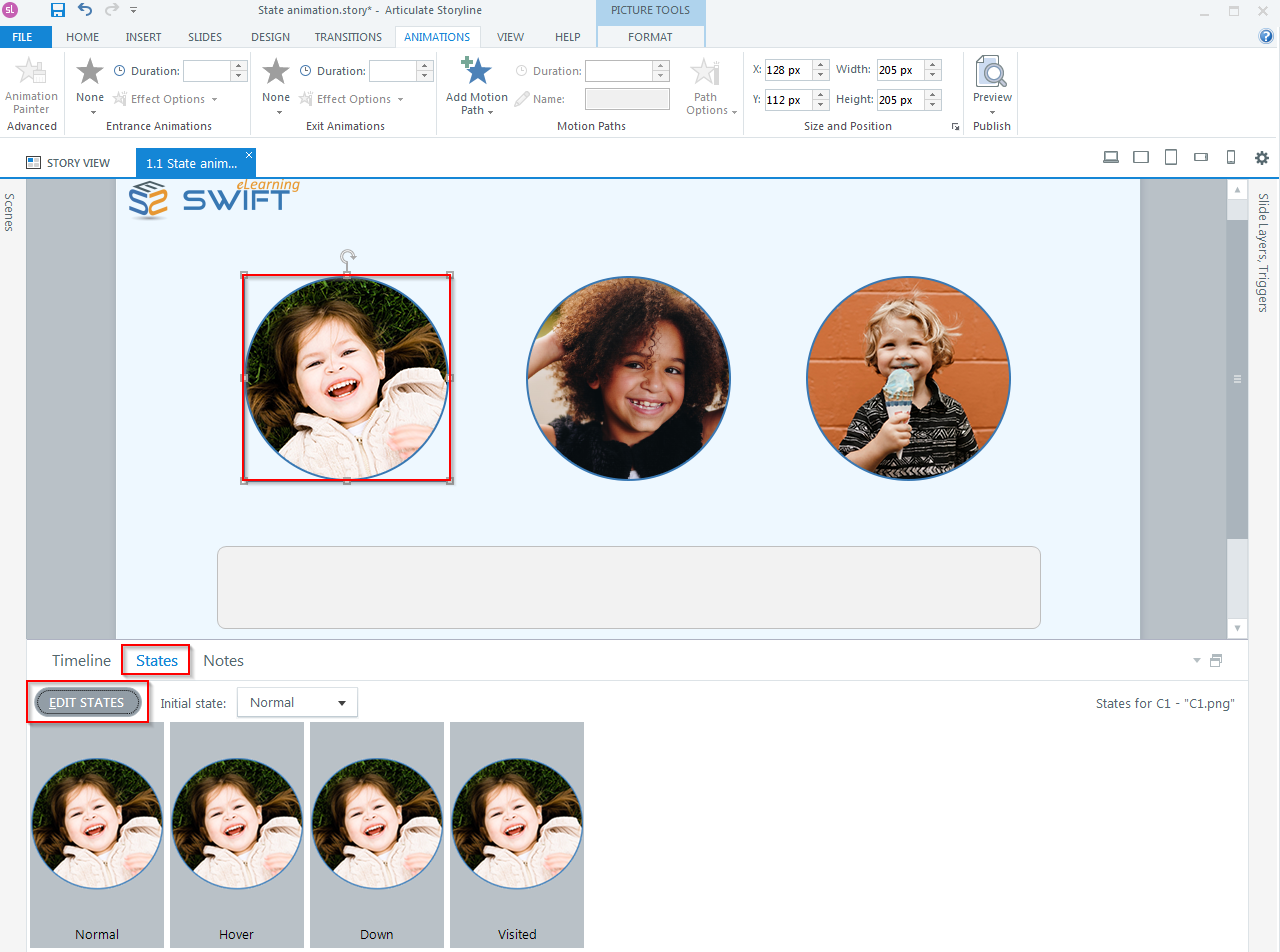
Select the image which you want to animate and click on “states”. Then click on “EDIT STATES”.
Step 2.1
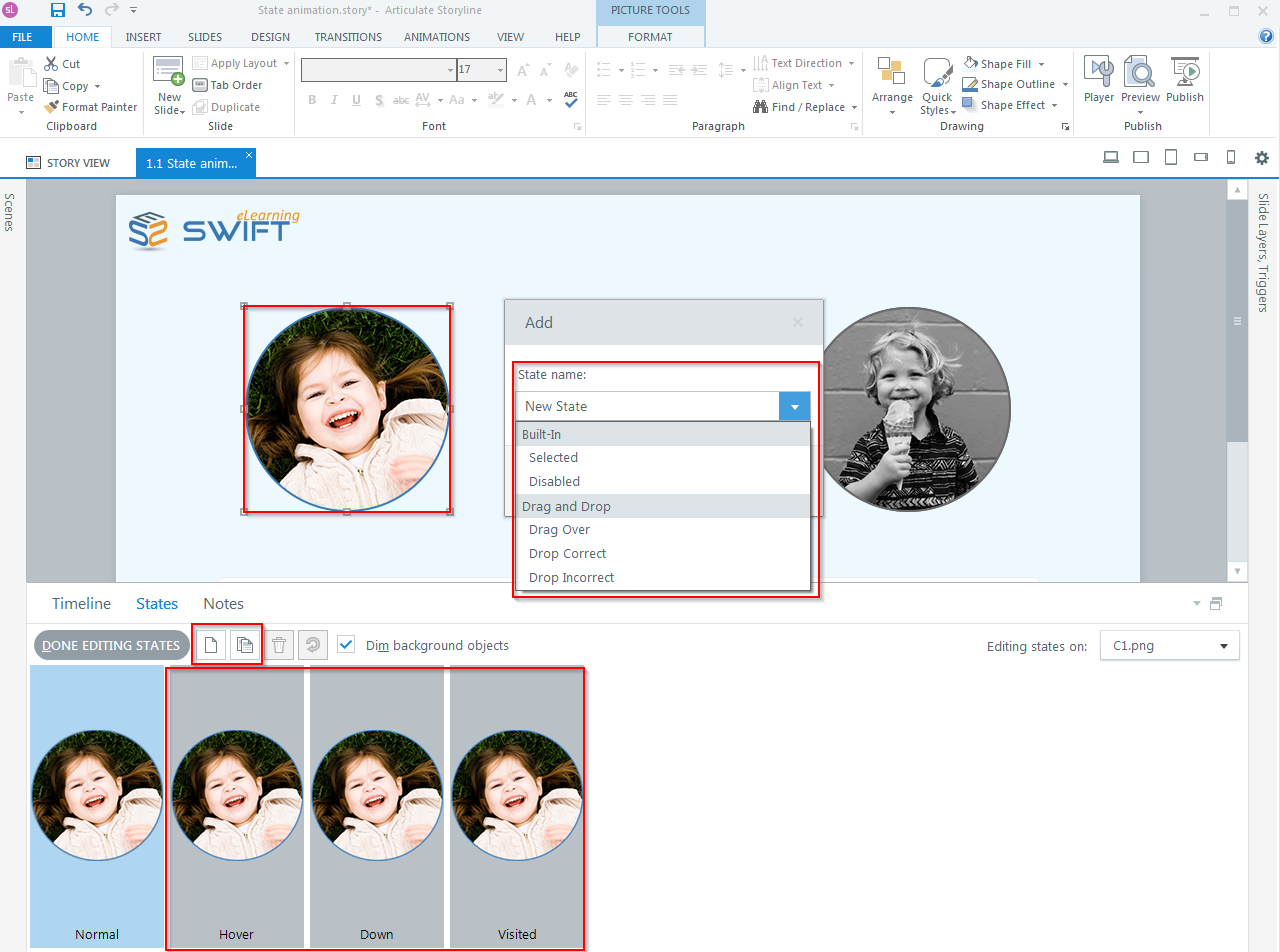
Next, create states by clicking “New or Duplicate” state icon. Let’s use hover, down and visited states.
Step 3
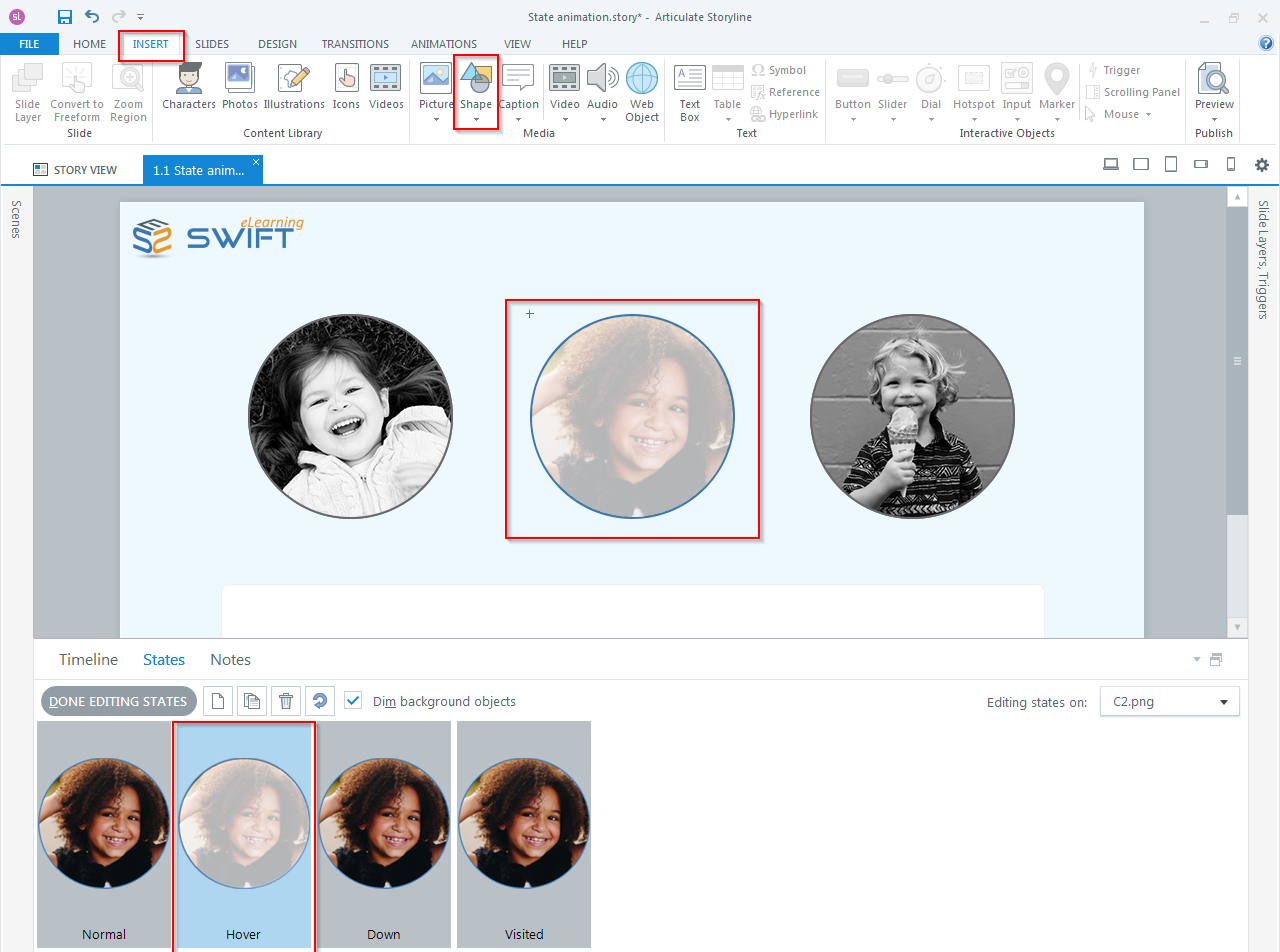
Select a state and then create a shape.
Step 3.1
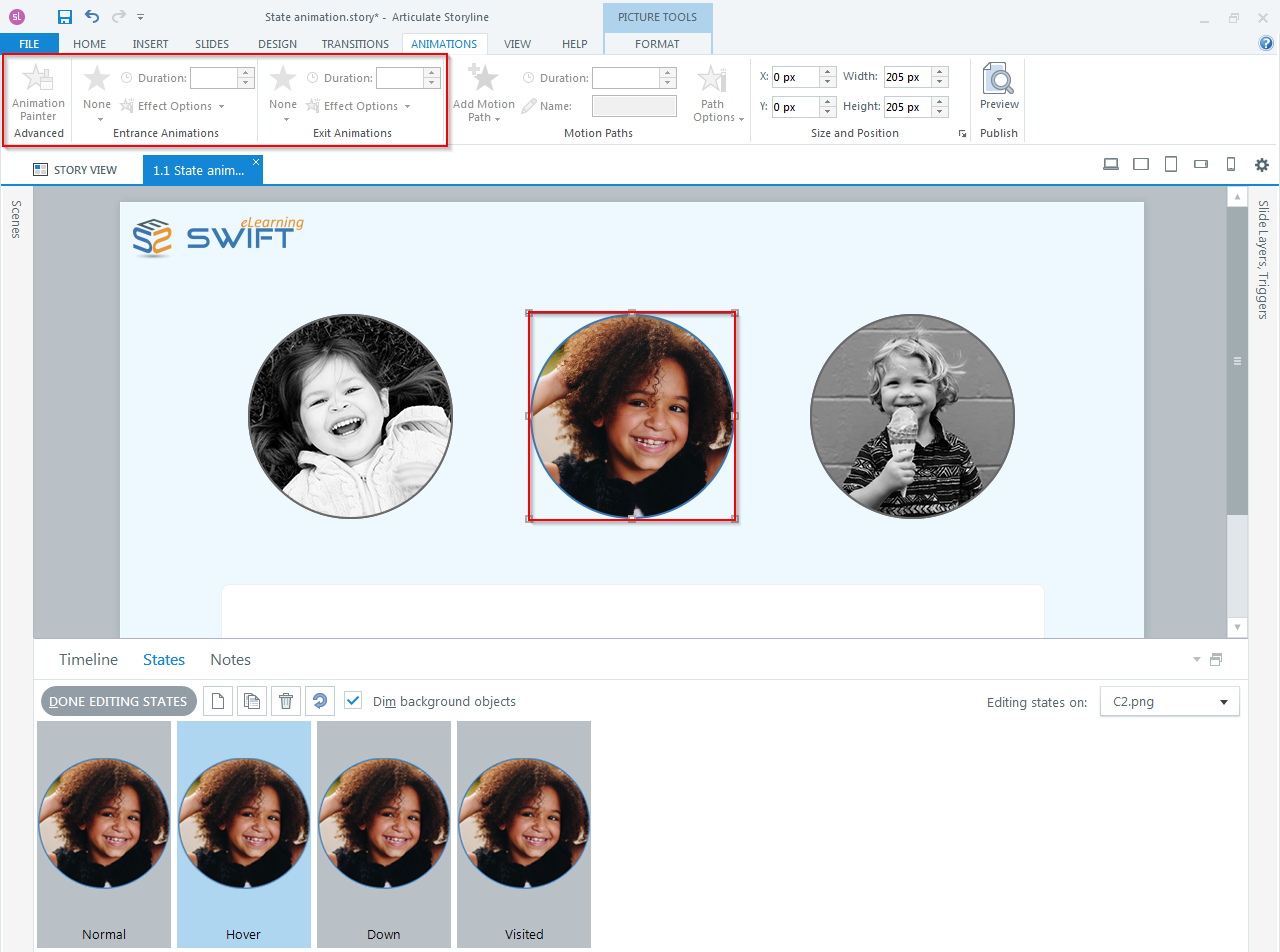
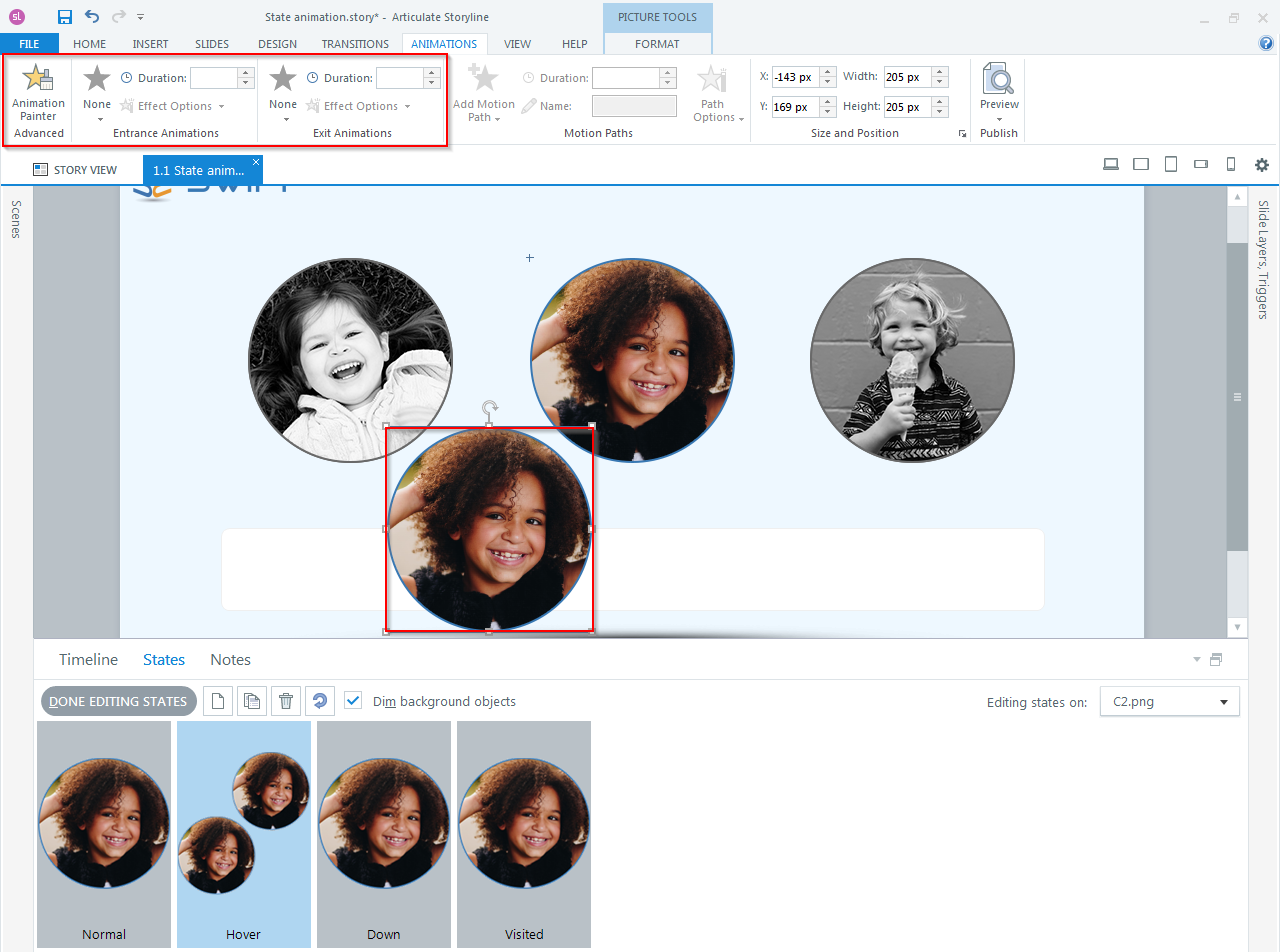
It is not possible to add animation to the object in a “State”. We can animate the same object by duplicating the object.
Normal Object:
Duplicate Object:
Step 4
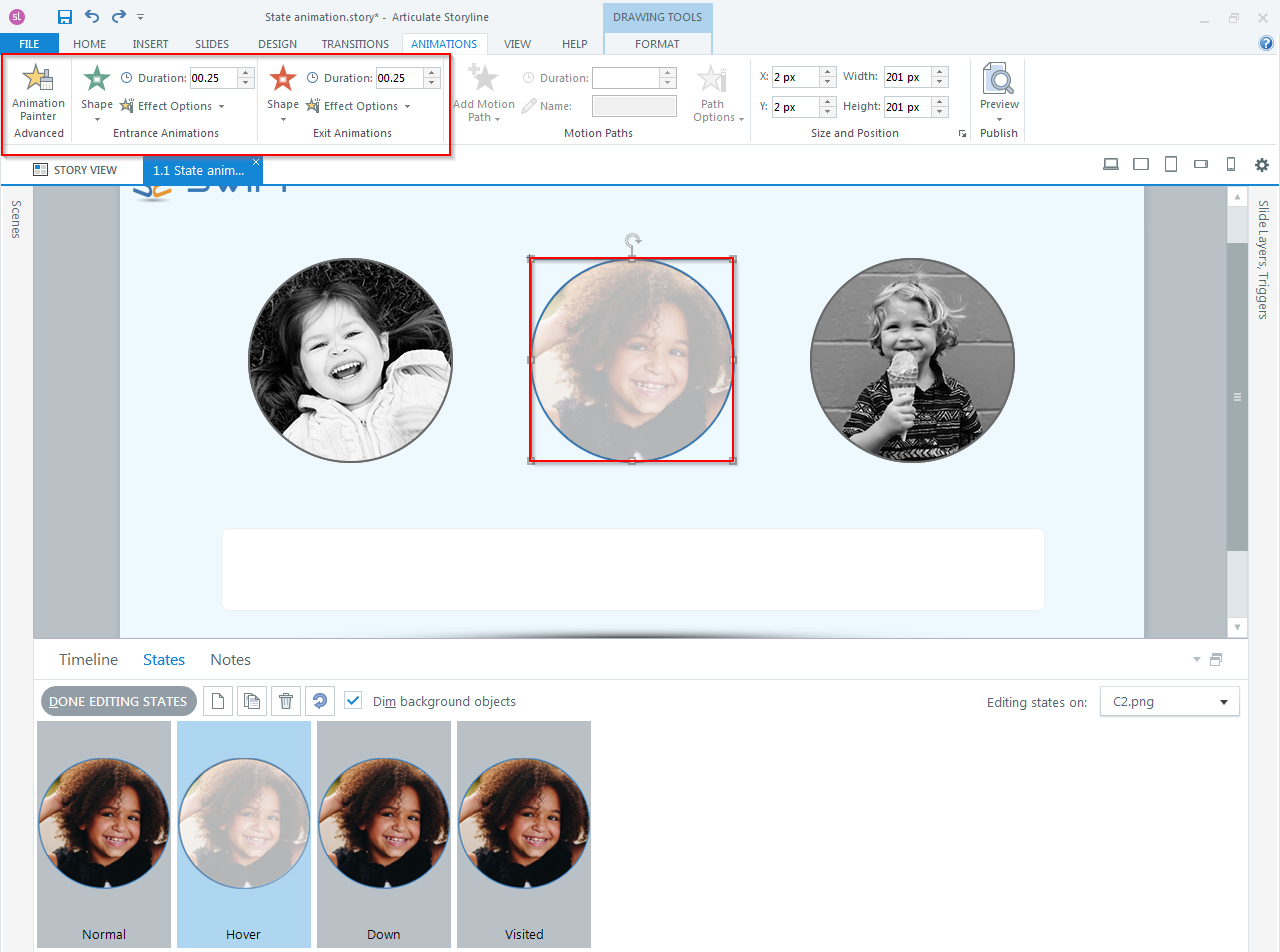
Finally add animations to the object.
Step 4.1
Once done, click on “DONE EDITING STATES”.
Note: In “States”, we cannot create Motion path animations. Adding animations to object in states can be done in Articulate Storyline 2 and Storyline 3 versions.
FREQUENTLY ASKED QUESTIONS (FAQS)
1. Can I add animations to text objects?
Yes, you can add animations to text objects. You can animate the text itself, or you can animate the object that the text is contained in.
2. Can I add sound effects to my animations?
Yes, you can add sound effects to your animations. You can either upload your own sound effects, or you can use the sound effects that are included with Storyline.
3. Can I add custom animations to Articulate Storyline?
Yes, you can add custom animations to Articulate Storyline using JavaScript. However, this is a more advanced technique and is not recommended for beginners.
4. Can I loop my animations in Arituclate Storyline?
Yes, you can loop your animations. This can be helpful if you want an animation to play continuously.
5. How can I hide an object without using an animation?
You can hide an object without using an animation by setting its visibility to “Hidden” in the States panel.
6. Are there best practices for creating subtle animations?
To ensure a professional and engaging look, opt for subtle animations. Use smooth transitions and avoid overwhelming your audience with excessive movement.
Conclusion
Elevate your eLearning with Articulate Storyline’s animated object states. This versatile tool allows seamless integration of captivating animations, enhancing user engagement with eLearning content development. Whether you’re a novice or an experienced designer, the step-by-step guide and FAQs provide invaluable insights. Embrace the power of animated object states to create immersive and impactful learning experiences, staying at the forefront of educational trends. Unlock your creativity and make learning come to life with Articulate
Our Services: eLearning Service Provider, Flash to HTML5 Conversion, eLearning Content Development




Leave a Reply
Want to join the discussion?Feel free to contribute!