How to add dynamic backgrounds in camtasia
Click or tap on the play button below to watch the video for easier understanding.
Adding dynamic backgrounds to your videos can greatly enhance their visual appeal and engagement. Camtasia, a popular video editing and screen recording software, provides various tools and features to help you achieve this.
In this tutorial, we will guide you through the process of adding dynamic backgrounds to your Camtasia projects for eLearning development. Whether you want to create custom eLearning content, a product demo, or a captivating YouTube video, incorporating dynamic backgrounds will take your video content to the next level. Learn how to transform static backgrounds into engaging, animated visuals that captivate your audience’s attention.
Here are the steps to incorporate a dynamic background into your video using Camtasia:
Step 1:
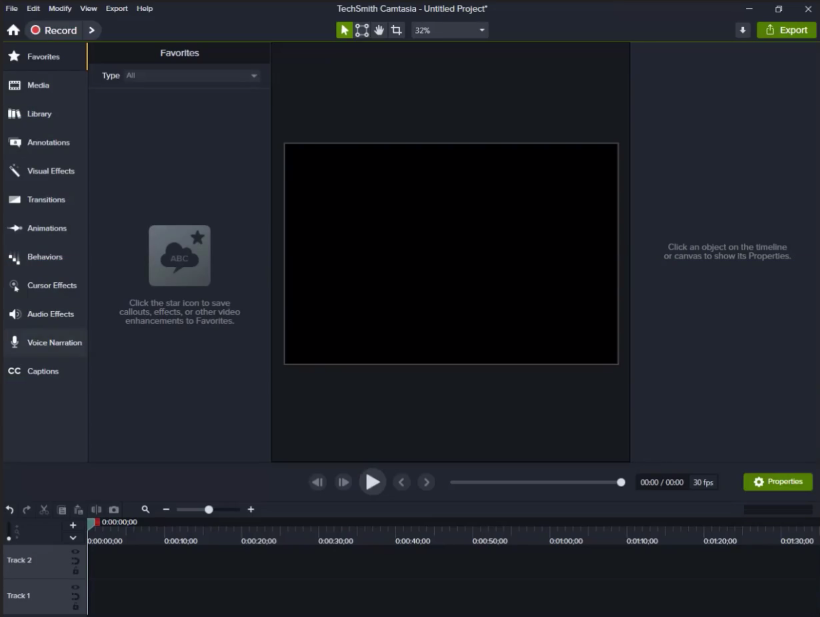
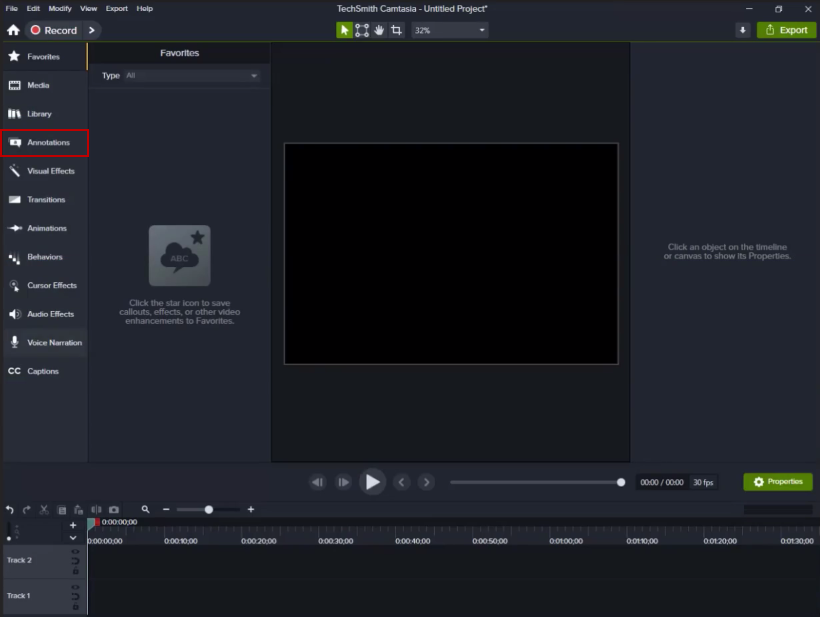
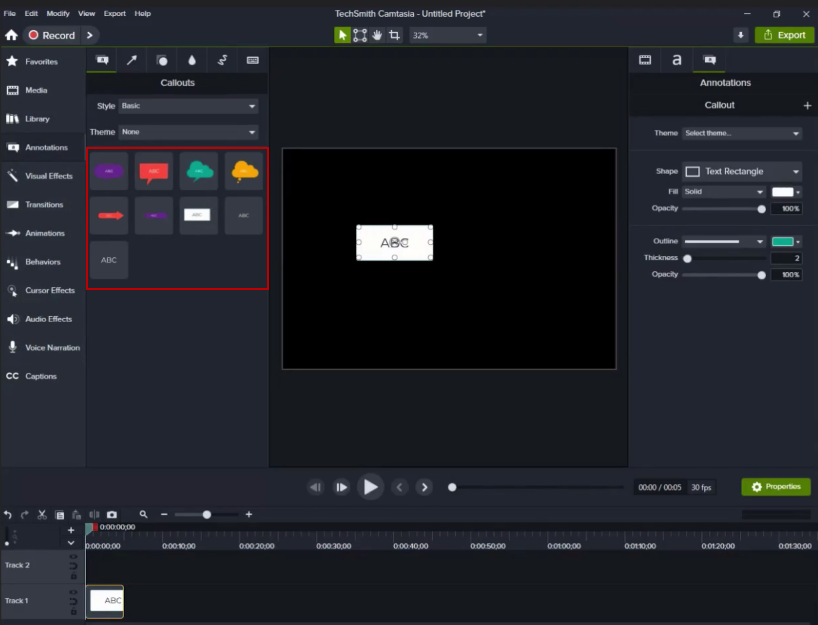
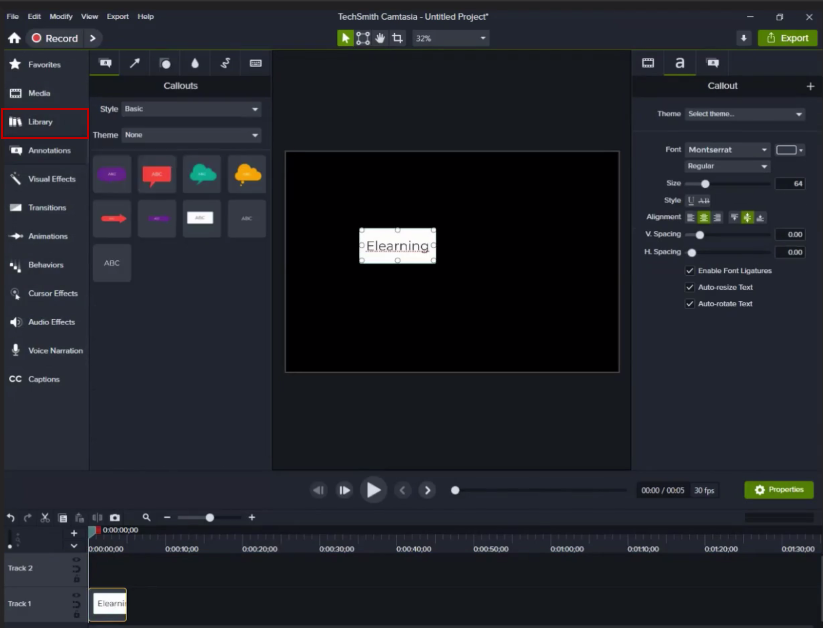
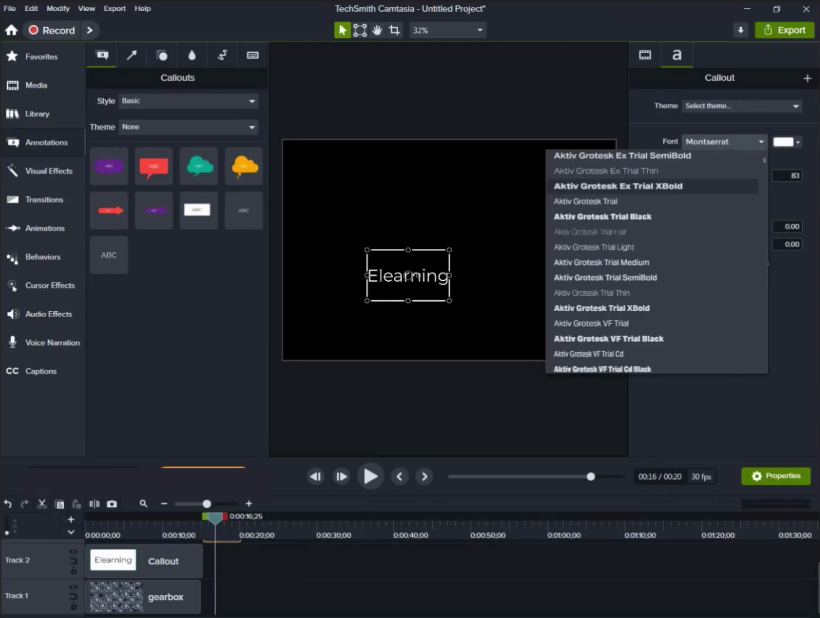
Launch the ‘Camtasia’ software and select the ‘Annotations’ tab located on the left-side panel.
Step 2:
Add or incorporate the desired elements or text into your project.
Step 3:
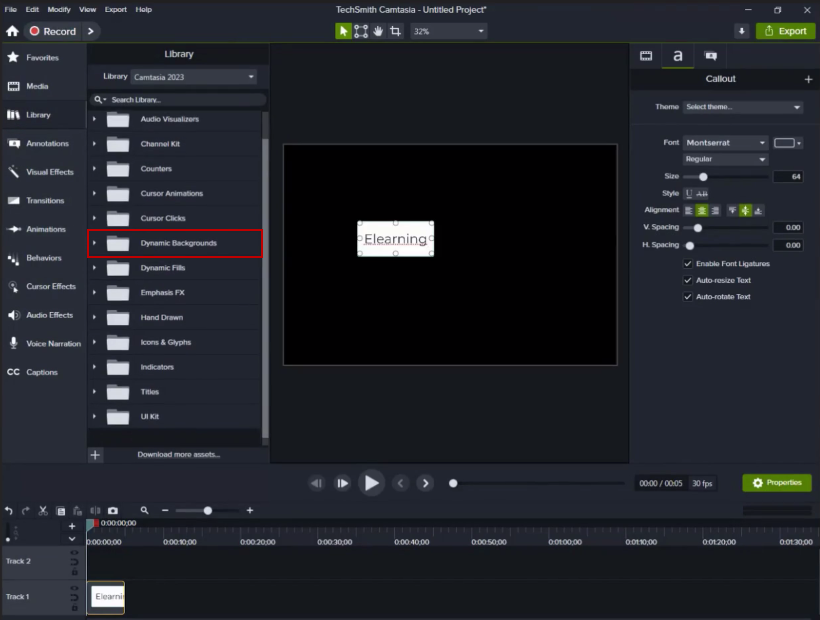
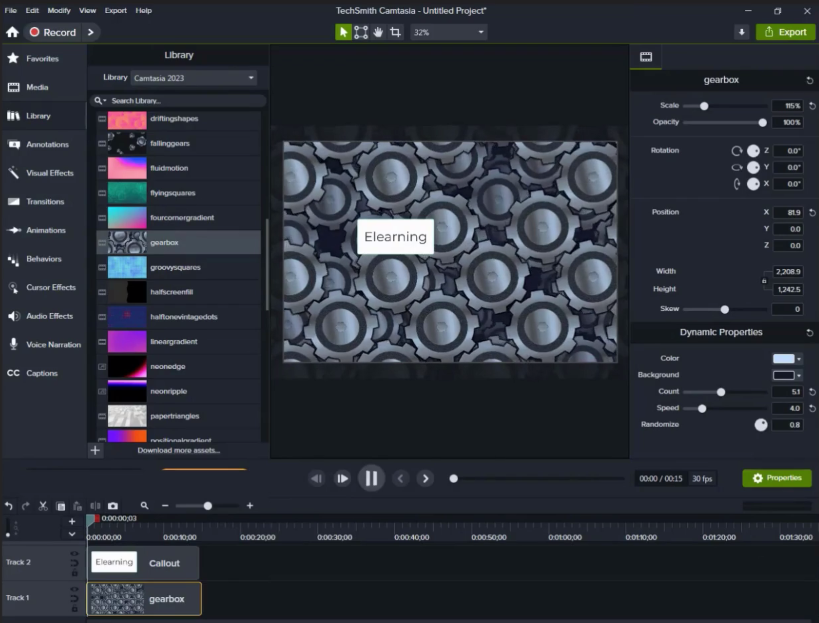
Go to the ‘Library’ section on the left-side panel and select the preferred background from the ‘Dynamic background’ category.
Step 4:
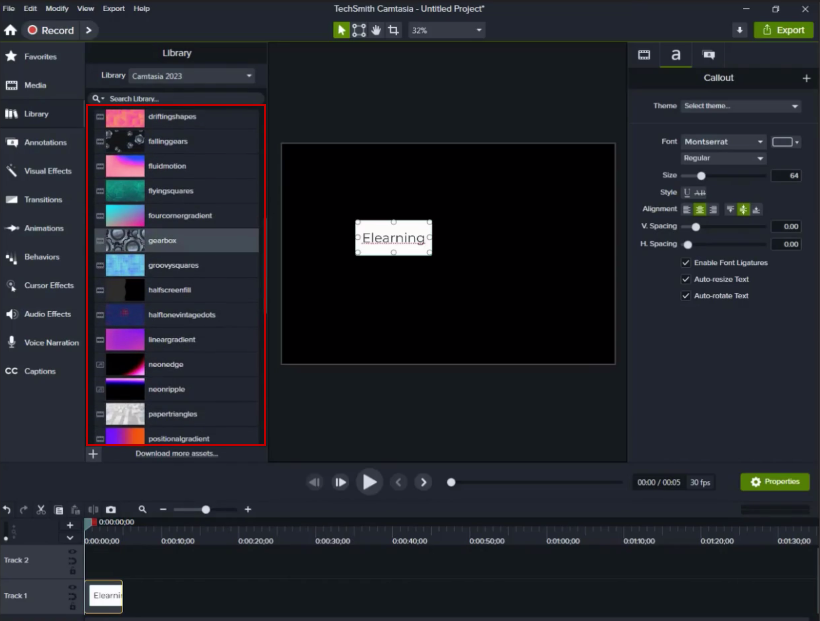
Choose the background from the list according to your specific needs.
Step 5:
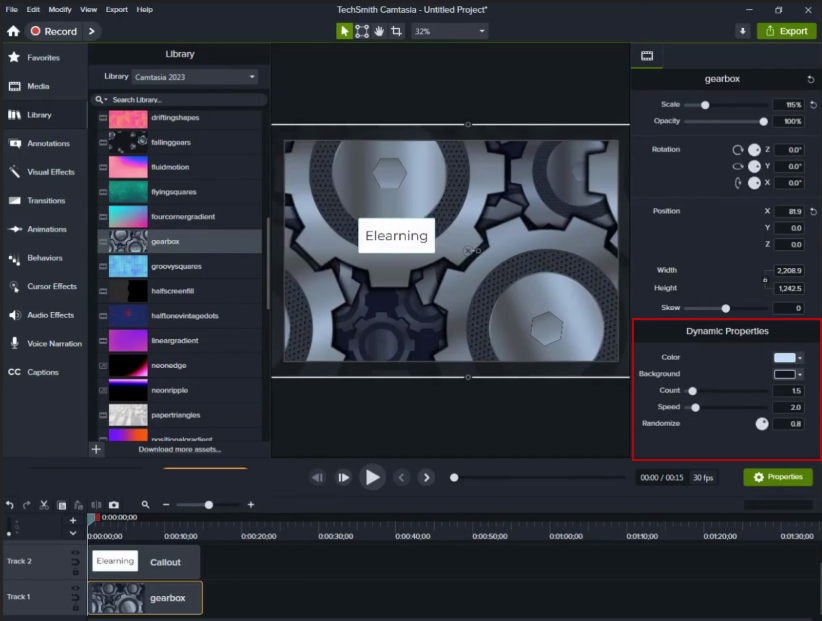
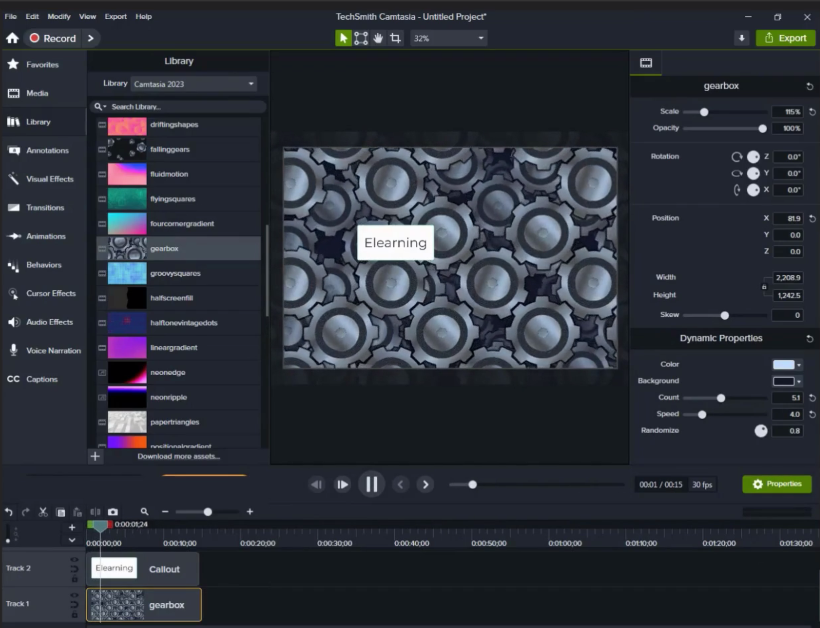
Select the background from the timeline and customize its dynamic properties according to your specifications in the right-side panel.
Step 6:
After making the necessary adjustments, proceed to preview your work, and you will see the dynamic background in action.
Step 7:
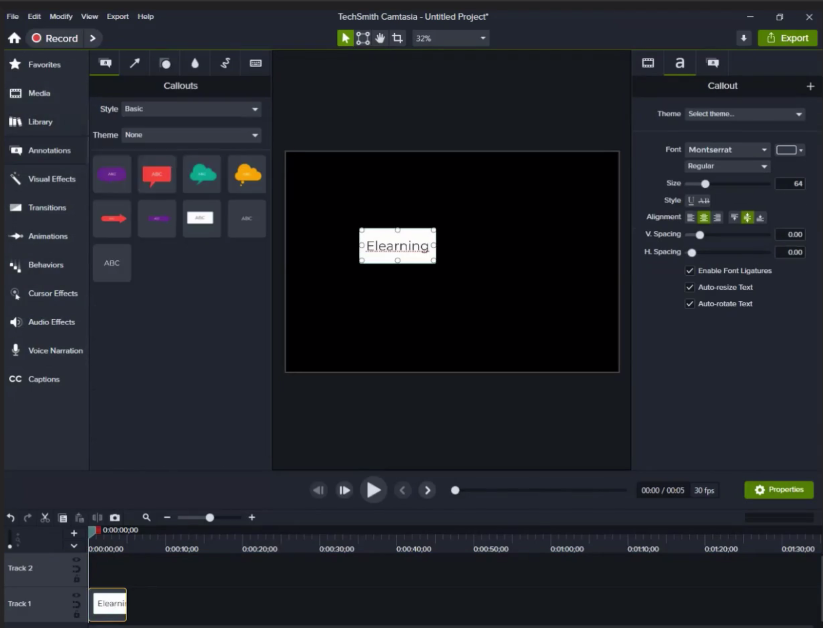
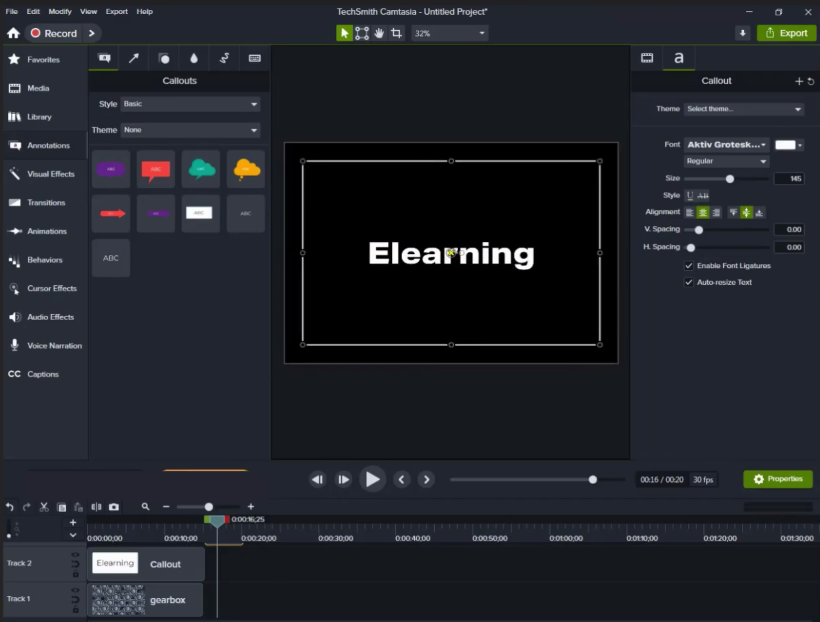
You can also apply the dynamic background to text. Begin by inserting the text and fine-tuning the font family and size to your preferences.
Step 8:
To add your preferred background to the text box, access the ‘Library’ section in the left-side panel and choose the background from the ‘Dynamic background’ category.
Step 9:
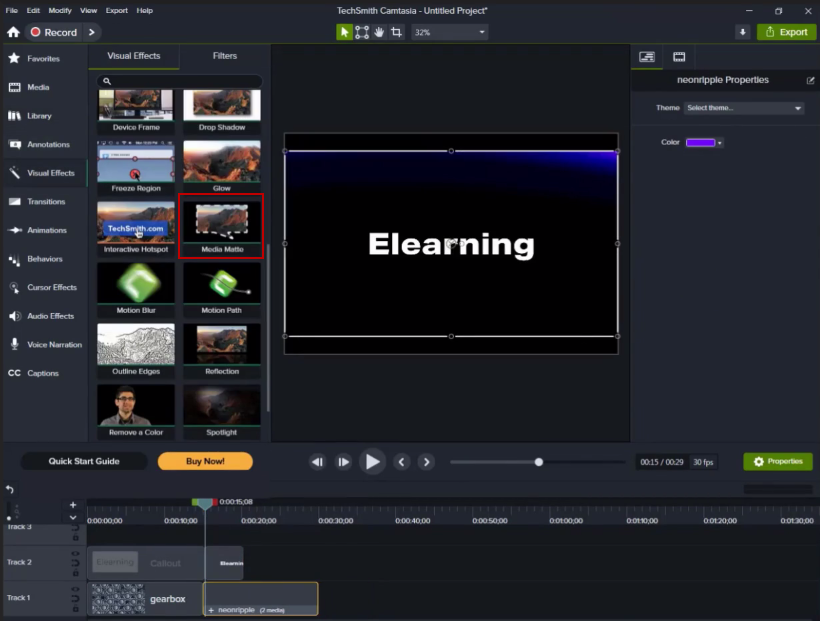
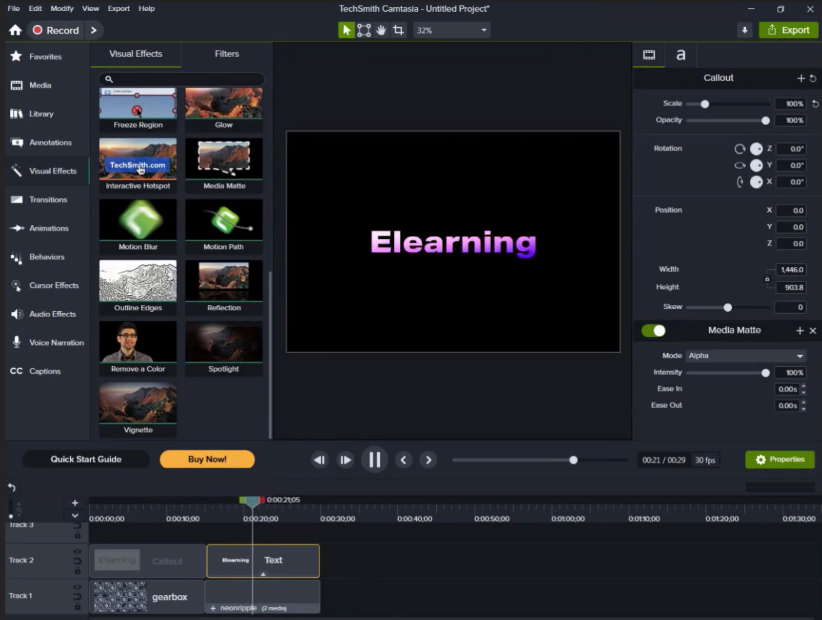
Navigate to the ‘Visual Effects’ section in the left-side panel, and from the list of options, select the ‘Media Meta’ effect. Apply this effect to the text box.
Step 10:
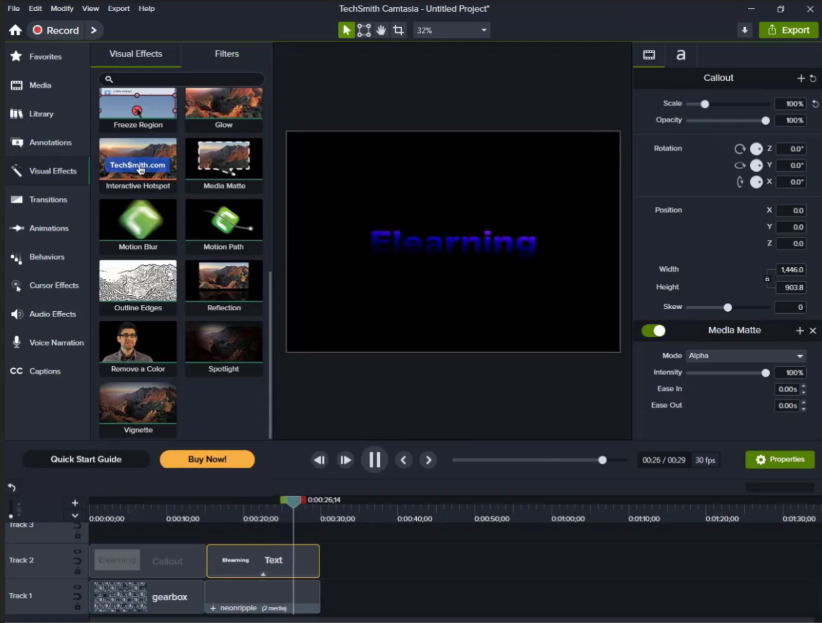
After completing all the steps, proceed to preview your work, and you’ll notice the dynamic background in action behind the text box.
Conclusion:
Incorporating dynamic backgrounds into your Camtasia projects can significantly elevate the quality and impact of your video content, especially in custom eLearning development.
Enhance your videos effortlessly by adding vitality and motion to your backgrounds, creating an engaging and captivating viewer experience. With Camtasia’s dynamic background features, you have the power to craft visually stunning and immersive videos customized for eLearning.
Experiment with different background animations and effects to find the style that best suits your content and enhances your storytelling.






Leave a Reply
Want to join the discussion?Feel free to contribute!